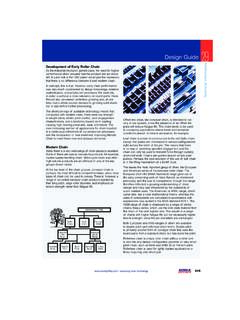
Transcription of sec 01 standard - Renold Jeffrey
1 11/19/08 11:38 AM Page 203. chain Installation and Maintenance 29. Technical Information The following precautions must be Guards must be provided on all taken before disconnecting and chain and sprocket installations removing a chain from a system in the USA in accordance with prior to replacement. the provisions of ANSI/ASME. "safety standards for Always shut off power switch to mechanical power transmission isolate equipment before installing, apparatus" and ANSI/ASME. removing, lubricating, or servicing "safety standards for a chain system. conveyor and related equipment". or other applicable safety standards. Connecting and disconnecting When revisions of these standards chain - always use safety glasses are published, the updated editions to protect your eyes. shall apply. Always loosen tensioning devices. Never reuse individual components. Support the chain to prevent uncontrolled movement of chain Never reuse a damaged chain and parts. or chain part.
2 Do not attempt to connect or Roller chain lubrication - this disconnect chain unless you know chain requires lubrication. See the chain construction. for guidance on lubrication. Use of correct extractor tools is recommended. Tools must be in good condition and properly used. Note: Failure to follow these practices Consult manufacturer or authorized could result in damage, serious injury, distributor for complete assembly or death. or disassembly procedures. If chain is to be used on high speed or heavily loaded applications, it is recommended that the use of crank link joints be avoided. advancing chain technology 203. 11/19/08 11:38 AM Page 204. 29 chain Installation and Maintenance Technical Information Introduction Care must be taken with sprockets of split design to ensure perfect adjoining of the faces of each half. Proceed Renold has more than 100 years of experience in the with the key fitting after the halves are finally bolted together, operation and maintenance of roller chain .
3 Involvement otherwise the key can prevent correct assembly and with designers, manufacturers, and users of all types of subsequently result in malgearing. equipment has enabled Renold Jeffrey to develop this Verify that key heads will not project beyond the width of definitive guide, designed to pass on the preferred any chain cases. methods of correct handling, adjustment, installation, and maintenance of roller chain drives resulting in maximum chain life. Checking Sprocket Alignment Accurate alignment of shafts and sprocket tooth faces The notes given below are general recommendations provides a uniform distribution of load across the entire chain and should be followed in the selection and installation width and contributes substantially to maximum drive life. of a chain drive in order that satisfactory performance and drive life may be ensured. Should you require any further information, please contact our technical sales staff. Equipment Needed Break chain with a Renold chain Extractor: 10101 for chains from to pitch 10102 for chains from to pitch For joining any chain up to pitch, a drift punch will be required.
4 Construction of medium or heavy chain drives requires millwrighting equipment such as lifting tackle, slings, wedges, packing, etc. Use a straightedge across the machined faces of the OTHER USEFUL EQUIPMENT sprockets in several different positions, if possible, as a Quantity of inner and outer links check against wobble. A nylon or similar line is a good Straight edges and/or strong, fine line substitute for a straightedge, particularly on longer center Spirit level distances. Plumb line Should endwise float of shafts be present, make due Selection of hammers, files, key blanks, etc. allowance so that sprocket alignment is correct at the mid position of float.. Preparation Check equipment to ensure that general transmission When alignment is correct within closest practical limits, requirements are correct ( flexible couplings, flywheel, drive the keys home and take a final check on sprocket means of drive adjustment). alignment. Check condition and rigidity of the shafts and bearings, particularly if there has been considerable previous service with an alternative method of transmission.
5 Replace or correct if necessary. Driver and driven shafts should be checked to ensure they are level and parallel to each other. This also applies to the idler shaft, if present. Use a spirit level and adjustable comparator bar or micrometer between shafts at extreme points on each side of the drive. Correct any parallelism errors and mark a permanent data line for the adjustable shaft. Place sprockets or respective shafts in approximate alignment and fit the keys in accordance with correct engineering practice. Do not secure keys at this stage. 204 advancing chain technology 11/19/08 11:38 AM Page 205. chain Installation and Maintenance 29. Technical Information Important Note chain cases Sprockets should always be designed to be as close to the Position the chain case bottom sections with the shafts supporting bearings as possible. concentric in their cavities. Manufacture suitable mountings and brackets to ensure Installation of chain rigidity. Renold chain should not be assembled on the sprockets Assemble the oil supply and return pipe system and the until attention has been paid to: drive to the oil pump.
6 1. Cleanliness of the sprocket teeth, particularly if debris of Assemble top section(s) of chain case. an abrasive nature (cement dust, weld spatter, etc.), has been prevalent while work was in progress. Fill the oil sump and check delivery to the chain . 2. Temporary positioning of the lower section of a chain chain Adjustment case, if present. In restricted spaces, maneuvering of To maximize chain life, some form of chain length adjustment large sections is often simplified by using the spaces must be provided, preferably by moving one of the shafts. between shafts that will later be occupied by the chain . (See diagram three on page 206.) If shaft movement is not Ensure the chain is clean and free of debris and place possible, an adjustable idler sprocket engaging with the around the sprockets, observing instructions where unloaded strand of the chain is recommended. Generally, matched strands are involved. In chain with two or more the idler should have the same number of teeth as the strands, joining is most easily accomplished at the mid- driver sprocket and care should be taken to ensure speed span of the drive, drawing the chain ends together with a does not exceed the maximum ratings shown.
7 chain clamp or rope tackle block. Ensure that the strength The chain should be adjusted regularly so that with one of the drawing tackle is sufficient to hold the chain . chain strand tight, the slack strand can be moved a distance of weights are shown in the Renold Jeffrey catalog. When 'A' at the midpoint. (See diagram one.). inserting the joining link of multi-strand chain , ensure the intermediate plates are assembled. Do not detach the To accommodate for any eccentricities of mounting, the drawing tackle until the link is completely assembled. When adjustment of the chain should be tested through a only partially inserted through the inner link, the weight of complete revolution of the large sprocket. the chain on release can splay or distort unsupported bearing pins. Adjustment is achieved either by the movement of one of the shafts or by use of the idler sprocket. The amount Adjust the chain using the data mark mentioned in the of the adjustment provided by either method should be preparation section to retain shaft parallelism.
8 Sufficient to take up chain wear amounting to two pitches or 2% elongation above nominal chain length, whichever For a chain of average center distance (30-50 x chain is the smallest. pitch) correct adjustment is when the midpoint of the longest span can be fully moved by hand in accordance with dimension A' shown in diagram one. Diagram Two Diagram One Over-tensioning should be avoided in all cases. When used for adjustment, an idler sprocket should be positioned on the unloaded side of the chain , preferably nearer to the driven sprocket and gearing with the outside of the chain . It should have an initial chain lap of at least three teeth and a free length of chain not less than four pitches between it and the nearest sprocket. (See diagram two above.). Generally, the number of teeth in any idler sprocket should not be less than the smallest sprocket and care should be taken to ensure that the speed does not exceed the maximum recommended. Where necessary, several sprockets can be used on a single drive, thereby meeting all possible needs for adjustment.
9 Advancing chain technology 205. 11/19/08 11:38 AM Page 206. 29 chain Installation and Maintenance Technical Information All mountings for idler sprockets should be rigid and when Test Run manual adjustment is provided, the moving member must Give the drive a short test run: be securely locked in position after adjustments have been 1. to regulate oil delivery to the chain ;. made. 2. to eliminate any oil weeps from the chain case and pipework;. Diagram Three 3. to check for any unusual noise or vibration. Maintenance Schedule Regular chain maintenance is important to obtain maximum life. In a correctly sized and installed drive, chain can be expected to last for approximately 15,000 hours. The following maintenance schedule is suggested. AFTER 3 MONTHS. Check chain adjustment and rectify if necessary. Change oil, oil filter, and clear the sump. ANNUALLY. Carry out the above checks. Check for wear on sideplates. Check for chain elongation. Check cleanliness of components: - Remove any accumulation of dirt or foreign materials.
10 Check for shaft and sprocket alignment. Check for wear on sprockets. Check the condition of the lubricant. Check the lubrication system: - Feed pipes are not clogged. - Lubrication schedule is being followed (manual lubrication). - Drip rate is sufficient (drip system). - Oil level is correct (drip, bath and disc systems). - Pump is working (stream system). chain Protection A new Renold chain should always be stored in its box and/or bag until installation. Renold chain is lubricated at the factory, but this lubrication will not stand up to outdoor conditions, particularly in a saltwater atmosphere. Unprotected, lubricated chains will become contaminated with grit and other materials that will harm the chain and tend to clog strainers, filters, and oil lines. A roller chain is AUTOMATIC ADJUSTMENT a precision-made series of bearings that will perform best Automatic adjustment can also be provided, but this if handled and stored in correct conditions. adjustment generally demands a special study of the conditions to enable a suitable design to be provided.