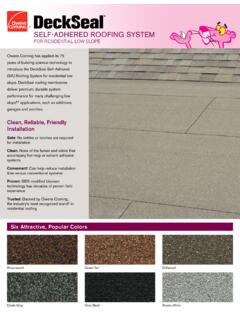
Transcription of SELF-ADHERED ROOFING SYSTEM COMPONENTS FOR …
1 NOTE: If installing the DeckSeal MA NailBase under the DeckSeal SA SBS Cap see the following instructions for each of those Corning DeckSeal MA NailBaseThis product is to be used under Owens Corning DeckSeal SA SBS Cap and should not be left not use DeckSeal MA NailBase in a torch down Corning DeckSeal MA NailBase should be stored at room temperature whenever possible. Do not store at temperatures above 90 F (32 C).Precautionary NotesOwens Corning ROOFING recommends strict adherence to OSHA safety MA NailBase is designed to be installed on roof slopes between 1/4:12 and 2:12 and is to be applied directly to an exterior grade of Plywood or OSB.
2 Plywood must be minimum 15/32 inch and OSB minimum 7/16 inch. Check local codes. Owens Corning DeckSeal SA SBS Cap is to be applied directly to Owens Corning DeckSeal MA NailBase or DeckSeal SA Base/Ply. Apply only when the weather is dry and the ambient temperature is 45 F (7 C) and rising. Do not install when water in any form ( rain, dew, ice, frost, snow) exists. All roof deck application areas must have positive drainage, continuous support, and be structurally sound to support the dead load requirements of the ROOFING SYSTEM . Apply only over clean, dry, dust-free surfaces. Ensure installation of DeckSeal MA NailBase does not prevent or interfere with ventilation of the existing to follow manufacturer s application instructions may void product the job so that the DeckSeal MA NailBase is covered by the DeckSeal SA SBS Cap the same 1.
3 Sweep the roof surface to remove any dust, dirt, or debris prior to starting installation. Step 2. Cut the DeckSeal MA NailBase to manageable lengths. Allow the cut sheets to relax prior to installation. Failure to allow the sheets to relax may result in wrinkles in the finished 3. Initiate starter course: For a 2 ply (layer) SYSTEM the starter course will always be 1/2 of the roll width. For a 3 ply (layer) SYSTEM the starter course will always be a 1/3 of the roll width (approximately 12 inches) and cut from the DeckSeal MA NailBase roll. (Cutting on one of the 12" lines is approximately 1/3 of the roll width).
4 The side lap seams of any 2 or 3 ply SYSTEM layer should always be offset from the other 4. Lay the material flat on the roof aligned with the eaves or at the lowest point of the 5. Nail the starter course at 6 inches on center across the center of the sheet using 1 inch diameter metal cap nails. See Fig. 1 Fig. 1Do not nail along the edges at this time (edge metal will be added later), only in the center. If additional pieces are needed to complete the starter course, continue to install each piece overlapping the preceding piece by 6 inches. Nail in the middle of the 6 inch end lap at 6 inches on 6. When the eaves starter sections are completed, position the next course (and all subsequent courses) by overlapping the previous course by 3 or 4 inches.
5 Install metal cap nails at 6 inches on center in the 3 or 4 inch side lap. All additional courses will require 2 rows of nails at 6 inches on center, evenly spaced vertically, and staggered down the center of the sheet. All end laps should be overlapped a minimum 6 inches. See Fig. 1 When installing each course stagger the end laps by 36 inches between Metal InstallFor 2 ply systems, the edge metal is installed directly over the base sheet. For a 3 ply SYSTEM , the edge metal is installed over the second ply (layer).1. The edge metal must be minimum 24 gauge galvanized steel or inch formed aluminum, primed with either an asphaltic primer that meets ASTM D41 or a commercially available water-based acrylic The roof flange of the edge metal should be 3 or 4 inches Primed edge metal must be dry to the touch before membrane Install the roof flange of the edge metal over the base sheet at the lowest point on the roof.
6 Nail the edge metal 4 inches on center in a staggered pattern. See Fig. 15. Install a minimum 8 inch wide strip of SELF-ADHERED DeckSeal SA Base/Ply over the edge metal leaving 1/2 inch of edge metal exposed at the : If installing the DeckSeal SA Base/Ply under DeckSeal SA SBS Cap, see the DeckSeal SA Base/Ply box for instructions for that ROOFING SYSTEM COMPONENTS FOR RESIDENTIAL LOW SLOPE INSTALL INSTRUCTIONSS istema de techado de 2 o 3 capasBase para clavos sujetada mec nicamente DeckSealOwens Corning DeckSeal SA Base/PlyThis product is to be used under Owens Corning DeckSeal SA SBS CapDo not use Owens Corning DeckSeal SA Base/Ply in a torch down Corning DeckSeal SA Base/Ply SELF-ADHERED membrane should be stored at room temperature whenever possible.
7 Do not store out of the box for prolonged periods, or in temperatures above 90 F (32 C). Do not remove the roll from the box until it is to be Notes Owens Corning ROOFING recommends adherence to OSHA safety regulations. DeckSeal SA Base/Ply is designed to be installed on roof slopes between 1/4:12 and 2:12 and is to be applied directly to an exterior grade of Plywood or OSB when used as a base sheet in a 2 ply SYSTEM , or Owens Corning DeckSeal MA NailBase when used as the second ply in a 3 ply : When installing DeckSeal SA Base/Ply, existing Plywood and/or OSB must be primed with either an asphaltic primer that meets ASTM D41 or a commercially available water-based acrylic primer.
8 New plywood and DeckSeal MA NailBase do not need to be primed. Note: Any primed substrate must be fully dry prior to installation. Refer to manufacturer s recommendations. Plywood must be minimum 15/32 inch and OSB minimum 7/16 inch. Check local codes. Apply only when the weather is dry and the ambient temperature is 45 F (7 C) and rising. Do not install when water in any form ( rain, dew, ice, frost, snow) exists. All roof deck application areas must have positive drainage, continuous support, and be structurally sound to support the dead load requirements of the ROOFING SYSTEM . Apply only over clean, dry, dust-free surfaces.
9 Ensure installation of DeckSeal SA Base/Ply does not prevent or interfere with ventilation of the existing to follow manufacturer s application instructions may void product the job so that the DeckSeal SA Base/Ply is covered by the DeckSeal SA SBS Cap the same 1. Sweep the roof surface to remove any dust, dirt, or debris prior to starting 2. Cut the DeckSeal SA Base/Ply to manageable lengths. Allow the cut sheets to relax prior to installation. Failure to allow the sheets to relax may result in wrinkles in the finished surface. Step 3. Initiate starter course: For a 2 ply (layer) SYSTEM the starter course will always be 1/2 of the roll width.
10 For a 3 ply (layer) SYSTEM the starter course will always be 1/3 of the roll width. (Cutting on one of the 12 lay lines will leave approximately 1/3 of the roll width.) If using SA Base/Ply as a second layer of a 3 ply SYSTEM , the starter course for that layer will be 2/3 of the roll side lap seams of any 2 or 3 ply SYSTEM layer should always be offset from the other 4. There are several ways to remove the release liner from the DeckSeal SA Base/Ply. One method is as follows: Lay the material flat on the roof aligned with the eaves edge at the lowest point on the 5. Fold the aligned sheet back half way exposing the release liner.
