Transcription of SERIES 2000 SLIDING DOORS - CRL-ARCH
1 Phone: (800) 262-5151 Fax: (866) INSTRUCTIONSSERIES 2000 SLIDING DOORS11M0171 SERIES 2000 SLIDING | , STORAGE, AND PROTECTION OF ALUMINUMThe following precautions are recommended to protect the material against damage. Following these precautions will help ensure early acceptance of your products and HANDLE CAREFULLY. AII aluminum materials at job site must be stored in a safe place, well removed from possible damage by other trades. Cardboard wrapped or paper interleaved materials must be kept dry. B. CHECK ARRIVING MATERIALS. Check for quantities and keep records of where various materials are KEEP MATERIALS AWAY FROM WATER, MUD, AND SPRAY. Prevent cement plaster or other materials from damaging the PROTECT THE MATERIALS AFTER ERECTION. Protect erected frame with polyethylene or canvas splatter screen.
2 Cement, plaster, terrazzo, other alkaline solutions, and acid based materials used to clean masonry are harmful to the finish. If any of these materials come in contact with the aluminum, immediately remove with water and mild rapidly changing technology within the architectural aluminum products industry demands that Aluminum reserve the right to revise, discontinue, or change any product line, specification, or electronic media without prior written : Dimensions in parentheses ( ) are millimeters unless otherwise 2000 SLIDING | guidelines for all installations: GENERAL INSTALLATION NOTES1. REVIEW CONTRACT DOCUMENTS. Check shop drawings, installation instructions, architectural drawings, and shipping lists to become thoroughly familiar with the project. The shop drawings take precedence and include specific details for the project.
3 Note any field verified notes on the shop drawings prior to installing. The installation instructions are of a general nature and cover most INSTALLATION. AII materials are to be installed plumb, level, and true. 3. SURROUNDING CONDITIONS. Make certain that construction which will receive your materials is in accordance with the contract documents. lf not, notify the general contractor in writing and resolve differences before proceeding with CHECK QUANTITY OF MATERIALS ON ARRIVAL. Be sure you have everything required to begin SEALANTS. Sealants must be compatible with all materials with which they have contact, including other sealant surfaces. Consult with sealant manufacturer for recommendations relative to joint size, shelf life, compatibility, cleaning, priming, tooling, adhesion, etc. Due to varying job conditions, all sealants used should be approved by sealant manufacturer to ensure that they will function for conditions shown on shop FASTENING.
4 Within the body of these instructions "fastening" means any method of securing one part to another or to adjacent materials. Only those fasteners used within the system are specified in these instructions. Due to the varying perimeter conditions and performance requirements, perimeter and anchor fasteners are not specified in these instructions. For perimeter and anchor fasteners refer to the shop drawings or consult the fastener BUILDING CODES. Due to the diversity in state/provincial, local, and federal laws and codes that govern the design and application of architectural products, it is the responsibility of the individual architect, owner, and installer to assure that products selected for use on projects comply with all the applicable building codes and laws. Aluminum exercises no control over the use or application of its products, glazing materials, and operating hardware, and assumes no responsibility CARE AND MAINTENANCE.
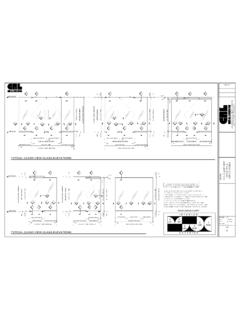
5 Final cleaning of exposed aluminum surfaces should be done in accordance with AAMA for anodized aluminum and for painted aluminum9. JOB SITE ESSENTIALS. See pages 10, and 2000 SLIDING | INSTRUCTIONSMULTI SLIDE AND POCKET DOOR PACKAGES INCLUDE:FABRICATED ITEMS: Door panel components with maximum security Hookbolt Lock, two Cylinders and Flush Finger Pulls FABRICATED ITEMS: Headers, Jambs, Tracks, Interlocker Angle and Trim for Pocket DOORS . Sizes need to be field adjusted to exact SCREWS: Installation screws and preparation for them are A shows typical panel assembly. Leading panel shown, other panels are similar. (Omit Roller Holders at fixed panels).Corner Block (installed)(4) x #10 x 5/8" FH Phillips at Each Corner(Screws Provided)D201 Top RailDH064 Rubber Bumper(Use Only When Interlockers Stack Against the Wall)Interlocker is notchedat Top to Clear Header SP237 Nylon Plug(Remove Plug to Adjust Roller)DETAIL ACS151(2) Roller Holders, 6" ( ) Long Each.
6 Attach Roller Holders to bottom rail with (2) ST19300 #8AB X 3/4"Phillips Pan Head SMS (One screw will also serve to install Roller).CS175 Tandem Roller(Furnished Loose) DT400 Lead StileD300at Locking Stile of Pair of DoorsD101 Bottom RailCS250 Interlocker with WeatherstripDH02900 Hookbolt with DH080 FaceplateSERIES 2000 SLIDING | MUNTINSI nstall HORIZONTAL MUNTINS (when applicable). See DETAIL D(2) #10 x 5/8" PhillipsScrews Provided (Two Per Angle)DT400 Lead or Fixed StileMF315 Clip Angles are Factory Installed in Muntins.(One at Each End of DU010)(Two at Each End of DU011)CS250 Interlocker with WeatherstripDU0105/8" ( ) MuntinDU0112" ( )Muntin (dotted)MULTISLIDE DOORS - FRAME INSTALLATIOND etermine DOOR materials are to be installed plumb, level, and true. Shim framing components as Cut HEADERS and TRACKS to DOOR WIDTH dimension.
7 Headers and tracks run Cut JAMB to DOOR HEIGHT MINUS 1-7/8" ( ). Jambs run between header and Position TRACKS and shim to level. Fasten tracks to floor. Stagger the screw locations as shown in DETAIL Tracks to Floor and Stagger Screw Location.(Installation Screws Not Included)Shim Tracks at Fastening Points as Required to EDETAIL DStainless Steel Track CoverSERIES 2000 SLIDING | Install HEADERS plumb and Insert lock channel into lock jamb and install screws. Just before channel is screwed tight install SD365 plastic end caps. Now tighten screws. See DETAIL F6. Install JAMBS plumb and square, shimmed as : On Installations Where this Joint is Exposed, (see NOTE on page 7).CS194 Headers With/WeatherstripInstallation ScrewsLocate One 3" ( ) from Each End and Approximately 18" (457) W/WeatherstripCS200 Locking Channel Assembly(2) #8 x 1-1/4" TEX Screws(2) SD365 Plastic End CapsInstallation Screws Locate One 3" ( ) from Each End and Approximately 18" (457) " ( )5" (127)JAMB SIZEDOOR HEIGHTDETAIL FHEADER AND TRACKS SIZEDOOR WIDTH3/8" ( )(2) DH064 SilencersC of screwLC of screwLNOT TO SCALE1-1/2" ( )NOTE: Frame Installation Screws are Not W/CS223 Stainless Steel Cap.
8 (Omit Cap at Fixed Panels)CS223 Stainless Steel Track CoverINTERIOR SIDESERIES 2000 SLIDING | : Straight cuts on HEADERS and JAMBS leave a hole at the intersection of the joint. See DETAIL F on page 6. On installations where this will be exposed, notch top of jamb or miter jamb and head at the corner as shown on DETAIL G. In either case jamb must be cut longer. Always install jamb on top of track as shown on DETAIL H 7. On DOORS with fixed panels install door ALIGNING CHANNELS on track. Use two aligning channels per fixed panel. Locate first channel 3" ( ) away from jamb and second channel at PANEL WIDTH minus 9" ( ) from first. See DETAIL HAligning ChannelsTwo per Fixed Channels to Track With (2) #6 x 7/16" TEK ScrewsHook Aligning Channels to Track for Proper Position and Secure Them With Two " ( )Hold Shoe 3" ( )Away from Jamb ChannelDETAIL H DETAIL GFixed panel width minus 9" ( )JAMB minus 3/8" ( )JAMB SIZE3/16" ( )1-3/8"( )3/16" ( ) minus 1/2" ( )CS227 NOT TO SCALEORSERIES 2000 SLIDING | Cut HEADERS and TRACKS to DOOR WIDTH PLUS POCKET (S) WIDTH.
9 Headers and tracks run continuous. NOTE: Pocket DOORS require a 1/4" ( ) shim between header and pocket wall to clear interlockers. See DETAIL I2. Locate TRACKS 1/4" ( ) away from pocket wall; shim to level and secure to floor with screws as shown on DETAIL E page 5. Locate installation screws 24" ( ) Install HEADERS making sure they are plumb with Cut LOCKING JAMB to DOOR HEIGHT MINUS 1-7/8" ( ). Locking Jamb runs between headers and Cut INTERLOCKER ANGLE and TRIM to DOOR HEIGHT PLUS BOTTOM CLEARANCE. Interlocker Angle and trim run from top of header to floor. Interlocker angle must be notched at top and bottom. (Field fabrication). See DETAIL IPOCKET DOORS - FRAME INSTALLATIONNOT TO SCALEPOCKET WIDTHDOOR WIDTH CS194 Headers withWeatherstrip1/4" ( )1-1/2" ( )1/4" ( ) Shim Required at HeaderInstallation Screws(Not Included. Typical)CS224 Tracks with CS223 Stainless Steel Cap (Omit Cap at Fixed Panels)CS197 Interlocker Angle (To Be Notched At Top and Bottom By Installer)DETAIL I3/8" ( )1/4" ( ) DOOR HEIGHT PLUS BOTTOM CLEARANCEMC175 TrimMC175 Clips for M-175 Trim at 12" ( ) AND TRIM SIZE1/4" ( ) SERIES 2000 SLIDING | PANEL INSTALLATIONFIXED PANELS:1.
10 Push panel into header at an angle, swing bottom to vertical plane and over panel aligning channels, lower into sill, and push into PANEL:2. Working in sequence shown on DETAIL K install remaining KRemove SP237 Nylon Plug from Stiles and Adjust Rollers With Phillips Screwdriver Turning screw Clockwise to Raise Panel and Counterclockwise to Holder With CS175 Adjustable RollerDETAIL L1231233. Remove SP237 Nylon Plugs from bottom of stiles. Adjust rollers through holes on both stiles to align panels and ensure proper engagement of hookbolt lock. Turn adjusting screws clockwise to raise panel and counterclockwise to lower it. See DETAIL L. Reinstall SP237 PANELSLIDING PANELSERIES 2000 SLIDING | :1 Ratio Strap Frame Caulkin Gun CAT. NO. GA1203 CRL Complete Set of Seven All Stainless Steel Spatulas CAT. NO. AB958 GCRL Backer Rod Roller Tool CAT.