Transcription of Single-Door Access Control System Installation Guide 1 ...
1 AXS-10 VisAccess Single-Door Access Control System Installation Guide 1. Introduction The Visonic Technologies AXS-10 is an electronic Access Control System designed for a single Access point, such as a main door in an apartment building or individual office doors . The System Control unit CRD-1M Magnetic relay activates a lock or electromagnetic strike (EMS), when a valid CRD-1. Prox. Card Stripe Card proximity key (tag or card) is presented to the reader located outside the protected area. The use of a proximity (non-contact) key makes the Installation of the RDC-3 RDC-3MP. AXS-10 System an attractive possibility in harsh environments and in RDR-3 Magnetic Magnetic places with poor lighting conditions. The proximity keys are totally Proximity Stripe TAG-1 Stripe sealed and are wear resistant. The reader reads the key's ID, Reader Prox. Tag AXS-10 Control Unit Reader Reader whenever the key is presented.
2 Figure 2 - System Components A second proximity reader may be connected to the AXS-10 to Control both sides of a door. An optional magnetic stripe card reader may be The AXS-10 has a memory capacity of 300 keys. Adding keys simply connected instead of a proximity reader. involves presenting new keys to the controller while the System is in ADD mode. The separate weatherproof readers provide added security and flexibility allowing outdoor or indoor Installation . The user can delete keys in the DELETE mode by presenting them to the reader or, if a tag/card is not available, by typing in its number (the The AXS-10 Control unit (see figure 1) includes a 3-digit display, 3 same one that appears when adding the key). visual indicators (LEDs) and 4 buttons. An internal proximity reader When the System is in TOGGLE mode, presenting a valid tag located in the upper right corner of the Control panel allows fast and arms/disarms an alarm System or activates/deactivates an electrical easy programming of Access keys.
3 The buttons are used for entering device (such as an air conditioner). the password and for programming the unit. AXS-10 controllers can be networked (see par. ). The AXS-10 kit includes: AXS-10 controller RDR-3 proximity reader with 1m (3 ft) 5-wire cable Installation instructions User Guide Control unit base template, for wall Installation Additional tools and equipment that may be needed: Proximity tags or cards (ordered separately). Power supply for the controller - 12V AC/DC. Electromagnetic strike (EMS) unit RTE (request-to-exit) push button or PIR, if required. Figure 1 - System Functional Presentation 2. Specifications AXS-10 CONTROLLER Current Consumption: Less than 10 mA. Power Input: 9-12V AC/DC Card Feeding Speed: 15 - 120 cm/sec Max Current Consumption: 150 mA (excluding EMS current) Minimum Head Life: 300,000 card passes Memory Capacity: 300 tags/cards Length of Supplied Cable: 1 m (3 ft).
4 Output Relay Contact Rating: 1A max.; continuous current Dimensions (LxWxD): 99x31x32mm (3-7/8 x 1-3/16 x 1-1/4 in). Display: 3 x 7 segments and 3 LEDs Weight: 45 g ( oz) approximately Operating Temperatures: 0 C to 50 C (32 F to 122 F) Operating Temperature: 0 - 50 C (32 - 122 F). Dimensions (L x W x D): 150 x 105 x 35 mm (5-7/8 x 4-1/8 x 1-3/8 in.) Color: Dark brown Color: Dark gray RDC-3MP MAGNETIC STRIPE READER (optional). Weight: 250g Designed for: Indoor and outdoor installations Vandal Resistance: Stainless steel RDR-3 EXTERNAL PROXIMITY READER Protocol: AB (TTL + LED). Indicators: Tricolor LED (Green, Red, Amber) Power Supply: - VDC. Tag Reading Range: 50-100 mm (2-4 in.) Current: Less than 35mA. Frequency: 125 kHz Output Type: Open-collector (pulled up internally with 4700 res.). 12. Tag Code Possibilities: 10 possible combinations Card Material: Plastic Dimensions (L x W x D): 116 x 70 x mm (4-1/2 x 2-3/4 x 5/8 in.)
5 Card Thickness: +/- mm Weight: g ( oz) Operating Temperature Range: 0 to 50 C (32 to 122 F). Operating Temperatures: -20 C to 50 C (-4 F to 122 F) Storage Temperature Range: -20 to +70 C (-4 to 158 F). Max. Distance form Controller: 10 meters/ Feet Data Tracks: Track 1, 2 (or 3, in high or low coercivity). Color: Metallic brown Humidity: 5 to 95%. RDC-3 MAGNETIC STRIPE READER (optional) LED Colors: Red/Green Designed for: Indoor Installation only Length of Supplied Cable: m (16 ft). Card Standard: ISO 7811 Cable Type: 10 core screened. Track Number: 2 (IATA) Dimensions (L x W x D): 104 x x 35 mm Reading Method: 210 BPI (4-1/8 x 1-15/16 x 1-3/8 in). Card Thickness: mm Weight: 380 g approx. ( oz). Power Supply: 5V DC 5%. Output Level: High - min, low - max Page 1 of 8. DE6270_V10. AXS-10. Single-Door Access Control System Installation Guide 3. Installation Controller Unit Installation Figure 4 - Proximity Reader Installation Setting DIP Switch Figure 3 - Control Unit Installation Proximity Reader Installation Caution: Do not install the RDR-3 on a metal surface or on a metal door frame, since this decreases the key reading range significantly.
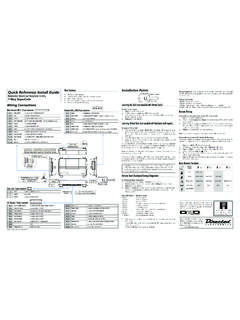
6 If you have to install the reader on a metal surface, use a spacer plate so that the reader will be at least 1 cm (3/8 in.). away from the metal. You may use RDR-BACK which is an optional spacer plate made specifically for this purpose. When installing two readers, you may install them in close Figure 5 - DIP Switch Setting proximity to each other. 4. Wiring Electromagnetic Strike Wiring Electro-Magnetic Locks Powered by AXS-10 Electro-Magnetic Locks Powered by an External Power Supply A. Connecting Electro-magnetic B. Connecting Electro-magnetic C. Connecting Electro-magnetic D. Connecting Electro-magnetic lock that opens the door lock that opens the door lock that opens the door lock that opens the door when power is supplied when power is disconnected when power is supplied when power is disconnected Page 2 of 8. DE6270_V10. AXS-10. Single-Door Access Control System Installation Guide RTE and Door Position Wiring Figure 6 - Connecting RTE and Door Position Inputs Figure 8 - Connecting Two Proximity Readers Proximity Readers Wiring Figure 7 - Connecting One Proximity Reader Figure 9 - DIP Switch Setting for Proximity or Magnetic Reader Magnetic Stripe Readers Wiring Figure 10 - Magnetic Stripe Reader RDC-3 Wiring Figure 11 - Magnetic Stripe Reader RDC-3MP Wiring * Reader 1 "Data In" terminal, for RDC-3 and RDC-3MP, is used for clock signal.
7 Figure 12 - Magnetic Stripe Reader RDC-3MP Wiring Page 3 of 8. DE6270_V10. AXS-10. Single-Door Access Control System Installation Guide Using AXS-10 Controllers as a Network Up to four AXS-10 controllers can be networked with or without PC, AXS-10 network with PC and AXSoft-10 software provides: for use of up to 300 users (keys). Real time recording and display of System events on the PC. The maximum distance between adjacent AXS-10 controllers screen. should not exceed 25 meter (75 ft.). To increase the distance (with Reports on users and events can be sent to a local or network 1200m increments), use SHM-1 modem. printer. A AXS-10 network without PC enables the installer / user to Control The System operator can program the unlocking duration (in all the 4 controllers from one controller. seconds) of the network doors . Adding and deleting keys can be done easily in the In such a configuration, every one of the 4 controller keys enables organization security office, including adding user information.
8 Unlocking each of the network 4 doors . Figure 12 - AXS-10 network without PC. Figure 13 - AXS-10 Network with PC. 5. Programming IMPORTANT! When using the magnetic reader RDC-3/3M/3P, 1. It is recommended to change the password during Installation the internal proximity reader is disabled. In such a case, all (see par. ). procedures in which the internal reader is involved should be 2. Inactivity for more than 10 seconds causes AXS-10 to exit the performed with the external magnetic card reader. programming menu and revert to normal operation. Note: While the System is in one of the programming modes, the AXS-10 does not operate the external reader or the relay output. Setting the Master Key The AXS-10 has one master key. The installer needs to assign one of the proximity keys (tag or card) as a master key and Entering Programming Menu program it into the controller memory. The AXS-10 recognizes a 6-step installer password.
9 Each step requires pressing a single button or a combination of two buttons. Note: The MODE button by itself cannot be used as the first button of the password. To enter the programming menu, press the MODE button and then enter the factory defined installer password F1 , F2 , F3 , F1 , F2 , F3 . Notes Page 4 of 8. DE6270_V10. AXS-10. Single-Door Access Control System Installation Guide To assign a master key: To turn the AXS-10 into Toggle mode by using master tag: Press the Mode button. While the System is in idle mode present the master tag for 5. Enter installer password. The green ADD LED starts flashing. seconds to the RDR-3 reader or present the master magnetic Press MODE a few times until the display shows: S0 . The stripe card to the magnetic stripe reader RDC-3 or RDC-3MP. System is ready to read the key. Present a tag or card to the The LED will change to green (the lock is unlocked and the top right corner of the controller (internal proximity reader).)
10 AXS-10 turns into Toggle mode). Once a key is presented, it will replace the current master key. Presenting any valid non-master key will turn the relay to lock Hold the new key until the SPECIAL LED stops flashing. position. To revert to normal operation, wait 10 seconds until the AXS- 10 automatically exits the programming menu. To turn the AXS-10 from Toggle mode to regular mode by To program the master magnetic stripe card, perform steps A, using the master key: B and C. When you are instructed to present a tag or a card, While the System is in idle mode, present the master tag card for present the desired magnetic stripe card to the magnetic stripe 5 seconds or present the master magnetic stripe card. The LED. reader RDC-3 or RDC-3MP. will blink red, which means that the AXS-10 is in regular mode. Erasing ALL User Keys Resetting the Installer's Password IMPORTANT: A user master key should be assigned before erasing user keys.