Transcription of SURE POWER MARINE ISOLATOR INSTRUCTIONS …
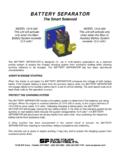
1 SURE POWER MARINE ISOLATOR INSTRUCTIONSFOR INBOARD APPLICATIONS(This instruction sheet is to be used in conjunction with ISOLATOR Instruction #180012)The installation of a Sure POWER Battery ISOLATOR in a MARINE inboard application is very similar to that of a typical automotive installation, with a few minor exceptions. The difference arises when the use of a battery selector switch is required or installing a Battery ISOLATOR in an application not requiring the use of battery selector switches, please follow the Sure POWER Multi-Battery ISOLATOR Application and Installation INSTRUCTIONS (#180012), included in this package. When using more than one charging source, please refer to the group installation INSTRUCTIONS for that particular alternator.
2 Most MARINE installations will fall under Group 1 or Group 3 INSTRUCTIONS . Typical MARINE wiring diagrams without selector switches are shown in figures 1, 2 and isolators may be used with selector switches. isolators actually enhance battery switch applications because each battery can still be charged independently when the switch is connecting either battery. Typical ISOLATOR with battery switch applications are shown in figures 4 and 5. These diagrams are only two of the possible connection : Be sure that the alternator has remote sense capability. Most single-wire Delco alternators do not have this provision. The voltage regulator must sense battery voltage. The sense line should be connected to the main battery terminal of the ISOLATOR .
3 Call the Sure POWER customer-service department if a particular application arises which is not : If using a circuit breaker in the main battery line, Sure POWER recommends connecting the voltage regulator sense line to the main battery terminal of the refer to ABYC and BIA rules and recommendations regarding proper MARINE wiring sizes and proper circuit breaker MARINE ISOLATOR Application ChartNumber ofCharging SourcesMaximumAlternator OutputNumber ofBattery BanksSure POWER IsolatorModel Number70 Amps70 Amps95 Amps95 Amps120 Amps120 Amps160 Amps160 Amps232323237027039521203120212031602160 370 Amps70 Amps120 Amps120 Amps2323270227033202320312 For Group 2 Applications, add a "3A" suffix to the model Group 3 Applications.
4 Add an "R" suffix to the model IN USAPAGE 1 INSTRUCTION 180119A 010210189 Avery Street Tualatin Oregon 97062 Tel Fax PowerBattery IsolatorCircuitBreakerCircuitBreakerTo accessorydistribution panelENGINEBATTERYONLYAUXILIARYBATTERYSu re PowerBattery IsolatorCircuitBreakerCircuitBreakerCirc uitBreakerTo accessorydistribution panel #1To accessorydistribution panel #2 ENGINEBATTERYONLYAUXILIARYBATTERY #1 AUXILIARYBATTERY #2 CircuitBreakerCircuitBreakerCircuitBreak erENGINEBATTERY #1 ENGINEBATTERY #2 AUXILIARYBATTERYTo accessorydistribution panelSure PowerBattery IsolatorSure PowerBattery IsolatorCircuitBreakerCircuitBreakerSele ctorSwitchTo accessorydistribution panelBATTERY #1 BATTERY #2 ENGINEBATTERY #1 ENGINEBATTERY #2 CBCBCBS elector SwitchesSure PowerBattery IsolatorTo accessorydistribution panelAUXILIARYBATTERYF igure 2 One alternator, three battery banks without selector switchApplicable ISOLATOR Models: 703, 1203, 1603 Figure 1 One alternator, two battery banks without selector switchApplicable ISOLATOR Models: 702, 952, 1202, 1602 Figure 3 Two alternator, two or three battery banks withoutselector switchApplicable ISOLATOR Models: 2702, 3202 (two battery banks) 2703, 3203 (three battery banks)Figure 4 One alternator, two battery banks with selector switchApplicable ISOLATOR Models.
5 702, 952, 1202, 1602 Figure 5 Two alternator, two or three battery banks with selector switchApplicable ISOLATOR Models: 2702, 3202 (two battery banks) 2703, 3203 (three battery banks)LITHO IN USAPAGE 2 INSTRUCTION 180119A 0102 RECTIFIER TYPE isolators FOR MARINEOUTBOARD ENGINESSure POWER Rectifier Type isolators are specifically designed for the latest outboard engines with regulator/rectifier type alternators. The system allows for the convenience of running one, two or three auxiliary batteries to POWER all types of accessories and safety equipment from a single or twin charging source. These special isolators are designed to withstand high peak inverse INSTALLATION / NO SELECTOR SWITCH1.
6 Mount ISOLATOR in a convenient location near the auxiliary Connect a new #10 wire from the "A" terminal of the ISOLATOR to the existing yellow-gray wire junction on the regulator terminal block. Do not remove any existing Connect a new #10 gauge wire from the #1 terminal of the ISOLATOR to the positive terminal of the auxiliary Connect auxiliary loads to the positive terminal of the auxiliary battery or to the #1 terminal of the Connect the negative terminal of the auxiliary battery to a good common negative For two or three battery isolators , repeat step 3, 4 and 5 for each auxiliary Follow ABYC and BIA recommendations for circuit breaker protection and wire INSTALLATION / NO SELECTOR SWITCH1.
7 Mount ISOLATOR in a convenient location near outboard Connect a new #10 gauge wire from the "A1" terminal of the ISOLATOR to the existing yellow-gray wire junction on the #1 motor regulator terminal block. DO NOT REMOVE ANY EXISTING Connect a new #10 gauge wire from the "A2" terminal of the ISOLATOR to the existing yellow-gray wire junction on the #2 motor regulator terminal block. DO NOT REMOVE ANY EXISTING Connect a new #10 gauge wire from the "B1" terminal of the ISOLATOR to the existing #1 main battery positive Connect a new #10 gauge wire from the "B2" terminal of the ISOLATOR to the existing #2 main battery positive Connect a new #10 gauge wire from the "B3" terminal of the ISOLATOR to the new auxiliary battery positive Connect the negative posts of all three batteries to a good common negative or ground Connect auxiliary loads between ground and the positive post of auxiliary Follow ABYC and BIA recommendations for circuit breaker protection and wire IN USAPAGE 3 INSTRUCTION 180119A 0102 REGULATORRECTIFIERBLOCKJUNCTIONREGULATOR TO
8 STARTERSOLENOIDISOLATORTO BATTERYTO WIRENEWREDYELLOWYELLOW/GRAYGRAYPURPLEEXP LODED VIEWISOLATOR INSTALLATION / WITH SELECTOR SWITCH1. Follow standard ISOLATOR INSTRUCTIONS , steps 1 and Step 3 - Connect outputs of ISOLATOR to battery terminals on selector switch. Example: ISOLATOR output terminal #1 to selector switch battery terminal #1. Repeat as Follow ABYC and BIA recommendations for circuit breaker protection and wire Avery Street Tualatin Oregon 97062 Tel Fax IN USAPAGE 4 INSTRUCTION 180119A 0102 BREAKERCIRCUITBATTERYAUXILIARYTO ACCESSORYDISTRIBUTION PANELSEE EXPLODEDENG. BATTERY+ONLY-STARTERCABLEVIEW+NEW WIRESURE POWERMARINE RECTIFIERISOLATORMODEL 702-SURE POWER MODEL 702 Application: 1 Engine, 2 BatteryNo Selector SwitchAUXILIARYBATTERY #2+-ONLYENG.
9 BATTERY-+TO ACCESSORYDISTRIBUTION PANEL 2 CIRCUITBREAKERNEW WIRESTARTERCABLESEE EXPLODEDVIEWSURE POWERMARINE RECTIFIERISOLATORMODEL 702TO ACCESSORYDISTRIBUTION PANEL #1 AUXILIARYBATTERY #1+-CIRCUITBREAKERSURE POWER MODEL 702 Application: 1 Engine, 3 BatteryNo Selector SwitchSURE POWER MODEL 2703 Application: 2 Engines, 3 BatteryNo Selector SwitchSURE POWERMODEL 2703 ISOLATORMARINE RECTIFIERENGINE #1 BATTERY+-VIEWSEE EXPLODEDENGINE #2 BATTERY+-BREAKERCIRCUITNEW WIRENEW WIRESEE EXPLODEDVIEWBATTERYAUXILIARY+-BREAKERCIR CUITTO ACCESSORYDISTRIBUTION PANELCIRCUITBREAKERENGINE #1 ENGINE #2 BATTERY#2+-#1 BATTERY-+TO ACCESSORYDISTRIBUTION PANELCIRCUITBREAKERNEW WIRESTARTERCABLESEE EXPLODEDVIEWSURE POWERMARINE RECTIFIERISOLATORMODEL 702 SURE POWER MODEL 702 Application: 1 Engine, 2 Batterywith Selector Switch21 BOTHOFFCIRCUITBREAKERSELECTORSWITCHSURE POWER MODEL 2703 Application.
10 2 Engines, 3 Batterywith Selector SwitchSURE POWERMODEL 2703 ISOLATORMARINE RECTIFIERENGINE #1 BATTERY+-VIEWSEE EXPLODEDENGINE #2 BATTERY+-STARTER CABLESEE EXPLODEDVIEWBATTERYAUXILIARY+-TO ACCESSORYDISTRIBUTION PANELENGINE #1 ENGINE #2 OFFBOTH122 OFF1 BOTHNEW WIRESTARTER CABLECIRCUITBREAKERCIRCUITBREAKERBREAKER CIRCUITSELECTORSWITCHSELECTORSWITCHNEW WIRE