Transcription of T-Max Manager Manual rev 3 - appdig.com
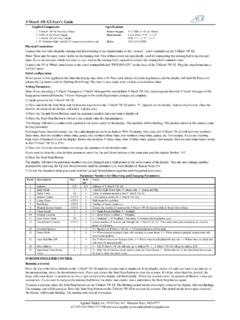
1 T-Max Manager and T-Max 3A User s Guide Page1 TABLE OF THET-MAX Setup 2-Auto 3-Maximum Bed 4-Display 5 through 8-Sending and Receiving ADNET-Repeater (optional).. Manager and T-Max 3A User s Guide CONNECTINGANEXTERNALPUSHBUTTON TO AT-MAX (C) COPYRIGHT 1995-2007 ByApplied Digital, Inc, information in this Manual is believed to be correct. However,Applied Digital, Inc. assumes no responsibility for anyerrors herein. This information is subject to change without notice, and should not be construed as a commitment byAppliedDigital, product is warranted against defective materials and workmanship for a period of two years from date of purchase. In theevent the product fails to perform, it may be returned; Shipping Paid, to the factory to be serviced or replaced at the factory' Digital, Inc. will pay to ship the repaired or replaced product by the shipping means of our will not be accepted without a Return Authorization Number assigned by the is a Condition of Sale that the user ofApplied DigitalInc.
2 's products assumes all risk and responsibility of use andindemnifiesApplied Digital, Inc. against all damages. Applied Digital, Inc. is not liable for loss of profits, lost savings, special,incidental, consequential, indirect or other similar damages arising from breach of warranty, breach of contract, negligence, orother legal action even ifApplied Digital, Inc. or its agent has been advised of the possibility of such damages, or for any claimbrought against you by another party. This warranty allocates risks of product failure between the purchaser andAppliedDigital, Inc. Salon System, Inc. s hardware pricing reflects this allocation of risk and the limitations of liability contained inthis warranty. It is a violation of the stated warranty to cut or modify the provided modular cables supplied with the T-Max Series Timers. Connecting the T-Max Series to third party timers not approved byApplied Digital, Inc. also violates thestated warranty. Contact your dealer orApplied Digital, Inc.
3 To determine if your third party timer is approved byAppliedDigital, Manager and T-Max 3A User s Guide Page31 OVERVIEWC ongratulations on your purchase ofApplied Digital, Inc. s T-Max Series of tanning bed T-Max is designed for complete automation and control of your tanning equipment. It isalso an excellent Manual backup system in case your computer fails. The T-Max Mgr can beused as a stand alone unit or can be controlled by a computer using many third party softwarepackages. Manual operation is accomplished via front panel via front panel controls is accomplished by pressing the proper sequence of are eight LED displays, each showing the status of one bed. LED lights to the left showwhich bank of eight beds are being controlled, beds 1-8, 9-16, 17-24 and so on. If the T-Max Mgr loses power, the T-Max 3A s can be configured to be stand alone timers. As long as the T-Max Mgr is active, only the Start/Stop and Clean Room features are available from the T-Max :Many tanning units aremanufactured with T-Max Certified timers built into them.
4 Thesetanning beds can be controlled by theT-Max Manager without the need to have a T-Max 3 Ain the tanning room. Contact the tanning bed manufacturer to see if your tanning bed is suppliedwith aT-Max Certified Certified timers are timers manufactured by Applied Digital, Inc. Connecting timers notmanufactured by Applied Digital, Inc. is not recommended and may not work the same as a T-Max timer. Applied Digital, Inc. does notsupport timers that are connected to the T-Max Manager that are not manufactured by Applied Digital, Manual should be used by a licensed electrician when installing your new system. Check forcompliance with local building Mgr:1 T-Max Mgr Unit1 9V @ 800mA Power Transformer1 RS-232 Cable DB9M-DB9F DB9M-DB25F Com Port Adapter1 USB-RS232 converter1 This Manual1 T-Max Utility Software1 ADICON Driver UtilityContact your dealer if anycomponents are : T-Max Enclosure Attaches to the T-Max 3A to hang on the wall or set on a Slave KitRequired for each slave T-Max Mgr Manager and T-Max 3A User s Guide Page4T-Max SpeakerConnects to T-Max 3A to provide for a higher volume alarm in tanning Monitor/PlusConnects anywhere in the T-Max Series daisy-chain to provide 16 displays showing bedtimes and status (Optional):Connects in the middle of the daisy chain amplify the communications (Optional) Optical IsolatorConnects either after theT-Max Manager /Pro or in the middle of the daisy-chain.
5 Protectssystem from power surges. Also acts as a Access Point and G2 Power Injector(wireless adapter)Allows theT-Max System to be connected without the need to connect daisy-chain 900 MHzfor your dealer for more information on all of our options for the T-Max Mgr:Power SupplyIN-120 VACOUT-9 to 12V (DC or AC) @ 800mACurrent x 10 x 2 CommunicationsT-Max Mgr-PCRS-232C, 9600 Baud, 8 Bit, 1 Stop Bit, No ParityDisplay: T-Max Mgr:8, 2 digit LED displays showing bed and time Units:128 T-Max 3A s controlling 128 T-Max Mgrs can be used to control up to 128 Computer can be connected to each T-Max PC Requirements1)1 MByte available )5 Mytes available Hard Disk Drive ) 1 available RS232 ) IBM AT, 286, 386, 486, Pentium or )Windows 95/98/2000/NT/XPT-Max Manager and T-Max 3A User s Guide Page52 QUICK the T-Max Timing System1)Install a T-Max 3A in each room. Install the T-Max Manager at the front ) A 50 modularcable (phone type cable) is provided with each T-Max 3A.
6 Run one modularcable from the T-Max Manager location to T-Max 3A in the nearest tanning room. Run theother modular cables from room to room in a daisy-chain :If you are connectingtheT-Max using theG2wireless adapters, DO NOT run themodular cables in adaisy-chain. Refer to the G2 Sheet for connecting theG2units to theT-Max Manager and timers in the tanning ) Connect the modular cables to each T-Max 3A and the T-Max Mgr. When finished each T-Max 3A except the last one will have a modular cable connected to each ) Connect the tanning bed to the Contact screw terminals on the back of the T-Max 3A ineach tanning :There may be many wires visible on the tanning bed. Twoof thesewires arespecifically used for connecting the tanning bed to an external timer. If you do not knowwhich wires to use, refer to the tanning bed s Manual or contact the bed s ) Each T-Max 3A came with a 9-12V power supply. Connect a power supply to the J4-12 VAC screw termination block on the back of each T-Max ) Plug each of the T-Max 3A s power supplies into a standard 110V power the ) If the T-Max Mgr has a key, turn the key fully ) Apply power to the T-Max Mgr.
7 Then wait 10 ) Press the Start/Stop Button under displays 1 and 8 on the T-Max Mgr at the same time untilthe displays changeand show zeros in displays 6, 7 and 8. Release the Start/Stop ) Press the Set buttons under displays 6, 7 and 8 until the number for security level 2 the factory default settings, see the security sheet that was supplied with theT-Max ) Once the Security number appears in displays 6, 7 and 8 press the Start/Stop button underdisplay 1. The display will change to various ) Press and release the Start/Stop Button under Display 3 on the T-Max Manager willchange to 1. Each T-Max 3A will show a 99 ontheir displays and beep tanning units with T-Max Certified timers mayshow an ID followed by a Manager and T-Max 3A User s Guide Page613) Go to each roomintheorderthat you want the room numbers to be(1, 2, 3, 4,5, 6 etc.)andpress the Start/Stop buttons in each room until the displays on each T-Max 3A shows a some tanning units with Red and Green buttons, press the Green you press the Start/Stop buttons, Display 3 on the T-Max Mgr will countup.
8 This is theMax. Bed Number that the T-Max Mgr will scan for each time power is ) Press the Change Display Beds button on the lower left corner of the T-Max Mgr. After ashort pause, the T-Max Mgr will scan and show a number under each display that represents abed is now modular cable with RJ-22 connectors needs to be run from the T-Max Mgr to the first roomand from room to room in a daisy chain fashion (Figure F, Section ).Note:If you are connecting theT-Max using theG2wireless adapters, DO NOT run themodular cables in adaisy-chain. Refer to the G2 Sheet for connecting theG2units to theT-Max Manager and timers in the tanning ManagerConnect the 9V-power supply to the T-Max Mgr and a 110 VAC outlet. Connect the modularcable going to the tanning room to the modular connectoron the T-Max Mgr. If you are using aPC, connect the RS-232 DB9F-DB9M cable between the serial port on the T-Max Mgr and theserial port on your computer (refer to Figure F, Section ).
9 3 AConnect the modular cable connected to the T-Max Mgr to one of the modular ports on the backof the T-Max 3A in the first tanning room. Connect the modular cable running to the nexttanning room to the open modular port. In the second tanning room, connect the modular cablefrom the first tanning room to one of the modular ports on the back of the T-Max 3A. Continueuntil all of the rooms are the 9V power supply that came with each T-Max 3A to the Pwr In9-12V screwterminal block on the back of each T-Max 3A. Connect the tanning bed to the Contact screwterminals on the back of the T-Max :There may be many wires visible on the tanning bed. Two of these wires arespecifically used for connecting the tanning bed to an external timer. If you do not knowwhich wires to use, refer to the tanning bed s Manual or contact the bed s manufacturer. TheT-Max 3A will touch these wires together to energize the Manager and T-Max 3A User s Guide ourG2wireless modules, you can connect an entireT-Max system without the need torun modular cables throughout your tanning salon.
10 Refer to theG2 User s guide forinstructions on connecting the G2to theT-Max system. Remember, you don t need to runcables throughout your tanning salon if you are using Addressing T-Max 3 AsNote:If you are installing new T-Max system and have just completed Section 2 (QuickInstallation), theaddresses on the T-Max 3As are set and you do not need to independently setaddresses on the T-Max 3 AsRefer the T-Max3A User s Guide on setting the addresses manually. Make sure you do not setduplicate Manager1) Make sure all wiring is completed. Refer to Section 3 for wiring you are usingG2 Wireless modulesto control your tanning salon, makeG2sare connected theT-Max Manager and each timer as shown in theG2 User s ) Apply power to the T-Max :On power up the T-Max Mgr displays will momentarily show 1,2,3,4,5,6,7,8, then theDisplays 7 and 8 will show values. Display 7 is the T-Max Mgr number, or the address the T-Max Mgr is set to: 0 is the Master setting and 1-7 are the Slave 8 is thesoftware version number in the T-Max Mgr.