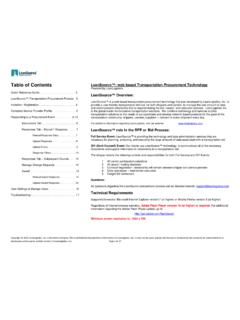
Transcription of Table of Contents - Mainchain
1 1 1 Table of Contents FREMANWEB BASICS .. 3 LOGGING INTO FREMANWEB .. 3 NAVIGATION AROUND FREMANWEB .. 4 EXPANDING HELP AND DETAILS PANELS .. 5 ACTIONS .. 5 GET A QUOTE .. 5 NEW CONSIGNMENT NOTE .. 6 EMAILING NOTES TO A THIRD PARTY .. 10 CONSIGNMENT REVIEW .. 11 ELECTRONIC DATA INTERCHANGE RELATIONSHIP TO FREMANWEB .. 13 WHAT IS EDI? .. 13 TRACK AND 15 MY NOTIFICATIONS .. 16 MANUAL LABELS .. 17 FREEFORM LABELS .. 17 CHANGE PROFILE .. 18 QUICK PRINT SETUP GUIDE .. 19 MAINTAIN .. 23 ADDING NEW RECEIVERS.
2 23 EDITING CURRENT RECEIVERS .. 24 PRODUCTS .. 25 DANGEROUS GOODS (DG) .. 28 NEW DANGEROUS GOODS .. 28 DANGEROUS GOODS EDITING .. 29 2 2 VALIDATING YOUR DANGEROUS 30 DG SIGNATORIES .. 32 SENDERS/CHARGES .. 33 IMPORT FILE .. 33 OPTIONS .. 33 NOTE 34 REPORTS .. 35 TO RUN A REPORT: .. 35 MANIFEST REPORT .. 35 NOTES REPORT .. 36 HIRE EQUIP REPORT .. 36 3 3 FREMANWEB BASICS FremanWeb allows you to: Create consignment notes Get quotes Review your consignment history Create dangerous goods (DG) paperwork (if required) Validate your DG Records Save receivers, product and DG records (if required)
3 Check delivery status of freight Keep consignment history for a period of 60 days Setup notifications Print a summary freight manifest Upload your consignments to Mainfreight Print directly onto standard A4 paper or Thermal Labels LOGGING INTO FREMANWEB FremanWeb is designed to allow customers to manage and track their freight via Mainchain . Mainchain is accessed via the Internet at: Enter your username and password, and then click [Login] to access Mainchain . Hover over the [Actions] menu then click the [Freman Web AU] button to access FremanWeb from Mainchain , this will open FremanWeb in a new window.
4 4 4 NAVIGATION AROUND FREMANWEB FremanWeb has 4 main tabs as seen below, which can be accessed by clicking on them. Actions Tab This is the main tab, used for: Creating consignment notes, labels, manifests Printing, uploading and track & trace functions Referring to previously created consignment notes Getting Quotes Checking notifications Importing consignment notes Maintain Tab Used to add, modify and delete records for: Receivers Products DGs and DG Signatories Sender/Charges Help Tab This is the Help tab, which contains.
5 This user manual Remote support link Mainfreight group contact details Label printer information & support Printer Management Tool and Quick Print Client links Repor ts Tab Used to generate manifest, consignment and hire equipment reports 5 5 Expanding Help and Details Panels Clicking the blue help icon will expand a help panel. The help information relates to the specific task on each page Below is what will display when clicking the help icon in the [Create New Consignment] screen. The Hide Details and Show Details icons expand or minimise sections of the consignment note creation page.
6 ACTIONS Get a Quote You can get quotes using the [Get Quote] option. You will need to enter in the following information: Choose your Charge/Sender code. This will automatically populate the Sender field details. Select your Carrier and Service Required Select the Suburb and City you would like to send your consignment to Enter the quantity, cube and weight 6 6 Once you have entered these details you can choose between these options: Displays the quote on screen Sends the quote to the specified email address in the Email Address field Prints the quote in PDF form (you will need a PDF viewer to view) Takes you to the connote creation screen with the charge/sender, selected suburb and city, and line details that you specified Note: You need an active charge code with structured rates to get quotes, if you do not have structured rates please contact your sales representative to get rates set up.
7 New Consignment Note To create a new consignment note, click on under Actions Your correct Charge and Sender details are setup to automatically populate on each new consignment note As charge/sender details don t change often, they appear minimised. They can be displayed by clicking the button. From here you can select a different Sender code or enter a Return/Non Standard pickup if required Receiver Deta ils To select a Receiver that has already been saved in FremanWeb: Start typing the Receiver Code and Freman will display the first name that matches the details you have typed, along with similar alternatives (if available).
8 Click the desired code to populate the details in the fields Note: See Section 3 in this guide on how to setup and save Receiver records in FremanWeb Manual Ent ry You can manually enter receiver details in FremanWeb also, if no receivers are saved for that receiver. Note: You can store receivers for future use by entering in the receiver details then clicking on the icon next to the [Code] field to save. This will bring up a window to enter in extra detail. 7 7 With a manual entry, there is no need to type any text in the [Code] field Start by typing your receiver name in the [Name] field and complete each field below: Address: type in the Address of the receiver.
9 A second Address line is available for additional address details Suburb: type in the Suburb. If a Suburb is not available, in the case of smaller towns and centres, enter the town name in the [Suburb] field and select from the matching results City: type in the city Phone: type in the receiver s phone number Receiver Reference: type in the receiver s reference number Sender Reference: type in the sender s reference number Service Required/Carrier: Select the carrier for your freight Description.
10 This text can be entered as free text, or chosen from the drop down menu of saved product items that may have been setup. The DG class will also appear if the product has been saved as a Dangerous Good Please Note: See the Product and Dangerous Goods sections in this guide on how to setup and save Product and Dangerous Goods (DG) records in FremanWeb Enter the total volume (in Metres) and weight (in KG) for each line Any general notes can be typed on a separate line in the [Description] column Fragile Handle With Care You can add extra lines to the connote by clicking the [Add Line] button.