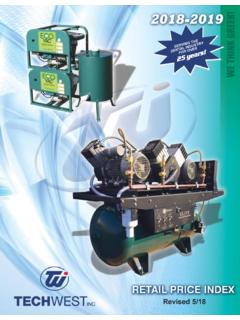
Transcription of TECH WEST INC.
1 2625 N. Argyle Ave. Fresno, CA 93727(559) 291-1650 (800) 428-7139 FAX (559) 348-9677 tech west of Dental Vacuumand Air Systems2625 N. Argyle Ave. Fresno, CA 93727(559) 291-1650 (800) 428-7139 FAX (559) 348-9677 tech west of Dental Vacuumand Air SystemsWHIRLWIND VACUUM PUMPINSTALLATIONAND SERVICEMANUAL Revised 4-151 WHIRLWIND PUMPINSTALLATION AND SERVICE MANUALThis manual is for the installation and service of tech west s WhirlWind 1: Plumbing Schematic4 Figure 2: Water Connection4 Figure 3: Typical Dual WhirlWind Installation5 Figure 4: Sink Cabinet Installation5 Figure 5: Vacuum Connection - Single WhirlWind6 Figure 6.
2 Vacuum Connection - Dual WhirlWind6 Figure 7: Wiring Diagram7 Figure 8: Remote Control Wiring7 Figure 9: Line Voltage Connection8 Weekly Servicing9 Parts List10-16 TROUBLESHOOTINGS ingle Vacuum Pump Troubleshooting18-19 Dual Vacuum Pump Troubleshooting20-21 Triple Vacuum Pump Troubleshooting22-23 Installation Diagrams and Information24-26 Maintenance & Service and Notes Sheet27-29 WHIRLWIND LOCATION REQUIREMENTSThe WhirlWind location should be level, accessible and well the WhirlWind will be located in a confined space, provide cross ventilation and install an exhaust following utilities are required.
3 (a) Cold Water SupplyInstall a separate 1/2 cold water branch for the WhirlWind water intake(s). This will cool and lubricate the shaft seal. Water pressure should be between 25 and 55 psi (water must remain on during operation) or shaft seal damage will occur.(b) Waste DisposalThe WhirlWind will exhaust both vapor and liquid waste. Provide exhaust vent sized to 2 in diameter and a waste drain which complies with local code.(c) Vacuum LineThe main vacuum line from the operatories must connect to the WhirlWind vacuum pump intake manifold.
4 (d) Electrical(1) Line voltage must be within the limits of Table 1 below. (Install a buck-boost transformer if line voltage is not between these values.) Provide a separate line for each pump motor. Circuit breaker switches must be 20 amp.(2)Local code may require you to provide one quick disconnect (safety switch) for each pump motor.(3)The WhirlWind is controlled by a 24 volt circuit. For remote control, provide one 18/3 jacketed cable for each pump VOLTAGE RATING230 v115 vMIN VOLTAGE RATING208 v constant110 v constantMAX VOLTAGE RATING240 v constant130 v constantTABLE 1 WHIRLWIND STEPS(a) Check the shipping carton for damage.
5 This could detect damage to the unit which might otherwise be overlooked.(b) Remove the WhirlWind from its shipping carton. Inspect the unit for damage. (Single WhirlWind s are shipped bolted to a pallet. This pallet is intended for shipping use only and should be discarded).(c) Inventory your Hook-Up Kit. Check its contents against the inventory sheet included. These items will be used in the remaining steps.(d) Mount the WhirlWind. To dampen vibration, ensure rubber isolators are installed on each WhirlWind to the schematic diagram of Figure 1 for steps (e) (f) and (g).
6 (e) Connect the cold water supply. See Figure 2. Turn the water on and check for leaks in the water control assembly.(f) Make the necessary waste connections. Figures 3 and 4 show typical installations. To install a tech west Exhaust Separator or Water Recycler see the applicable installation sheet.(g) Connect the main vacuum line. For Single WhirlWind s, connect flexible hose to the pump intake manifold (Figure 5). For Dual and Triple WhirlWind s, connect to the vacuum intake manifold(Figure 6).Refer to the wiring diagram of Figure 7 for steps (h) and (I).
7 Detailed wiring diagrams are on the inside of each pump relay panel cover plate.(h) Connect remote control 18/3 jacketed cable to each pump relay panel. Use wire connectors which provide secure mechanical connections. See Figure 8.(i) Connect to line voltage (via safety switch(es) if required by local code). Use 12 gauge THHN grade wire and approved conduit for permanent wiring. See Figure 9. (Single WhirlWind pumps may operate on either 115 volt or 230 volt lines. For terminal changing instructions see inside of relay panel cover plate.)
8 (j) Turn on the WhirlWind. Check the pump(s) for leaks and the vacuum level following the instruction in Weekly Servicing page Blue HoseBall ValveBrass AdapterBrass Close NippleBrass BushingFigure 1: Plumbing Schematic1. Line Filter4. Impeller7. Exhaust Vent2. Cold Water Supply5. Solenoid Valve8. P-Trap Adapter3. WhirlWind Pump6. Exhaust Separator9. Waste LineFigure 2: Water Connection5 VentilationFloorSinkExhaustSeparatorFrom OperatoryFanExhaustVentCold WaterSupplyMainVacuumLineSafetySwitchSaf ety SwitchExhaustVentExhaustSeparatorColdWat erSupplyP-TrapAdapterFigure 3: Typical Dual WhirlWind Vacuum InstallationFigure 4: Sink Cabinet Installation6 Figure 5: Vacuum Connection For Single WhirlWind PumpFigure 6.
9 Vacuum Connection For Dual WhirlWind PumpGLUE ALL EXHAUST HOSE CONNECTIONS SECURELYWITH PVC GLUEPump OneDual CheckValve AssemblyHose ClampMainVacuumLinePump Two3/4 FlexiblePVC HoseMain VacuumLine3/4 CouplingMale Adapter (PVC GLUE ALL HOSE CONNECTIONS EXCEPT THIS ONE)LineFilter7 RelayPanelWireConnectorsToRemoteControlP anel230 vSafetySwitches18/3 JacketedCableCircuitBreaker230 v230 vNuet24 V Remote Control PanelWhirlWind OneWhirlWind Two24 VRemoteControlRelay24 8: Remote Control WiringFigure 7: Wiring DiagramWiring Diagram IllustratesThe Connections For a Dual WhirlWind Pump8 Figure 9: Line Voltage ConnectionsConduitFromSafetySwitchGround ConnectionTerminalBoardRelayBoxMotorLead sLoadOutLineInLoadOutLineInWHIRLWIND PUMPWEEKLY SERVICINGR efer to Figure 10 for the following steps.
10 (a) Clean vacuum filter bowl and screen. Turn the pump off and unscrew the vacuum filter bowl, rinse bowl and screen under cold water. Replace bowl or screen if damaged. Ensure gasket is in place in the filter bowl before reassembly.(b) Flush the WhirlWind pump(s) and main vacuum lines with a non-foaming dental vacuum cleanser. Follow the cleanser manufacturer s instructions.(c) Visually inspect WhirlWind pump(s) for water leakage. Ensure that all hose clamps and water connections are tight.(d) Check vacuum gauge level. Vacuum settings are adjusted at the factory according to table 3 below.