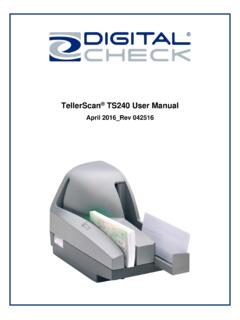
Transcription of TellerScan TS240 User Manual - Digital Check
1 TellerScan TS240 user Manual April 2016_Rev 042516 TellerScan TS240 user Manual Rev 042516 Page | 2 Table of Contents About the TellerScan TS240 .. 4 FCC - Class B .. 4 Industry Canada - Class B .. 4 TellerScan TS240 System Requirements .. 4 TellerScan TS240 Included Equipment .. 5 External View of the TellerScan TS240 .. 6 Rear View of the TellerScan TS240 .. 6 TellerScan TS240 Initial Setup .. 7 New user Notice .. 7 Cable Connections and Scanner Placement .. 7 Installing the 1 Line Printer Ink Cartridge .. 8 Installing the 1 Line Printer Ink Cartridge (continued) .. 9 Installing the 4 Line Printer Ink Cartridge .. 10 Installing the Ink Cartridge (continued) .. 11 Installing the Franker Roller .. 12 Testing the Scanner.
2 13 Installing the Optional USB Driver .. 13 Installing ScanLite2 .. 13 LED Status Indicator .. 14 LED Status Indicator .. 14 LED Status Indicator (continued) .. 15 Loading Items into the Scanner .. 16 Accessing the TellerScan TS240 .. 17 Accessing the Internal Document Path .. 17 Accessing the Cameras .. 17 Accessing the Cameras (continued) .. 18 Closing the Camera Door .. 18 TellerScan TS240 Routine Maintenance .. 19 TellerScan TS240 Maintenance Overview .. 19 Inspect the TS240 Document Track .. 19 Cleaning the TS240 Camera .. 19 Cleaning the TS240 Drive Rollers Using a Cleaning Card .. 20 Cleaning the TS240 Drive Rollers Using a Cleaning Swab .. 21 Replacing the SADR Discrimination Roller .. 22 TellerScan TS240 user Manual Rev 042516 Page | 3 TellerScan TS240 Troubleshooting.
3 23 Document Feeding Problems .. 23 Clearing Jams .. 23 Image Quality .. 23 MICR Errors .. 23 Using the Diagnostic Pop-up .. 23 TellerScan TS240 Frequently Asked Questions .. 24 Is Using a Check Jogger Recommended? .. 24 What is the Typical Cleaning Interval? .. 24 What is the LED Status Light Sequence? .. 24 What About Avoiding MICR Read Head Interference? .. 24 How Long Does the Ink Cartridge Last? .. 24 What is the Entry Tray Capacity? .. 24 What is the Exit Pocket Capacity? .. 24 How Many Checks Per Minute Should My TS240 Scan? .. 24 TellerScan TS240 Specifications .. 25 Digital Check Contact Information .. 26 TellerScan TS240 user Manual Rev 042516 Page | 4 About the TellerScan TS240 The TellerScan TS240 is an easy-to-use, high-volume Check scanner that automatically scans the front and/or back side of checks and reads the MICR (Magnetic Ink Character Recognition) code line.
4 The images and data are then transmitted through a USB (Universal Serial Bus) interface to the PC. The TS240 has an automatic feeder that handles up to 100 items, and also features a 100-item exit pocket. The TS240 is rated at up to 150 documents per minute (DPM) scanning speed. Speeds can vary based on the length of the documents being scanned, the application settings and the PC performance or configuration. The TS240 does not have an On / Off Switch , but will become fully activated when the USB cable is connected to a powered-on PC. The TS240 is automatically powered off when the PC powers down, as it senses the loss of power to the USB port. FCC - Class B This equipment has been tested and found to comply with the limits for a Class B Digital device, pursuant to part 15 of the FCC Rules.
5 These limits are designed to provide reasonable protection against harmful interference in a residential installation. This equipment generates, uses and can radiate radio frequency energy and, if not installed and used in accordance with the instructions, may cause harmful interference to radio communications. However, there is no guarantee that interference will not occur in a particular installation. If this equipment does cause harmful interference to radio or television reception, which can be determined by turning the equipment off and on, the user is encouraged to try to correct the interference by one or more of the following measures: Reorient or relocate the receiving antenna. Increase the separation between the equipment and receiver.
6 Connect the equipment into an outlet on a circuit different from that to which the receiver is connected. Consult the dealer or an experienced radio/TV technician for help. Industry Canada - Class B This Digital apparatus does not exceed the Class B limits for radio noise emissions from Digital apparatus as set out in the interference-causing equipment standard entitled Digital Apparatus, ICES-003 of the Department of Communications. TellerScan TS240 System Requirements Minimum Recommended GHz processor 1 GB RAM GHz Dual-Core or faster processor 2 GB RAM or more GB free disk space 10 GB free disk space Windows XP, Windows Vista, Windows 7, 8 or 10 Windows 7, 8 or 10 (64-bit) USB port USB port DCC API for standard models DCC API for TS240 -150UV model DCC API or newer DCC API for TS240 -150UV model TellerScan TS240 user Manual Rev 042516 Page | 5 TellerScan TS240 Included Equipment The TellerScan TS240 includes the following equipment in the box.
7 TellerScan TS240 Check scanner 100V-240V 50/60Hz voltage sensing, external power supply and cord USB cable Ink cartridge - MS0083 (1 line printer) or MS0095 (4 line printer) depending on model Note: Ink cartridges are included only with Inkjet models Franker roller Note: Franker rollers are included only with Franker models TellerScan TS240 user Manual Rev 042516 Page | 6 TellerScan TS240 Features External View of the TellerScan TS240 Rear View of the TellerScan TS240 TellerScan TS240 user Manual Rev 042516 Page | 7 TellerScan TS240 Initial Setup New user Notice PLEASE NOTE: Do not connect the USB cable from the scanner to your PC before installing the drivers or the scanning application / software.
8 Digital Check does not provide scanning software. Please contact your bank or other solution provider for further assistance with installing the driver or getting the scanning software set up or installed. Digital Check provides only an optional driver installation utility and a separate demonstration program. See the Installing the Optional USB Driver section or the Installing Scanlite2 section for additional information. Cable Connections and Scanner Placement Note: Do not connect the USB cable from the scanner to your PC before installing the drivers or the scanning application / software . Place the unit on a flat surface near the PC and away from direct light sources such as spot lights or desk lamps. Place the scanner in a position that is at least 6 inches away from any power supply, other electronic devices, pneumatic tubes at the teller window, etc.
9 To avoid magnetic interference with the MICR read head. Connect the Power Cord for the external Power Supply to the Power Supply and then plug the connector into the rear Power Connection port. Connect the USB cable by plugging it into the rear USB port. TellerScan TS240 user Manual Rev 042516 Page | 8 Installing the 1 Line Printer Ink Cartridge Note: This step only applies to TellerScan TS240s that have the optional Inkjet configuration. Follow these instructions when installing the ink cartridge for the first time, or when replacing an empty cartridge. Inkjet platform style might vary based on production. The cartridges are installed the same way for all TS240 1 line platform styles.
10 Step 1: Lift up on the Center Cover to remove it and provide access to the Ink Cartridge Platform . Step 2: Open the ink cartridge pouch and remove the protective tape covering the ink nozzles. Be careful not to touch the ink nozzle with your fingers or allow it to come in contact with anything else. TellerScan TS240 user Manual Rev 042516 Page | 9 Installing the 1 Line Printer Ink Cartridge (continued) Step 3: Insert the nozzle end of the cartridge into the platform while keeping the end of the cartridge tilted slightly upward. Push down on the rear of the cartridge until it clicks twice and snaps into position. Step 4: Verify that the cartridge is properly installed. The cartridge should appear tilted at a slight angle when fully seated.