Transcription of TRS-1 TRS-2 - Millett
1 TRS-1 TRS-2 Before starting, make sure firearm is UNLOADED!!INSTRUCTION and OPERATION TRS-1 TRS-2 TACTICAL RIfLE SCOPEI nstallation and use of Millett Tactical TRS-1 and TRS-2 scopes92-0027/02-10 MountingMounting your scope properly is important to the accuracy and durability of your firearm and scope. Proper mounting assures that the scope is aligned to the barrel and rigged to the rifle for the base and ring combination that you have chosen, make sure mounting screws for the base are firmly tightened. On most bolt action rifles, 50 to 60 inch pounds is suitable for the torque. Loctite is recommended to prevent the screws from loosening under recoil.
2 Place the bottoms of the rings onto the base and center and tighten. Make sure ring bottom is aligned in the base and not cocked or out of line with the bore. failure to align the bottoms of the rings onto the base can damage the the scope into the bottoms of the rings, with the eyepiece to the rear, and align the crosshairs to the vertical and horizontal, moving the scope back and forth to get a full sight picture. While looking through the scope, align the crosshairs and the eye relief. The eye relief on this model scope should be about 75mm or 3 the top caps of the rings on the bottoms and slightly tighten the screws.
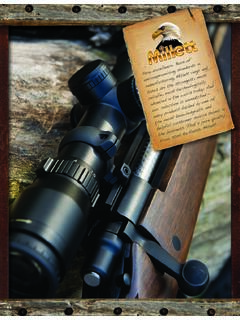
3 Check the alignment and eye relief before fully tightening the cap screws. TRS-1 scope mounted on a tactical rifle using Millett Angle-Loc rings and Picatinny is aligning the scope to the bore of the rifle to assist you in getting on target when sighting in the rifle. There are several ways to boresight a rifle: 1. Looking through the scope and the bore of the rifle until they are both at the same point. 2. Using an optical device inserted into the bore and aligning the scope to a point on the boresighter. 3. Using a laser inserted into the barrel at the muzzle or chamber to make a reference point and aligning the scope crosshairs to that point.
4 All of these systems work well when the instructions supplied with each method are InSighting in your rifle is critical to assure that point-of-aim and impact yards are the same at a known range. The method we recommend is to start shooting at 25 yards or 50 yards with a target large enough to allow some room for error. The goal of properly sighting in the scope is to eliminate human error, so use a solid rest to support the rifle. It s best if at the time you sight in, the wind is 3 shots, carefully holding the crosshairs at the same point on the target for each shot. Measure the distance from the point at which you were aiming to the center of the 3 shot group.
5 This is how much you will need to move your scope to align the crosshairs. Note: The arrows on the turrets of the scope are for direction of movement of the bullet. Move the target to 100m or yards and repeat the sighting in procedure to adjust the turrets until the scope is aligned to the rifle. Fire a group of shots after adjustment to assure the proper sight-in. It is best to fire the rifle at the ranges that the sight will be using to assure your zero and drop for various ranges. Many shooters set the sights a number of inches high at 100 yards so they have a longer point-blank range.
6 Example: a 308 sighted 2 inches high at 100 yards will be dead on at 200 yards, extending the point-blank range to over 300 yards. Once the scope is sighted in, you can zero the windage and elevation turrets by loosening the 3 small set screws in the top of the caps and turning the cap until the zero ( 0 ) lines up with the dot on the body of the scope. Then, retighten the screws. Now, it s easy to count the clicks for elevation and windage. Note: Small Allen wrench in the features of the TRS ScopesThe TRS was designed to give the shooter the most useful features needed under the most demanding conditions.
7 To get the full benefit of the features, it s best to learn their use before needing them. Try the different TRS features before you need them under varying of the CrosshairsOn the rear of the scope, there is a small knob that has markings from Off to 10. This is your control for illumination of the crosshairs in low light or when you want a high contrast to the target. Use the lowest setting that still gives good visibility to the target and the crosshairs. NV is for use with Night Vision devices or under the lowest light battery life of the illumination is about 50 hours at the highest setting and over 150 hours for the lowest.
8 Turn the illumination off when not in use. It s best to have a spare battery with you in the field in case a new battery is : When the illumination is turned on at night, it can be seen from directly in front of the scope, giving away your position. We recommend using the supplied lens shade and an anti-reflection device in combat situations. eye Piece FocusWindageelevationturret Lock RingsRange FocusZoom ControlIlluminator4 Turret LocksAn exclusive feature of the Millett TRS scopes, is the turret locks that prevent accidental movement of the windage and elevation adjustments of the scope.
9 By tightening the ring at the base of the turrets to the right, the adjustment is locked. Note: As the lock is positive, it is important to carefully adjust the turret when you have unlocked the ring. There may be some tension when first moving the turret. Do not try to over power the lock when the lock is tightened, as this may damage the Eye focusAt the rear of the scope, there is adjustment that is used to focus the crosshairs to your eyes. This is a diopter adjustment and is set from 2 + to diopter. Adjustment is made by rotating the rear ring. Adjust until the crosshairs are sharp to your eyes.
10 Side Range focusOn the left side of the scope, there is a large knob that is used to remove parallax and to improve the focus of the scope at differing ranges. By turning the knob, you can adjust the scope s focus. Adjust until you have a sharp image of the target. The range marks may not be absolutely accurate due to your eyes, lighting conditions and other factors. It s best to adjust the range focus for the best image and no parallax. Parallax can be seen if the crosshairs move from the point-of-aim when you shift your eye from side-to-side or up-and-down while looking through the scope.