Transcription of UNDERSTANDING COLORED GROUT INSTALLATIONS GOOD …
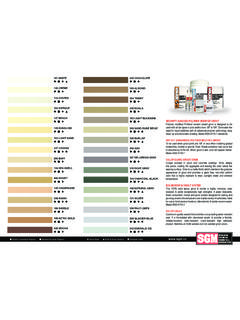
1 1502 SW 2nd PlacePompano Beach, FL |product guide toproduct guide topptechnical informationtechnical informationUNDERSTANDING COLORED GROUT INSTALLATIONSWe as manufacturers of COLORED Portland cement grouts, use the highest quality raw materials available. We exercise exacting care and computerized color equipment in our quality control lab to ensure that color matching is as exact as possible. COLORED GROUT is a beautiful finishing touch, as well as an integral part of all INSTALLATIONS . Proper use and techniques will result in a stronger, denser and more uniform GROUT . Some variation is to be anticipated and is described in all manufacturers color cards, kits and product literature. CAUSES FOR DISCOLORED GROUT JOINTSThe fundamental cause for differences in the final finish of COLORED GROUT joints throughout an installation , commonly referred to as mottling, is uneven curing.
2 Notwithstanding an installers best efforts and adherence to recommended procedures, discolored and/or inconsistent GROUT colors may also occur due to the inconsistent nature of Portland cement. If a GROUT cures slower in one part of a joint than in another, darker or lighter colors (in comparison) will develop. Many additional factors that are listed in the following paragraphs can also cause shading. By knowing the causes, proper attention to these factors can bring about uniform COLORED GROUT CONDITIONS SHOULD BE CAREFULLY CONTROLLED: Conditions during which GROUT is placed may be controlled. Using the proper installation techniques and precautionary measures will help minimize GROUT FOR A GOOD installation : If the tile surface has high water absorption or is porous, the use of COLORED grouts may permanently stain the tile. Check the water absorption rate of the tile before grouting.
3 Unglazed quarry tile or semi-vitreous tile with 5% water absorption or higher must be protected. Use a protective coating, such as Southcrete 901 Clear Penetrating Sealer & GROUT release. Sealers and waxes are also used to protect GROUT joints. Wait at least three (3) weeks before using. The use of SGM GROUT Sealer will give a wet look and create a protective film over the joint. Tile INSTALLATIONS on concrete or masonry substrates may develop surface discoloration due to efflorescence. This may occur when moisture wicks ups through the substrate and setting bed. This whitish powder or crystalline deposit may appear along the joint or edges of the tiles. A quick check for potential efflorescence is to tape a small piece of polyethylene film on the slab surface before tiling. Make sure the tape seals all edges. Moisture movement will become apparent within one or two (1-2) days by water condensation under the plastic film.
4 The potential for efflorescence is inherent in all Portland cement setting and grouting systems and is not considered a manufacturing FOR PROBLEM AREAS: GROUT placed during the cooler part of the day may cure slower than GROUT set in the heat of the day, which cures one area of a job is exposed to the sun and another area is not, the sunny area will often cure faster and lighter than the shaded area. Sun shields will help reduce problems of this type. If one area is more exposed to heating and air conditioning, the resulting draft will cause an uneven cure and variations in the color of the in the depth and width of GROUT joints will cause the GROUT to cure unevenly with resulting differences in the color. Clean or rake joint to a uniform depth before grouting. Do not GROUT until the setting bed has cured.
5 Typically twenty-four (24) hours for thin-bed method, seventy-two (72) hours for thick-bed method. Scored Tile has an inherent problem. The joint formed by the scores in the center of the tile is not as deep as the joints between the tiles, therefore these joints will cure faster than the perimeter; uneven shades of color will develop. The use of COLORED GROUT is not recommended. Do not attempt to wet cure, fog, spray or allow water to be applied to freshly placed GROUT . If damp curing becomes necessary, wait at least twenty-four (24) hours after the GROUT has been installed. Then saturate the entire installation with even, equal amounts of water. Covering the entire installation with non-staining Kraft paper for at least three (3) days will help assist in the proper hydration and minimize GROUT shading.
6 Never use polyethylene for covering freshly placed Portland cement based COLORGROUT INSTALLATIONSpp Performance, versatility and variety results in a job well done. MIXINGP roper hydration (curing) is also dependent upon the amount of water used in both mixing and in the final clean up. Consistent and uniform color development of the GROUT in an entire installation depends upon the limited and consistent amount of water being used. For mixing, the appropriate amount of water is one that produces a stiff dry mix. Wet , easy flowing, fluid mixes caused the cement and color to bleed and float to the surface with resulting variations in the color of the same amount of water must be used in every batch. Approximately gallon ( liters) of water for 25 lb. Bag of Security Polymer GROUT , 1 gallon ( liters) for 25 lb. Bag of Dry-set GROUT .
7 Use the same person for GROUT mixing throughout the entire installation . The entire contents of GROUT bag should be dry mixed first when using less than a complete bag or whenever two or more dye lots are being used. Use a clean container and potable water. Gradually add powder to the appropriate amount of water. Mix by hand with margin trowel or slow RPM power mixer. Allow GROUT to slake 5-10 minutes, remix, and then use. Do not re-temper with water or powder after this point, if mix becomes unusable, discard and prepare fresh mix. Periodic mixing will keep GROUT mix workable Verify appearance with a test area before installation commences. Using a firm rubber float, fill and compact GROUT joint working diagonally across the joints. Remove excess GROUT from surface initially with rubber float. GROUT small areas.
8 GROUT all areas with the same procedure. All materials and effected areas should remain above 50 F (10 C) or below 100 F (38 C), 24 hours prior and 72 hours after placement. Disgard unmixed material (lumps).PREPARATION Careful observation should be made prior to the commencement of any work. Job site conditions will affect the outcome of every installation . Ensure that all of the controlling factors be considered prior to grouting such as the following: Tiles must be twenty-four (24) hours cured for thin-bed method, seventy-two (72) hours for thick-bed method. Remove any tile spacers, excessive mortar in joint or construction debris. GROUT joints must be uniform in width and depth. Follow manufacturers directions on GROUT ProductSpecial CharacteristicCementious GROUT (CG)2 = ImprovedDry-set CG-2 WAA = High Abrasion ResistanceSecurity Polymer 2-W, AW = Reduced Water AbsorptionReaction Resin Grouts (RG)1 = NormalEGS RGHigher Performance CharacteristicsANSI Material SpecificationSGM Product Meeting SpecificationsANSI installation Chemical Resistant Water Cleanable Tile Setting and Grouting EpoxyEGS - 100% Solids Epoxy Mortar & GROUT System Polymer Modified Cement GroutsSecurity Polymer GROUT HINTSA void excessive use of water during the first cleaning operation.
9 Work as dry as possible. Using a cheesecloth or towel lightly dampened will produce a consistent finish, minimize clean-up cleaning and polishing must be done as dry as possible. If scrubbing is necessary, use only a very, use only a very lightly dampened doodlebug or scotch brite pad. The best method is to sprinkle the dry unmixed GROUT directly from the bag over the entire installation and rub it into the freshly grouted joints. This method both increases the density (hardness) of the joints and absorbs any excess in weep THE PROPER CLEANUP PROCEDURES Even with proper curing, poor cleaning techniques can spoil an otherwise good installation . Allow GROUT joints to become firm, the amount of time will vary for each installation , due in part by the ambient temperature, absorption of substrate and porosity of the tile being grouted.
10 Remove any excess GROUT left on surface of tiles with a rubber float, then after the GROUT has become firm in the joint, smooth the joint with a cheesecloth or lightly dampened towel. Use two buckets of clean potable water, one for rinsing the majority of the GROUT residue from the cleaning towel and one to moisten the towel in clean water. Never use a sponge for grouting. Re-polish the installation 1-2 hours after to remove any weep water and residual GROUT FOR RESTORING SHADED GROUTS Minor variations will occur due to any or all of the above In most cases, the use of Safe Clean Crystals will remove variation in the joint. Note: Allow the GROUT to cure a minimum of twenty-eight (28) days prior. Since most variation in color is topical, lightly sand joint using medium 100-grit sandpaper to remove surface discoloration.