Transcription of Universal WiFi Internet Adapter WNCE2001 - Netgear
1 350 East Plumeria DriveSan Jose, CA 95134 USAS eptember wifi Internet Adapter ( WNCE2001 )User Manual 2 | Universal wifi Internet Adapter WNCE2001 2010 Netgear , Inc. All rights part of this publication may be reproduced, transmitted, transcribed, stored in a retrieval system, or translated into any language in any form or by any means without the written permission of Netgear , SupportThank you for choosing Netgear . To register your product, get the latest product updates, or get support online, visit us at Phone (US & Canada only): 1-888-NETGEARP hone (Other Countries): See Support information , the Netgear logo, ReadyNAS, ProSafe, Smart Wizard, Auto Uplink, X-RAID2, and NeoTV are trademarks or registered trademarks of Netgear , Inc. Microsoft, Windows, Windows NT, and Vista are registered trademarks of Microsoft Corporation. Other brand and product names are registered trademarks or trademarks of their respective holders.
2 Statement of ConditionsTo improve internal design, operational function, and/or reliability, Netgear reserves the right to make changes to the products described in this document without notice. Netgear does not assume any liability that may occur due to the use, or application of, the product(s) or circuit layout(s) described herein. Contents | 3 Table of ContentsChapter 1 Getting StartedHardware Features.. 4 Top Panel with LEDs .. 4 Rear Panel .. 4 Power Connection Options .. 5 Installation .. 6 Preparing to Change Your Internet Adapter Settings .. 6 Using the Smart Wizard to Change the Setup .. 8 Chapter 2 Advanced SettingsDevice Status Screen .. 9 Show Statistics .. 11 DHCP Connection Status .. 12IP Address .. 13 Managing Your Configuration Settings.. 13 Backing Up Settings .. 14 Restoring Settings .. 14 Erasing the Settings .. 14 Upgrading the Firmware .. 15 Advanced Wireless Settings.
3 16 Using Push 'N' Connect (WPS) .. 16 Chapter 3 TroubleshootingUsing the USB Power Cable .. 18 Connecting to .. 18 Connecting to Wireless Networks.. 18 Appendix A Factory Settings and Technical SpecificationsFactory Settings .. 20 Technical Specifications .. 21 Appendix B Related DocumentsAppendix C Notification of Compliance Chapter 1. Getting Started | 411. Getting StartedHardware FeaturesTop Panel with LEDsTop PanelLEDA ctivityPower Solid green: Unit is powered on and operating normally. Solid or blinking amber: Unit is busy. Solid red:yy Power source does not provide enough power. Off: Unit is not powered On: The Ethernet cable is connected. Off: No Ethernet cable is Green: The connection to the router is excellent. Amber: The connection to the router is good. Red: The connection to the router is poor.
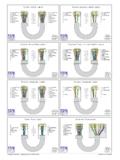
4 Off: No wireless PanelEthernet portPowerResetWPSbuttonbuttonFigure 1. Rear panel Chapter 1. Getting Started | 5 Universal wifi Internet Adapter WNCE2001 Power Connection OptionsDepending on the cable that you received with your product, you might need a plug converter to connect the Internet Adapter to the power Adapter . If it is needed, the plug converter is included in the 2. Plug converterYou can power on your Internet Adapter using either of these methods: Method 1: Connect the Internet Adapter to an electrical outlet with the included power 3. Power Adapter Method 2: Connect the Internet Adapter to a USB port on a nearby computer or device with the USB power cable:Figure 4. USB power cableMake sure that the device where you connect the USB power cable is powered on. Some USB ports on consumer electronic devices cannot provide the power that the Internet Adapter requires.
5 In such cases, the power LED turns solid red and the Internet Adapter may reset itself or turn itself off. If this happens, try connecting the USB cable to a different device, or use the Internet Adapter power Adapter | Chapter 1. Getting Started Universal wifi Internet Adapter WNCE2001 InstallationThe Universal wifi Internet Adapter ( WNCE2001 ) Installation Guide included in the package, explains how to install your Internet Adapter . The steps are summarized in this section. 1. You use a computer to set up the Internet Adapter . During setup, make sure that your computer is not connected to a router. You can restore the connection after the Internet Adapter installation is complete. Disconnect the Ethernet cable from your computer if you use it for a wired network connection. If your computer is wirelessly connected to a network, stop your wireless Connect the Internet Adapter .
6 Use an Ethernet cable (included) to connect the Internet Adapter to your computer. Use either the USB power cable or the power Adapter to provide power to the Internet Adapter . (See Power Connection Options on page 5.)3. Open your Internet browser. It automatically displays the setup page. Follow the instructions on the setup Disconnect the Ethernet and USB cables from your Connect the Internet Adapter to your TV, Box, or Blu-ray your device doesn t have a USB port, then use the power Adapter cable that came with your Internet Adapter and plug it into an electrical Congratulations! Your installation is complete. You can return your computer to its usual set up and begin using the Internet to Change Your Internet Adapter SettingsIf you want to change the settings for the Internet Adapter after installation, then you need to connect it to a computer while you are making changes.
7 1. Connect your Internet Adapter to a computer with an Ethernet Connect either the USB power cable or the power Adapter cable that came in the product package to the rear panel of your Internet Adapter . Chapter 1. Getting Started | 7 Universal wifi Internet Adapter WNCE2001 To supply power to your Internet Adapter , use whichever method is more convenient for you. See Power Connection Options on page 5. Connecting the Internet Adapter to a laptop3. Launch an Internet browser such as Mozilla Firefox or Microsoft Internet Explorer. In the address field, enter Unless you changed the settings on the Firmware Upgrade screen (see Upgrading the Firmware on page 15), the software automatically checks for new firmware at the Netgear website. Then the following screen displays:The Device Status screen shows what the current settings are for the Internet Adapter . A menu in the left pane allows you to view or change the | Chapter 1.
8 Getting Started Universal wifi Internet Adapter WNCE2001 Using the Smart Wizard to Change the SetupThe Smart Wizard helps you set up your Internet Adapter . For information about advanced configuration, see Chapter 2, Advanced Universal wifi Internet Adapter ( WNCE2001 ) Installation Guide included in the package, explains how to install your Internet Adapter . During installation, when you launch your Internet browser, the Smart Wizard automatically displays. After installation, to use the Smart Wizard again: 1. Connect the Internet Adapter to a computer and go to as described in Preparing to Change Your Internet Adapter Settings on page From the menu on the left, select Setup Wizard. The following screen displays:This is the same Smart Wizard that displays during installation as described in the Installation Guide. 3. You can select a network from the list, or select the Manually input my wireless SSID radio button.
9 Click Continue. When you have chosen the network that you want to join, the next wizard screen displays. Follow the onscreen prompts to connect to a wireless network:4. When the Review Settings screen displays, click Finish. If you are done making changes, disconnect your Internet Adapter from your computer, and reconnect it to the device on which you want to use it. Chapter 2. Advanced Settings | 922. Advanced SettingsTo change advanced settings, connect the Internet Adapter to your computer and use your Internet browser to go to as described in Preparing to Change Your Internet Adapter Settings on page 6. Device Status ScreenWhen you connect to , after the automatic firmware check, the Device Status screen displays:This screen shows the current settings and the status of your Internet Adapter . You can click Show Statistics to see device performance statistics such as the number of packets sent and number of packets received for each port.
10 See Show Statistics on page 11. Click DHCP Status to see information about your current DHCP connection. See DHCP Connection Status on page 12. The following table describes the fields in the Device Status 1. Device Status Settings FieldDescriptionDevice StatusHardware VersionThe hardware version of the Internet VersionThe current firmware version of the Internet Adapter . If you upgrade the firmware, this field Language VersionThe language version running on the Internet Adapter . If you upgrade the firmware, this field Connection StatusWireless ConnectionThe status of your wireless connection (connected or disconnected).Link RateThe actual transmission (Tx) and receive (Rx) link rate in the current wireless connectionName (SSID)Your Internet Adapter is set up to connect to this SSID, also called the wireless location of the Internet wireless channel of the TypeThe security setting for the wireless PortMAC AddressThe physical address of the Internet Adapter , as seen from the local area network (LAN).