Transcription of Use & Care Guide - Whirlpool
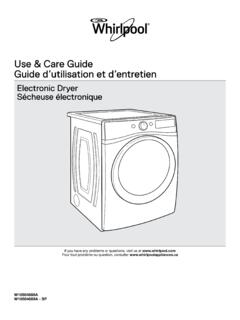
1 W10680139DW10680140D - SPIf you have any problems or questions, visit us at tout probl me ou question, consulter & care Guide Guide d utilisation et d entretienElectronic Dryer S cheuse lectroniquePara obtener acceso al Manual de uso y cuidado en espa ol, o para obtener informaci n adicional acerca de su producto, visite: SafetyTable of Contents DRYER SAFETY ..2 CHECK YOUR VENT SYSTEM FOR GOOD AIR FLOW ..4 CONTROL PANEL AND FEATURES ..5 CYCLE Guide ..6 USING YOUR DRYER ..10 ADDITIONAL FEATURES ..12 DRYER care ..13 TROUBLESHOOTING ..15 WARRANTY ..18 ASSISTANCE OR SERVICE ..Back CoverTable de mati res S CURIT DE LA S CHEUSE ..19V RIFICATION D UNE CIRCULATION D AIR AD QUATE POUR LE SYST ME D VACUATION ..21 TABLEAU DE COMMANDE ET CARACT RISTIQUES ..23 Guide DES PROGRAMMES ..25 UTILISATION DE LA S CHEUSE ..29 CARACT RISTIQUES SUPPL MENTAIRES ..31 ENTRETIEN DE LA S CHEUSE.
2 32D PANNAGE ..34 GARANTIE ..38 ASSISTANCE OU SERVICE ..Couverture arri re34 Check Your Vent System For Good Air FlowGood air flowMaintain good air flow by:n Cleaning your lint screen before each Replace plastic or foil vent material with 4" (102 mm) diameter heavy, rigid vent material. GoodBettern Use the shortest length of vent possible. n Use no more than four 90 elbows in a vent system; each bend and curve reduces air Remove lint and debris from the exhaust Remove lint from the entire length of the vent system at least every 2 years. When cleaning is complete, be sure to follow the Installation Instructions supplied with your dryer for final product Clear away items from the front of the To Dry and How To Dry? for better fabric care and energy answering these questions, you can achieve the most energy savings and enhanced fabric care from your dryer. Using these automatic cycles, the drying air temperature and moisture levels are sensed in the load.
3 This sensing process occurs throughout the entire drying cycle and turns off once the load reaches your selected dryness level. Using the NORMAL dryness level provides the optimal energy savings. If Timed Dry is your answer, the dryer runs for the amount of time you select, which sometimes results in shrinkage, wrinkling, and static due to overdrying. Use Timed Dry for the occasional damp load that needs a little more drying time or when using the drying rack. Tips for getting the best performance from your steam dryer (on some models)n Results may vary depending on fabric. 100% cotton garments with wrinkle-free finish may yield better results than those without. 100% cotton items may require additional touching up after cycles that use Use of fabric softener sheet is not recommended with cycles that use steam . It may cause temporary staining on clothes. n Cycles that use steam are not recommended for items that have been starched.
4 Wash any starched or new garments prior to using a cycle that uses The steam Refresh Cycle is best for smoothing out wrinkles and reducing odors from loads consisting of dry items of wrinkle-free cotton, cotton-polyester blend, common knits, and with heat, dryers require good air flow to efficiently dry laundry. Proper venting will reduce your drying times and improve your energy savings. See Installation venting system attached to the dryer plays a big role in good air flow. Blocked or crushed vents as well as improper venting installation will reduce air flow and dryer calls caused by improper venting are not covered by the warranty and will be paid by the customer, regardless of who installed the dryer. To clean or repair venting, contact a venting optionTouch to activate the EcoBoost option, which allows you to increase your energy savings by using a slightly lower heat level.
5 For automatic cycles, the EcoBoost option will increase drying times by approximately 40 minutes; the LED Display will reflect this EcoBoost option will default on for Normal. For optimal energy, turn on the EcoBoost option. For optimal time, turn off the EcoBoost Panel and FeaturesPOWERT ouch to turn the dryer on and off. Touch to stop/cancel a cycle at any time. WHAT TO DRY/HOW TO DRYF irst select a cycle from the What to Dry (Automatic cycles) and then select the How to Dry to get the best combination cycle available for the type of items you are going to dry. See Cycle Guide for cycle and hold until the LED comes on to start a cycle, or touch once while a cycle is in process to pause DISPLAYWhen you select a cycle, its default settings will light up and the Estimated Time Remaining (for Automatic Cycles) will vary depending on What to Dry and How to Dry selections or actual time remaining for Timed Dry cycles (for Manual Cycles) will be displayed.
6 1234 Not all features and cycles are available on all to select available modifiers for your dryer. Not all cycles and options are available on all using Timed Dry Cycle, you may select a dry temperature based on the type of load you are drying. Use the warmest setting safe for the garments in the load. Follow garment label : Automatic Cycles will give you up to 3 temperatures to adjust and it varies, depending on the What to Dry or How to Dry selections that have been made. DrynessYou may adjust the Dryness on Automatic Cycles (except for the Sanitize cycle), if desired. NOTE: Dryness is for use with Automatic Cycles only. +\- Timed Dry AdjustTouch + or with Timed Dry cycle to increase or decrease the length of the cycle. NOTE: The control panel features a sensitive surface that responds to a light touch of your finger. To ensure your selections are registered, touch the control panel with your finger tip, not your fingernail.
7 When selecting a setting or option, simply touch its MODELSNON- steam MODELS1236564426 OPTIONS Use to select available options for your dryer. Not all cycles and options are available on all Reduce (on some models)Touch to add the Static Reduce option to selected Automatic cycles. The dryer will automatically tumble, pause, and introduce a small amount of moisture into the load to help reduce static. This option adds approximately 8 minutes to the total cycle BeepUse this to turn the signal indicating the end of a drying cycle to low, medium, high, or : You may also turn off the tones that sound when a feature, setting, or option is touched. Touch and hold End Beep for about three seconds to turn sounds to low, medium, high, or BeepTouch to select the Damp Beep signal. You may adjust the signal to low, medium, high, or off. When selected, a series of beeps will sound when the load is damp, but not completely dry.
8 This will allow you to take clothes out of the load that do not need to dry completely. This option is available on some cycles. The Damp Beep signal is selected as a default for the Bulky/Sheets cycle, as a reminder to manually reposition bulky loads midway through the Shield OptionIf you will be unable to remove a load immediately, touch Wrinkle Shield to add up to 150 minutes of periodic tumbling to help reduce wrinkling. You may select the + steam setting (on some models) to add a short steam cycle after 60 minutes to help smooth out : If you open the dryer door prior to the end of the Wrinkle Shield option, the dryer will go into Pause mode. You will need to touch Power to turn off or touch Start/Pause to continue Wrinkle Shield OptionTouch to activate the EcoBoost option, which allows you to increase your energy savings by using a slightly lower heat level.
9 This will increase dry times. EcoBoost option will default on for Mixed Normal. Can be selected for: Mixed Gentle, Casual Normal, Casual Gentle, Delicate Normal, and Delicate Gentle. It will be not available for the other Refresh ( steam models only)This cycle is best for reducing wrinkles and odors from dry items. Cycle time will increase depending on number of Guide - steam ModelHow do you want to dry? How to Dry Cycle SelectionNormalSanitize*GentleSteam RefreshTimed DryRegularAutomatic Sensor Cycle stops when dryness level is High Heat Used to kill of 3 common HeatAutomatic Sensor Cycle stops when dryness level is Cycle to remove wrinkles and amount of dry timeDryer runs for the amount of time do you want to dry? What to Dry Cycle SelectionBaby ClothesMixedRHandkerchiefsaRPajamasRSwea tshirtsRT-ShirtsRBusiness CasualCasualsRCotton DrapesRDress Shirts/PantsRMachine Wash CurtainsRNapkinsRNo-Iron FabricsRTableclothRThe Whirlpool Cabrio dryer has a unique user interface to help you select the best cycle you need for your load.
10 The What to Dry How to Dry layout guides you to the optimal cycle in two easy steps:First determine what items are in the load that you are trying to dry. Use that to Guide your What to Dry selection. Then determine how you want the dryer to dry them by selecting the appropriate How to Dry selection. To get the most energy savings and enhanced fabric care from your dryer, use the Automatic cycles. These cycles measure the drying air temperature and moisture levels to turn the dryer off once the load reaches the selected dryness level. Dryer performance and results may vary with service voltage less than best fabric care , choose the cycle that best fits the load being dried. R - Recommended Cyclea - Alternate CycleBlank Cycle is available but not do you want to dry? How to Dry Cycle SelectionNormalSanitize*GentleSteam RefreshTimed DryRegularAutomatic Sensor Cycle stops when dryness level is High Heat Used to kill of 3 common HeatAutomatic Sensor Cycle stops when dryness level is Cycle to remove wrinkles and amount of dry timeDryer runs for the amount of time do you want to dry?