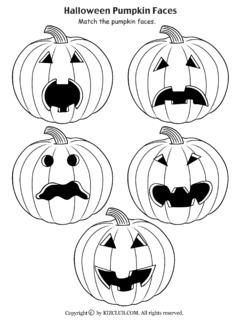
Transcription of Vampirina Pumpkin Stencil
1 VampirinaPumpkinStencil DisneyDemiPumpkinStencil DisneyGregoriaPumpkinStencil DisneyInstructions: Ask an Adult to do the following. Prepare your Pumpkin by:1. Carefully cut* a hole in the top for the lid. Make sure you angle the saw inwards so your lid sits on top of the Pumpkin and doesn t just fall Scoop out the seeds and strings with a Scrape some of the flesh from the inside so your Pumpkin is about an inch thick all the way around (or at least wherever you ll be carving). You can poke a straight pin through it to estimate the Print out the pattern. 5. Trim off excess Tape or use pins to affix the pattern to the If your Pumpkin is quite lumpy, dip the paper in water or vegetable oil (the oil will make printer ink run less, but makes the project quite slippery). 8. Smooth the pattern onto the Pumpkin , affix with pins or masking tape and let the paper dry. 9. You can also make small cuts* in the paper where it bunches so it lies flat on the Pumpkin .
2 Add pins or tape to hold. Smooth the pattern onto the Pumpkin , affix with pins or masking tape and let the paper dry. 10. Carefully poke holes through the pattern with a nail, push pin or Pumpkin poker. Make the holes about 1/8th inch apart (or even closer for more complicated patterns). This step can take quite awhile so be patient. You can just place the Pumpkin in your lap and work away at Remove the paper from the Rub flour or chalk dust all over the part where you poked the holes so you can see them Push a nail through the Pumpkin skin where you want to start carving. 14. Turn and push until it s all the way into the Pumpkin , then remove. 15. Repeat anywhere you re going to need to start carving (eyes, nose, etc). 16. You want to do all the pushing before you start carving because it take some pressure (once you start carving, the Pumpkin becomes weaker and applying pressure may cause it to break).
3 17. Using your nail hole as a starting point, carefully cut* the design with your serrated knife or saw. 18. Start somewhere in the center of the design to keep from putting too much pressure on areas already Use a sawing motion to cut* out your design, using very light your time and allow the sawing to do the work rather than applying pressure and forcing When making curves, just slightly turn the saw. When making sharp corners, remove the saw and re-insert it at an To remove pieces, push them out from the inside. For larger pieces, you may want to cut them into smaller bits and remove them in Once your Pumpkin is all set, use a Pumpkin light (safer than a candle) or a candle in a candleholder designed for pumpkins to light it Light the candle and place it on a piece of tinfoil inside the Pumpkin . Put the lid on. Let it sit a Remove the lid and there should be a smoke mark on Cut* a vent in the lid where the smoke mark : Pumpkin Printer and paper Spoon or Pumpkin scoop Small nail or Pumpkin poker Serrated knife or Pumpkin saw (the more complicated the pattern, the more you re going to want a Pumpkin saw)*Cutting is intended for Decoration Instructions