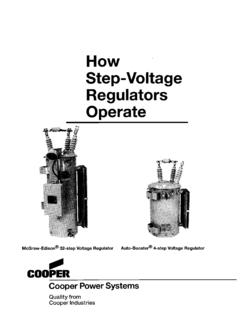
Transcription of VR-32 Regulator and CL-2A Control
1 Refer to page 1-2 of these instructions for the definitions of warning and caution instructions do not claim to cover all details or varia-tions in the equipment, procedure, or process described, nor to provide direction for meeting every possible contingency during installation, opera-tion, or maintenance. When additional information is desired to satisfy a problem not covered sufficiently for the user s purpose, please contact yourCooper Power Systems 1992, reprint of 2/91 1992 Cooper Power Systems, RegulatorsCooper Power System's VR-32 Regulator and CL-2A ControlInstallation, Operation and Maintenance InstructionsParts Replacement Information1 Cooper Power SystemsS225-10-5 Service InformationTABLE OF CONTENTSVR-32 REGULATORS - SECTION 1 Introduction ..1-3 Receiving ..1-3 Installation ..1-3 PRE-INSTALLATlON INSPECTlON.
2 CONNECTIONS .. A Regulator INTO SERVICE .1-5 Removal From Service ..1-6 DETERMINING NEUTRAL POSITlON ..1-6DE-ENERGIZING THE Regulator ..1-6 Maintenance Program ..1-6 PERIODIC INSPECTlONS ..1-6 REMOVAL OF CL-2A FRONT OF CL-2A FRONT 1-7 UNTANKING THE Regulator .. 1-7 RETANKING THE Regulator .. 1-8 Construction .. 1-8 SURGE PROTECTION .. 1-8 POSlTlON lNDlCATOR & 1-8 INTERNAL CONSTRUCTlON &WIRING 1-10CL-2A Regulator Control - SECTION 2 Introduction .. 2-2 Specifications .. 2-2 Pre-Installation Operational Check .. 2-2In-Service Calibration Check .. 2-2 Setting the CL-2A Control for Service .. 2-3 Control Operation Modes .. 2-4CL-2A Control Operation .. 2-4 DEVELOPMENT OF POTENTIALS .. 2-7 LINE DROP 2-9 MOTOR 2-10 Automatic/Manual Operation .. 2-10 Supervisory Control and DataAcquisition (SCADA).
3 2-10 Voltage Reduction .. 2-11 Retrofitting a CL-2A Control .. 2-11VR-32 Regulator TAP CHANGER - SECTION 3 Tap Changer Operation .. 3-1 Motor .. 3-1 Reversing Switch .. 3-1 Drive Mechanisms .. 3-2 Contacts .. 3-3 Operating Sequence .. 3-3 TROUBLE SHOOTING GUIDE - SECTION 4 Complete Regulator In Service .. 4-1 EXTERNAL CHECK .. 4-1 DEFINING THE PROBLEM .. 4-1 JUNCTlON BOX TROUBLE SHOOTlNG .. 4-1 POSlTlON lNDlCATOR 4-2 FRONT PANEL TROUBLE SHOOTING .. 4-3 CIRCUIT BOARD TROUBLE 4-4 CIRCUIT BOARD 4-10 ACCESSORIES - SECTlON 5 .. 5-1 SPARE PARTS - SECTION 6 .. 6-1 APPENDIX - SECTION 7 .. 7-1 Serial Numbers .. 7-1 List of Tables .. 7-1 List of Diagrams .. 7-11-2VR-32 Regulator and CL-2A ControlCAUTION:A CAUTION describes a potentiallyhazerdous situation which, if not avoided, couldresult in minor or moderate injury.
4 !WARNING: A WARNING describes a potentiallyhazardous situation which, if not avoided, couldresult in death or serious injury.!Figure 1-2 Features of the VR-32 Voltage OF ALERTS: PLEASE READ THE FOLLOWING CAREFULLY AND HEED THE WARNINGSCAUTlONS, AND NOTICES :A NOTICE describes a situation, which ifnot avoided could result in damage to the equipmentwith no likelihood of personal CLAMP-TYPE TERMINALS2. THREADED-STUD BUSHING TERMINALS3. BUSHINGS4. POSITlON INDICATOR5. Regulator LIFTING LUGS6. UPPER FILTER PRESS CONNECTION7. ARRESTER MOUNTING BOSSES8. BALL-TYPE OlL SIGHT GAUGE9. Control CABLE10. NAMEPLATES (2)11. GROUND BOSSES (2)12. DRAIN VALVE & OlL SAMPLING DEVICE13. BOLT-DOWN PROVISlONS14. CONTROL15. Control ENCLOSURE16. POLE-TYPE MOUNTING BRACKETS17. ENCLOSURE SUPPORT BAR18. HANDHOLE COVER19.
5 MOV-TYPE SERIES ARRESTER20. JUNCTION BOX21. INTERNAL ASSEMBLY LIFTING LUGS22. PANEL-TYPE RADIATORS (Not Shown)S225-10-51-3VR-32 VOLTAGE REGULATORS - Section 1 INTRODUCTIONC ooper Power System's VR-32 feeder voltage regulatorsare regulating auto-transformers. They regulate line voltagefrom ten-percent raise (boost) to ten-percent lower (buck) in32, approximately 5/8 % Power System's regulators are supplied with thefollowing standard features:Dual-rated 55/65oC relief bushings with clamp-type external series arrester mounting sight filter press valve and oil-sampling 65oC rise insulation system and the sealed-tank con-struction allow for a BONUS CAPACITY 12% above the55oC normal rating without loss of normal insulation life. TheBONUS CAPACITY is stated on the nameplate (such as167/187 kVA for a nominal 167 kVA Regulator ), and is avail-able when the ADD-AMP feature is not in use.
6 All CooperPower System's regulators are manufactured and tested toANSI standard unit construction, which suspends the internalassembly and the Control enclosure form the cover, allowsfor ease of inspection and are three types of step-voltage regulators: source-side series winding, load-side series winding, and seriestransformer. Cooper Power System's Regulators are usuallyequipped with an equalizer winding. The nameplates locat-ed on the tank and Control box clarify the power to shipment, the Regulator is thoroughly tested andinspected at the factory. Immediately upon receipt of theregulator shipment, before unloading, a thorough inspectionshould be made for damage, evidence of rough handling, orshortages. The position indicator, junction box, arrester,radiators, and bushings should all be inspected for evidenceof damage.
7 Should this initial inspection reveal evidenceof rough handling, damage, or shortages, it should benoted on the Bill of Lading and a claim should immedi-ately be made with the carrier. Also, notify Cooper PowerSystems, 2300 Badger Drive, Waukesha, Wisconsin 53188,attention Service an overhead crane is used for unloading, the regula-tor must be lifted by means of a sling and spreader bar uti-lizing the tank-mounted lifting lugs which are shown inFigure 1-2. Do not lift the entire unit with the lifting eyes onthe cover. The lifting eyes are only to be used to untank theinternal assembly which is attached to the :Do not subject tap changer to tempera-tures above 150oF. To do so may cause damage tothe contact panels, resulting in misalignment of the con-tacts.!WARNING: The cover may fracture if the cover-mounted lifting eyes are used to fit the entire unit.
8 Liftthe entire unit only with the tank-mounted lifing lugs.!StoringIf the Regulator is not to be placed into immediate use, it can bestored with minimal precautions. Locate the unit where the possibil-ity of mechanical damage is InspectionBefore connecting the Regulator to the line, make the followinginspection:1 . Check the oil sight gauge. Look for visible signs of oiI Examine the series arrester for damage. If damaged, install anew arrester of the same voltage Inspect the porcelain bushings for damage or leaking seals. Ifthere is a suspicion that moisture has entered the unit, removethe handhole cover and inspect for evidence of moisture such asrust or watertracks in the oil. If moisture has entered the tank, drythe Regulator and filter the oil before putting the unit in oil must test 26 kV minimum in a standard gap (ASTM D877).
9 Be sure to properly replace the handhole If the Regulator has been stored for some time, test the dielectricstrength of the oil according to ASTM The Regulator may be energized at rated line voltage (with caution)and an operational check, page 1-8, can be performed. (Thisprocedure is optional.)6. A Hi-pot test may be done to insure adequate electrical clearanc-es to ground. (This procedure is optional.)1-4 Figure connections Regulator and CL-2A ControlWARNING: Connect the "S" bushing to theSOURCE, the "L" bushing to the LOAD, and the"SL" bushing to NEUTRAL. To do otherwise may causeexcessively high or low voltage on the load side of theregulator or cause severe damage to the Regulator .!NameplateThe VR-32 nameplate (Figure 1-3) prominently displays the55/65 C temperature rise rating of the Regulator .
10 The sealed-tank system along with the 65 C rise winding insulation allowsthe Regulator to be used at this dual rating. This provides anadditional 12 percent capacity without loss of normal nameplate is stamped with pertinent rating informationand includes the schematic diagram of the VR-32 internaldesign. Refer to the nameplate to determine the correct adjust-ment for the required regulated load voltage. A movable peg onthe nameplate indicates the tap and load voltage in ConnectionsA Regulator can regulate a single-phase circuit, or one phase ofa three-phase wye or delta circuit. Two regulators connectedphase-to-phase in open-delta, or three regulators connectedphase-to-phase in closed-delta, can regulate a three-phase,three-wire delta circuit. When connected in wye, three regula-tors can regulate a three-phase, four-wire multi-grounded wyecircuit.