Transcription of WASHER INSTALLATION & CARE INSTRUCTION MANUAL …
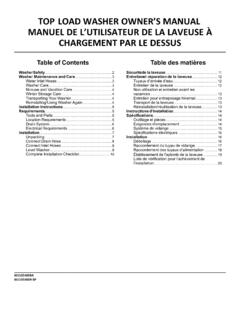
1 WASHER INSTALLATION & CARE INSTRUCTION MANUALMANUEL D INSTRUCTION D INSTALLATION ET D ENTRETIEN DE LA LAVEUSEMANUAL DE INSTRUCCIONES PARA LA INSTALACI N Y EL CUIDADO DE LA LAVADORAW11197727 ATable of ContentsWASHER SAFETY ..2 INSTALLATION REQUIREMENTS ..3 Tools and parts ..3 Location Requirement ..4 Drain System ..4 Electrical Requirements ..5 INSTALLATION INSTRUCTIONS ..5 Connect Drain Hose ..6 Connect Inlet Hoses ..7 Level WASHER ..8 Complete INSTALLATION Checklist ..9 WASHER MAINTENANCE AND CARE ..9 Water Inlet Hoses ..9 WASHER Care ..9 Non-Use And Vacation Care ..10 Cleaning Your Dispenser ..10 Winter Storage Care ..11 Transporting Your WASHER ..11 Reinstalling/Using WASHER Again.
2 11 Table des mati resS CURIT DE LA LAVEUSE ..12 EXIGENCES D INSTALLATION ..13 Outils et pi ces ..13 Exigences d emplacement ..14 Syst me de vidange ..14Sp cifications lectriques ..15 INSTRUCTIONS D INSTALLATION ..15 Raccordement du tuyau de vidange ..16 Raccordement des tuyaux d alimentation ..17 Mise niveau de la laveuse ..18 Liste de v rification pour INSTALLATION termin e ..19 ENTRETIEN ET R PARATION DE LA LAVEUSE ..19 Tuyaux d arriv e d eau ..19 Entretien de la laveuse ..19 Non utilisation et entretien en p riode de vacances ..20 Nettoyage du distributeur ..20 Entretien pour entreposage hivernal ..21 Transport de la laveuse ..21R INSTALLATION /r utilisation de la laveuse.
3 21 ndiceSEGURIDAD DE LA LAVADORA ..22 REQUISITOS DE INSTALACI N ..23 Herramientas y piezas ..23 Requisitos de ubicaci n ..24 Sistema de desagote ..24 Requisitos el ctricos ..25 INSTRUCCIONES DE INSTALACI N ..26 Conecte la manguera de desagote ..27 Conexi n de las mangueras de entrada ..27 Nivelaci n de la lavadora ..28 Lista de control de la instalaci n terminada ..29 MANTENIMIENTO Y CUIDADO DE LA LAVADORA .30 Mangueras de entrada de agua ..30 Cuidado de la lavadora ..30 Cuidado durante per odos sin uso y en las vacaciones ..31 Limpieza del dep sito ..31 Cuidado para el almacenamiento durante el de la lavadora ..31C mo reinstalar o usar la lavadora nuevamente ..322 WASHER SAFETYYou can be killed or seriously injured if you don't immediately You can be killed or seriously injured if you don'tfollow All safety messages will tell you what the potential hazard is, tell you how to reduce the chance of injury, and tell you what canhappen if the instructions are not safety and the safety of others are very have provided many important safety messages in this MANUAL and on your appliance.
4 Always read and obey all safety is the safety alert symbol alerts you to potential hazards that can kill or hurt you and safety messages will follow the safety alert symbol and either the word DANGER or WARNING. These words mean:follow REQUIREMENTST ools and PartsGather required tools and parts before starting needed Pliers that open to 13/4" Level4" BlockRuler or measuring tapeBucketParts supplied: NOTE: All parts supplied for INSTALLATION are in cardboard insert in the top of the hose with clamp, U-form, and cable tieParts needed (Not supplied with WASHER ): Inlet hoses with flat washers4 Location RequirementSelect proper location for your WASHER to improve performance and minimize noise and possible WASHER walk.
5 Install your WASHER in a basement, laundry room, closet, or recessed will need A water heater set to 120 F (49 C). A grounded electrical outlet located within 4 ft. ( m) of power cord on back of WASHER . Hot and cold water faucets located within 3 ft. ( m) of hot and cold water fill valves on WASHER , and water pressure of 20-100 psi (138-690 kPa). A level floor with maximum slope of 1" (25 mm) under entire WASHER . Installing on carpet is not recommended. Floor must support WASHER s total weight (with water and load) of 315 lbs (143 kgs).IMPORTANT: Do not install, store, or operate WASHER where it will be exposed to weather or in temperatures below 32 F (0 C).
6 Water remaining in WASHER after use may cause damage in low temperatures. See the Winter Storage Care section for winterizing INSTALLATION is your area or closet installationDimensions show recommended spacing allowed, except for closet door ventilation openings which are minimum required. This WASHER has been tested for INSTALLATION with spacing of 0" (0 mm) clearance on the sides. Consider allowing more space for ease of INSTALLATION and servicing, and spacing for companion appliances and clearances for walls, doors, and floor moldings. Add spacing of 1" (25 mm) on all sides of WASHER to reduce noise transfer. If a closet door or louvered door is installed, top and bottom air openings in door are SystemDrain system can be installed using a floor drain, wall standpipe, floor standpipe, or laundry tub.
7 Select method you standpipe drain systemMinimum diameter for a standpipe drain: 2" (51 mm). Minimum carry-away capacity: 17 gal. (64 L) per minute. Top of standpipe must be at least 39" (990 mm) high; install no higher than 96" ( m) from bottom of WASHER . If you must install higher than 96" ( m), you will need a sump pump standpipe drain systemSee requirements for floor standpipe drain drain systemFloor drain system requires a Siphon Break Kit (Part Number 285834), 2 Connector Kits (Part Number 285835), and an Extension Drain Hose (Part Number 285863) that may be purchased separately. To order, please see toll-free phone numbers in Assistance or Service section.
8 Minimum siphon break: 28" (710 mm) from bottom of WASHER . (Additional hoses may be needed.)Laundry tub drain systemMinimum capacity: 20 gal. (76 L). Top of laundry tub must be at least 39" (990 mm) above floor; install no higher than 96" ( m) from bottom of : To avoid siphoning, no more than " (114 mm) of drain hose should be inside standpipe or below the top of wash tub. Secure drain hose with cable "(76 mm)3"(76 mm)24 (155 cm2)48 (310 cm2)20 (508 mm)1"(25 mm)1"(25 mm)5"(127 mm)14" max.(356 mm)" "(114 mm)39"(990 mm) "(114 mm)39"(990 mm) "(114 mm)5 Electrical Requirements A 120 V, 60 Hz., AC only, 15 or 20 A, fused electrical supply is required. A time-delay fuse or circuit breaker is recommended.
9 It is recommended that a separate circuit breaker serving only this appliance be provided. This WASHER is equipped with a power supply cord having a 3 prong grounding plug. To minimize possible shock hazard, the cord must be plugged into a mating, 3 prong, grounding-type outlet, grounded in accordance with local codes and ordinances. If a mating outlet is not available, it is the personal responsibility and obligation of the customer to have the properly grounded outlet installed by a qualified electrician. If codes permit and a separate ground wire is used, it is recommended that a qualified electrician determine that the ground path is adequate. Do not ground to a gas pipe.
10 Check with a qualified electrician if you are not sure the WASHER is properly grounded. Do not have a fuse in the neutral or ground INSTRUCTIONSB efore you start: Remove shipping is necessary to remove all shipping materials for proper operation and to avoid excessive noise from "( m)1. Move washerMove WASHER to within 4 ft. ( m) of its final location; it must be in a fully upright : To avoid floor damage, set WASHER onto cardboard before moving it and make sure lid is taped Remove shipping baseTo avoid damaging floor, place cardboard supports from shipping carton on floor behind WASHER . Tip WASHER back and place on cardboard supports. Remove shipping base.