Transcription of Wheels and Tyres - rrtechnical.info
1 Chapter R Wheels and Tyres Contents Sections Rofb Row Silver Silver Spirit Spur Contents and issue record sheet R7 R1 Wheels R2 R2 Tyres - General information R3 R3 Retarnmended tym, tyre pressures, and snow chains R4 R4 Special torque tightening figures R5 R5 Bentley Comicfie/ Eight Mutsanne/ Turbo R Caminental Comiche tH Mulsnne S RI R1 R1 R1 R1 R2 R2 R2 R2 R2 R3 R3 R3 R3 R3 1 7187 -. L, TSD 4700 Issue record sheet The dates quoted below refer to the issue date of individual pages within this chapter. I W I R? 1 A9 I R4 1 RE I II i S~~ I Page No. S I I I l I 5 - 5/89 9/88 6 b 'BY 9768 7 8 9 Section R2 Wheels Introduction This section incorporates the removal and fitting procedure of individual Wheels . If it is necessary to raise the complete car, reference must be made to Chapter A. Rolls-Royce Silver Spirit, Silver Spur, Corniche, and Corniche II cars are fitted with 6JK X 15 heavy gauge pressed steel Wheels .
2 Bentley Eight, Mulsanne, Mulsanne S, and Continental cars are fied with 6% J X 15 aluminium alloy Wheels . Bentley Turbo R cars are Mted with 7% J X 75 aluminium alloy Wheels . The removal and fitting procedure is identical for each type of wheel, noting that on cars fitted with aluminium alloy Wheels extra care must be taken to prevent damaging the surface coating of the Wheels . Refer to figure R2-1 for the car jacking positions. The car jack is stowed behind the trim panel situated atthe front of the luggage compartment (see fig. R2-2). Workshop safety Nwer work beneath the car if ie is only suppomd on a jack. Always ensure that car stands or blo& are used as a safety premutbn. Wheel trims -To remove and fit One-piece wheel trim (see fig. R2-4, insets A and B). To remove a wheel trim proceed as follows using the tommy bar provided in the tool kit.
3 Place the tommy bar in one of the positions indicated, noting the relationship between the removal points and the tyre valve. Then, whilst supporting the wheet trim, press the tommy bar towards the tyre. Do not twist the tommy bar as this could damage the wheel trim. To f~ a wheel trim, position it against the wheel ensuring that the tyre valve is aligned centrally with the hole in the trim. Then, strike the trim firmly with the heel of the free hand until it is seated on the wheel. Two-piece wheel trim (see fig. R24, inset C). The outer wheel trim is secured by eight equally spaced clips situated around its circumference. The inner wheel trim is a clipon fit over three equally spaced protrusions on the road wheel. To remove an outer wheel trim proceed as follows using the tomrny bar provided in the tuol kit. Position the tomrny bar as indiated, then press towards the tyre.
4 Repeat this operation at several points around the circumference of the wheel until the trim is released. Do not twist the tommy bar as this could damage the wheel trim, To remqve an inner wheel trim, position the tommy bar as indicated. Then, whilst supporting the wheel trim, press the tommy bar in the direction indicated by the arrow. To Man inner or outertrim, position it against the wheel then strike it firmly with the heel of the free hand until it is seated on the wheel. Lockable wheel trim (see fig. R2-4, inset D). Each road wheel incorporates a locking wheel trim, the lock being concealed by a protective cover. A small tool for removing the cover and a key for the wheel trim lock are contained in a pocket on the inside of the tool stowage compartment trim flap {see fig. R2-2). fig. R2-1 Car jacking positions 1 Front jacking point using a trolley jack 3 Rear jacking points using the car jack 2 Front jacking points using the car jack 4 Rear jacking point using a trolley jack Note When removing or fitting a wheel trim, extreme care must be taken to prevent damaging the surface coating of the trim and road wheel.}
5 To remove a wheel trim proceed as follows. 1. Insert the removal tool through the holes in the lock cover, then pull the cover from its location. Note that the cover is retained to the wheel trim by a short strap. 2. Insert the key into the lock and turn it anti- clockwise a quarter of a turn. With the key in this position pull the trim from the wheel. To fit a wheel trim proceed as follows. 1. Ensure that the rubber seal is correctly located around the circumference of the wheel trim. Fig. W-2 Luggage compamnent 1 Location of key and wheet trim removal tool 2 Tools stowage area 3 Rubberplug 4 Lowering bolt for spare wheel carrier Fig. R25 Car jack correctly positioned A Spigot on the jack head located in the jacking bracket 2. Locatethe lower edge of the trim into its retaining channel in the wheel. Align the spigot on the rear of the trim with one of the recesses situated between the wheel nuts.
6 Then, with the key in the unlocked position, firmly press the wheet trim into the centre of the wheel. Do not apply pressure to the head of the key. When the trim is fuliy inserted turn the key clockwise to the locked position and remove the key. 3. Press the lack cover into position, then return the key and removal tool to their stowage location. Note The wheel trim locks should be lubricated, in accordance with the recommended service schedules, using BP Keenomax L3 lubricant. Ideally2 ml of lubricant should beinjected into each lock. Alternatively the lubricant may be applied to the key and the key inserted into the lockseveral times. Lubricant should also be lightly applied to the rear of the lock and the tatch. Wheels - To remove 1. Position the car on a level surface and place the gear range selector lever in the park position.
7 2. Remove fuse A6 from fuse panel F2 on the main fuseboard. 3. Apply the parking brake. 4. Remove the wheel trim (see Wheel trims - f o remove and fit). 5. Priorto raising the car, slacken the wheet nuts approximately half a turn. Note Each wheel nut is marked with an arrow indicating the direction of its removal. Nuts on left-hand Wheels have left-hand threads. Nuts on right-hand Wheels have right-hand threads. 6. To raise the front of the car proceed as follows. Chock the rear Wheels . Position a trolley jack underthe front pivot mounting for the lower triangle levers on the sub- frame [see fig. R2-1, item 1 ). Place a piece of soft wood between the jack head and the mounting. Alternatively, raise the car using one of the two front jacking points situated on the car underbody {see fig. R2-1, item 2) utilizing the ear'jack. Release the nuts and remove the wheel.]}
8 7. To raise the rear of the car proceed as follows. Chock the front Wheels . Position a trolley jack under the centre of the final drive casing (see fig. R2-1, item 41. Place a piece of soft wood between the jack head and the final drive casing. Do not jack the car under the final drive crossmein ber. Alternatively, raise the car using one of the two rear jacking points situated on the car underbody {see fig. R2-1, item 3) utilizing the car jack. Release the nuts and remove the wheel. Wheels -To fit Reverse the procedure given for removal noting the following. 1. Ensure that the spherical seatings of the nuts and wheel are not damaged. Fig. W-4 Wheel trim removal ~~~l~ Rlor w TsBg mdd yem Re1ls-R~ Silwr Spl rt hnrlby Eight ~~~m Sh Spur Ro[ls-R- Garnleha I1 Prlar la 7 del war Bendey Mul Wnns Bennev M~mlcema S Rmrinv Gafl~mmte!]}
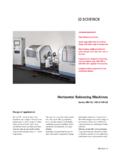
9 Bendew Turaa R TSD 4700 2. Prior to fitting, lightiy grease the spherical seats of the wheel nuts. 3. Fit the wheel and torque tighten the wheel nuts to between 61 Nm and 68 Nm (6 kgf m and 7 kgf m; 45lbfftand 501bfft). Failure to observe the torque figures can damage the spherical seating faces and cause dificulry in removing and fitting the wheel nuts. Wheel and tyre balm Weeis can be balanced using either a vertical or horizontal type of balancing machine. The Dunlop adapter plate AP30 is designed for use in conjunction with the Dunlop balancing machine WBMZO. balancing machines are also obtainable from Hofmann balancing Techniques Limited, Car1 Schenck Fig. R2-5 Horizontal type of balancing machine with Fig. R2-8 Vertical type of balancing machine with adapter for spigotted Wheels adapter for spigutkd Wheels A 117,50rnrnminus0,05mm A f mm minus mm ( in minus in) ( in minus in) B Bore to give mm to 0,076 mm C 25,443 mm ( in) in to in) clearance on spindle C 254 mm (l.
10 O in) (UKI Limited and Leycock Engineering Limited. If the specified balancing equipment is not available, reference should be made to figures R2-5 and R2-6. These illustrations show two types of small adapter collars which convert existing wheel balancing equipment for use on spigotted road Wheels . When fitting the adapter collar, it must be accurately centralized on the adapter plate. f he manufacturer's instructions must be observed when using the balaneing equipment, and the following points noted. l. Before balancing , ensure that the Tyres are inflated to the correct cold inflation pressure (see Section R4). 2. When checking wheel balance on the car, it is essential that, after stopping the car the weight of the car is removed from the Tyres as soon as possible. This prevents temporary 'flats' from forming on the Tyres . No attempt should be made to balance Wheels on which "Hats' have formed, as the static balance may be affected by as much as 720 g cm (10 oz in).