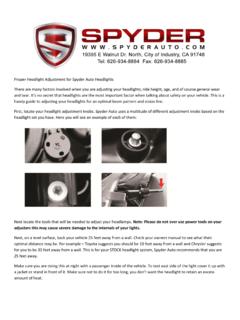
Transcription of Why & How to Aim Headlamps and Auxiliary Lamps
1 12/04/2006 01:48 PMDaniel Stern Lighting Consultancy and SupplyPage 1 of 7 Daniel SternLightingProductsTechRelaysMarkerfla shAimLightsBulbsAutomotive Lighting FAQNHTSA Alert!How To Aim Headlamps and Auxiliary LampsClick here for a printer-friendly PDF version of this Headlamps will work as designed only if they are correctly aimed Headlamps are dangerous, ineffective and illegal. Thefollowing procedures will assure correct aim of your Headlamps formaximum seeing without unlawful and dangerous glare. Be sure to usethe correct procedure for the specific Headlamps and vehicle you areworking optical beamsetter is a device that looks a bit like a TV camera. Itis wheeled in front of each headlamp on your vehicle, adjusted toheight, and the optics within the beamsetter permit highly precisevisual aim checking and adjustment . This is definitely the mostaccurate way to aim Lamps , but beamsetters are not yet as common inNorth America as they are elsewhere in the world. However, more andmore optical beamsetters are placed in service all the time, so checkaround before deciding nobody near you has one.
2 High-end body shopsand auto dealer service departments are good you cannot find someone who has a beamsetter and will use itcorrectly, you aren't necessarily out of luck. Fog Lamps , driving Lamps ,and visually-aimable Headlamps do not require a mechanical aimer orother machine in order to achieve at least passably-correct visual ECE (E-code) Headlamps are visually aimable, and many newer US(DOT) Headlamps can be accurately aimed visually. First, you mustdetermine if your Headlamps can accurately be aimed visually. If youhave ECE (E-code, European-spec) Headlamps , you can aim themvisually. If your US DOT headlamp lenses are marked VOL, VO or VOR,they can be aimed visually. If your US DOT Headlamps are NOTmarked VOL, VO or VOR, they cannot officially be correctly aimedvisually and are intended to be aimed using a mechanical aimingdevice. These mechanical aiming devices are all but extinct, and so youwill likely have to do the best you can using a visual 01:48 PMDaniel Stern Lighting Consultancy and SupplyPage 2 of 7 likely have to do the best you can using a visual prepare for aiming, the car should have at least 1/2 tank of fuel,weight in the trunk equal to the most frequently carried load (this maybe a full trunk, or it may be an empty one, or anything in between),and weight in the driver's seat equivalent to the most frequent of the tires should be checked when cold to make sure they're atthe correct inflation pressure.
3 Jounce each corner of the car firmly(grasp the bumper and push down several times rhythmically) toensure that the suspension is settled into a normal a location that has a vertical wall and enough level ground for thelength of the vehicle plus 25 feet ( m). The wall will be used as anaiming screen. You'll need to make marks on the wall, so if it is a wallyou're not allowed to deface, use tape. Measure a distance of 25 feet( m) straight back from the wall, and mark this position on thefloor or ground. Align front of the vehicle with this floor mark, andthen bring the vehicle straight forward, right up to the wall. Make amark "V" on the wall directly in front of the center of the vehicle. Goodreferences for the center point include such things as hood ornaments,grille badges and license plate , make a mark "C" on the wall directly in front of the axis of eachlamp. The "axis" is often marked with a dot, cross, bulb typedesignation or name brand, but if not, it is directly in front of the is one axis for each lamp, so a vehicle with four lights will havefour axes and a vehicle with two lights will have two, plus any auxiliaryfog and/or driving Lamps that may be , move the vehicle straight back from the wall until theheadlamps are aligned with the floor mark.
4 Walk to the wall and makeadditional marks: Extend the "V" mark with a vertical line downward atleast six inches. Next, connect all of the "C" marks with a horizontalline we'll call "H-H". Then, measure downward from each "C" mark thatrepresents the axis of a lamp and place a mark "B" per the (European E-code) headlampsLamp axis heightDistance to measuredownwardUp to " (80 cm)3" (76 mm)35" to 39" (89-99 cm)4" (102 mm)12/04/2006 01:48 PMDaniel Stern Lighting Consultancy and SupplyPage 3 of 7 " or higher (100 cm) " (114 mm)US DOT Headlamps marked VOLUp to " (80 cm) " (53 mm)35" to 39" (89-99 cm)3" (76 mm) " or higher (100 cm) " (89 mm)US DOT Headlamps marked VOR,and mechanical aim low or high/low beam lampsUp to " (80 cm)N/A, do not measure downward35" to 39" (89-99 cm)2" (50 mm) " or higher (100 cm)3" (76 mm)US DOT Headlamps marked VO,Mechanical-aim high-beam-only Lamps ,and Driving ( Auxiliary high beam) lampsAny mount height (80cm)N/A, do not measure downwardFog lampsUp to 18" (46 cm) " (38 mm) " to 28" (47-71 cm)3" (76 mm) " or higher (72 cm)4" (102 mm)Connect these two newly-measured points with a horizontal linewe'll call "B-B".
5 After you've done all of this, your wall will bemarked like this for a system of two high/low beam Headlamps :Or like this for a system of two low- or low/high beam plus two high-beam Lamps :12/04/2006 01:48 PMDaniel Stern Lighting Consultancy and SupplyPage 4 of 7 The visual aim procedure for Lamps listed above as "N/A, do notmeasure downward" does not require the lower B-B horizontal connect your +C marks with a horizontal draw a vertical line through through the center of each +C the same with the oV point. These lines make it easier to see thereference marks when you are standing 25 feet away, adjusting theaiming screws on the car. You now have an accurate plot on the wallof the height and separation of the Headlamps (but ONLY if your car islevel, the ground is level and the wall is vertical!). Note that the "B-B", "C" and "V" designations are for purposes of clarity in thisdescriptive article. It is not necessary to draw the letters on the wall--just plot the points.
6 Of course, you may use the letters in your aimingprocedure if it will help AIMINGThe low beam pattern of a visually-aimable headlamp has a distincthorizontal cutoff. Below the cutoff is bright light. Above the cutoff isdark. The aim is determined by measuring and adjusting the height ofthis cutoff relative to the reference marks you plotted on the European-spec ECE and US DOT VOL Headlamps , the cutoff is atthe top of the left half of the beam pattern, and it should be lined-upexactly with the B-B US DOT VOR Headlamps , the cutoff is the squared-off top edge ofthe 'hot spot' (brightest region of the beam) on the right side of thebeam pattern, and should be lined-up exactly with the applicablehorizontal line per the table 01:48 PMDaniel Stern Lighting Consultancy and SupplyPage 5 of 7 mechanical-aim Headlamps , you will have to do your best to placethe top edge of the low beam 'hot spot' on the applicable horizontalline per the table AIMINGT hese instructions are applicable only to European ECE low beams,because US DOT VOL and VOR Headlamps cannot be visually aimedhorizontally, and in many cases, cannot be aimed horizontally by anymeans at all, because no provision for horizontal aim adjustment isprovided.
7 [This is because US regulators believe there is no way todefine a visual cue, such as a kink in the cutoff, that would allowaccurate left-to-right placement of a headlamp beam and that cars willnot get in fender-benders that will knock the Headlamps out ofhorizontal alignment. For what it's worth, the Europeans have beensuccessfully aiming their Headlamps vertically AND horizontally since1955. -ed.]European ECE Headlamps have a "kink" or "elbow" at the top of thecenter of the beam pattern, where the cutoff bends upwards. Adjusteach headlamp so that the kink lines up (left-to-right) with the +Cmark for whichever headlamp you're working on. The tolerance here is+/- 2 inches of point (c). Slight leftward aim (-1") increases seeingdistance down the road, but excessive leftward aim increases glare tooncoming is what a correctly aimed set of European ECE or US DOT VOLheadlamps looks like on low beam:And here is what a correctly aimed set of US DOT VOR or mechanical-aim Headlamps looks like on low beam:12/04/2006 01:48 PMDaniel Stern Lighting Consultancy and SupplyPage 6 of 7 adjusting a high/low beam headlamp in the low beam mode, donot attempt to readjust it in high beam mode.
8 All high/low beamheadlamps are meant to be adjusted on the low beam setting only--the high beam adjustment is correct when the low beam adjustment iscorrect. If you are experiencing a problem where setting the lowbeams correctly places the high beams too high, but setting the highbeams correctly places the low beams too low, you are dealing with apoorly-designed Lamps & HIGH-BEAM-ONLY Lamps IN 4-LAMPSYSTEMST hese instructions apply to ECE high beam Headlamps , US DOT highbeam Headlamps marked "VO", and all driving Lamps . These must beadjusted so that the bright, center "hot spot" of the beam is straightahead of the lamp in both the vertical and horizontal planes. Use theintersection of the horizontal and vertical lines at point +C for eachheadlamp as "cross-hair sights" to center the high beam hot spot, likethis:12/04/2006 01:48 PMDaniel Stern Lighting Consultancy and SupplyPage 7 of 7 sure to work on one lamp at a time. It is best to disconnect thepower to the headlamp you are not working on, so light from the otherlamp's beam pattern doesn't mislead your eyes.
9 Also be sure todisconnect or cover the adjacent high/low beam lamp when you areaiming its high-beam-only LAMPSFog Lamps are aimed using a procedure very similar to that used forlow-beam Headlamps . The cutoff extends clear across the top of thebeam pattern. Simply align the fog lamp so that the cutoff at the topof the beam falls on the appropriate B-B line for the lamp mountingheight, as listed in the table Lamps produce a wide, bar-shaped beam of light. Horizontal aim ismuch less critical than it is with Headlamps . The fog Lamps should bepointed straight ahead, not leftward or Stern Lighting (Daniel J. Stern, Proprietor)click here to send emailCopyright 2006 Daniel J. Stern. Latest updates 12/04/06. No part of this text maybe reproduced in any form without express permission of author. Permission toquote is granted for the purposes of communication with the author.


