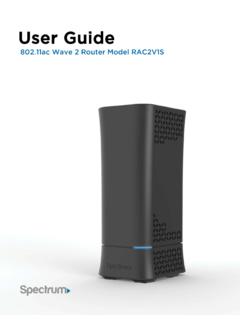
Transcription of Wi-Fi CellSpot Router TM-AC1900 Dual Band Router
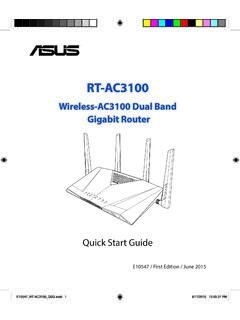
1 Start Guide Wi-Fi CellSpot Router TM-AC1900 dual band Router 3x3 Wireless-AC 1900 gigabit RouterE9490 / First Edition / June 20141 EnglishPackage contents TM-AC1900 AC adapter Network cable (RJ-45) A quick look at your Wi-Fi CellSpot Router1) LAN 1~4 LED6) Power LED11) USB ports2) WAN (Internet) LED7) WPS button12) WAN port3) USB LED4) LED9) Power switch14) LAN ports5) 5 GHz LED10) Power (DC-IN) port15) Reset buttonNOTE: If any of the items is damaged or missing, contact your band Wireless Router WiFi Antenna Start Guide2 EnglishNOTES: USB External HDD/Flash disk: The wireless Router works with most USB HDDs/Flash disks up to 2TB and supports read-write access for FAT16, FAT32, EXT2, EXT3, and NTFS. To safely remove the USB disk, launch the web GUI ( ), then in the Network Map page's upper right corner, click the USB icon and click Eject USB / USB Incorrect removal of the USB disk may cause data corruption.
2 For the list of file system and hard disk partitions that the wireless Router supports, visit For the list of printers that the wireless Router supports, visit your routerIMPORTANT: Before installing the Router , ensure that Internet connec-tion is available45 90 45 TM-AC1900 dual band Wireless Router1. Position your wireless the optimal wireless transmission between the wireless Router and connect-ed wireless devices, ensure that you: Place the Place the Place the To ensure Always wireless Router in a centralized area for a maximum wireless coverage for the network devices. wireless Router away from metal obstructions and away from direct sunlight. wireless Router away from or 20 MHz only Wi-Fi devices, computer peripherals, Bluetooth devices, cordless phones, transformers, heavy-duty motors, lights, microwave ovens, refrigerators, and other industrial equipment to prevent signal interference or loss.
3 The best wireless signal, orient the three detachable antennas as shown in the drawing below. update to the latest Visit the ASUS website at to get the latest Prepare your Unplug the AC adapter from the power outlet and disconnect it from your cable/ADSL Disconnect the network cable from your cable/ADSL Reboot your computer (recommended).ModemOFF!WARNING! Before disconnecting the wires/cables, ensure that your cable/ADSL modem has been turned off for at least 10 seconds. If your modem has a backup battery, remove it as Power OutletLANM odemPowerWAN3. Set up your wireless Insert your wireless Router s AC adapter to the DC-IN port and plug it to a power Using another network cable, connect your modem to your wireless Router s WAN Insert your modem s AC adapter to the DC-IN port and plug it to a power Using the bundled network cable, connect your computer to your wireless Router s LAN port.
4 Ensure that the WAN and LAN LEDs are : You can also set up Wi-Fi CellSpot Router using a mobile device such as a smartphone or tablet PC. To do this, go to Update Network Names(SSIDs) and Passwords using a mobile device for Disable the proxy server, if Set the TCP/IP settings to automatically obtain an IP Disable the dial-up connection, if : For more details on disabling your computer settings, refer to Frequently Asked Questions (FAQs).4. Disable some settings on your set up your Router using QIS (Quick Internet Setup):1. Press the power button at the back of your Router . Ensure that the Power, LAN and WAN LEDs are Launch your web browser such as Internet Explorer, Firefox, Google Chrome, or Safari. Setting up your Router using the Quick Internet Setup WizardNOTE: If QIS does not launch automatically, enter or in the address bar and refresh the browser Assign your Router login name and password and click Next.
5 You will need this login name and password to log into Wi-Fi CellSpot Router to view or change the Router settings. Please take note of your Router login and password for future use. Passwords can not be recovered. If the password is lost, the Router must be factory reset. 7 English4. The wireless Router s Quick Internet Setup (QIS) feature automatically detects if your ISP connection type is Dynamic IP, PPPoE, PPTP, L2TP, and Static IP. Please obtain the necessary information about your Internet connection type from your Internet Service Provider (ISP). If your connection type is Dynamic IP (DHCP), QIS wizard will automatically direct you to the next step. NOTE: If your connection type is Static IP, choose Static IP and click Next. Key in IP address, subnet mask, default gateway and DNS server information provided by your ISP. Click Next to of Router ( TM-AC1900 ) administrator passwordLogin name: Login password: 8 EnglishYour wireless Router comes with the intuitive ASUSWRT web graphical user interface.
6 ASUSWRT allows you to easily configure its various fea-tures through a web browser such as Internet Explorer, Firefox, Safari, or Google the Router via the ASUSWRT web GUIIMPORTANT: For more details on using your Router 's Web GUI, refer to the user manual . Alway check and upgrade firmware to the latest version for better experience. Visit ASUS Networking video channel for tutorial videos on featured : Use the search bar on the bottom of the inter-face to get more informa-tion from ASUS technical support site your Netword Names (SSIDs) and passwords using your mobile device. The set up wizard will automatically recongize your mobile device and display a simplified mobile web page when you visit For moreadvanced options, visit the same URL via a version if you use a smartphone or a tablet PC to launch it. To set up your Router using a mobile device:3.
7 Make sure you are connected to either or CellSpot_5 GHz network4. Open up a web brower on your mobile device and go to .Update Network Names (SSIDs) and Passwords usinga mobile device TM-AC19005. Enter the admin username admin and temporary password password . Please Note: During your first visit you are require to update your Admin password for security purposes. Follow the instructions for changing your admin password and then continue to the Network Names and Password screen. 1. Turn on your Wi-Fi CellSpot change your Network names and SSIDs from yourmobile device :2. Enable Wi-Fi CellSpot On this page you can change one or both of the Network Names (SSIDs) ( or CellSpot_5 GHz) and the passwords. When you are done select Save. Please note: When you change the name of the network that you are currently connected to during the update you will likely be disconnected as the network name has changed.
8 Simply serch for the newly named network via your Wi-Fi settings, selected it and enter the new password associated with Please make a note of your Network Names and passwords. If you forget your password you must do a factory reset on your Router . There is no password name: Login password: 11 EnglishFrequently Asked Questions (FAQs)After following the steps, I still cannot access the wireless Router s web graphics user interface (web GUI) to configure the wireless Router that your PC's proxy settings are disabled and your PC'S IP address is obtained from the DHCP server automatically. for details on disabling the proxy settings, visit the ASUS Support site at For details on using the DHCP server to obtain IP addresses automatically, refer to your Windows or Mac operating system's help feature.
9 The client cannot establish a wireless connection with the of Range: Put the Router closer to the wireless client. Try to change the channel : Use wired connection to connect to the Router . Check the wireless security settings. Press the Reset button at the rear panel for more than five find the Router : Press the Reset button at the rear panel for more than five seconds. Check the setting in the wireless adapter such as SSID and encryption access the Internet via wireless LAN adapter. Move the Router closer to the wireless client. Check whether the wireless adapter is connected to the correct wireless Router . Check whether the wireless channel in use conforms to the channels avail-able in your country/area. Check the encryption Check if the ADSL or Cable connection is correct. Retry using another Ethernet the ADSL LINK light blinks continuously or stays off, Internet access is not possible - the Router is unable to establish a connection with the ADSL network.
10 Ensure that all your cables are all properly connected . Disconnect the power cord from the ADSL or cable modem, wait a few min-utes, then reconnect the cord. If the ADSL light continues to blink or stays OFF, contact your ADSL service can I find more information about the wireless Router ? Online FAQ site: Technical Support site: Customer Hotline: Refer to the Support Hotline in this Start Guide NOTE: Device and screen images simulated. CellSpot is a trademark ofT-Mobile USA, Recycling/Takeback ServicesASUS recycling and takeback programs come from our commitment to the highest standards for protecting our environment. We believe in providing solutions for you to be able to responsibly recycle our products, batteries, other components, as well as the packaging materials. Please go to for the detailed recycling information in different with the REACH (Registration, Evaluation, Authorisation, and Restriction of Chemicals) regulatory framework, we published the chemical substances in our products at ASUS REACH website at Communications Commission StatementThis device complies with Part 15 of the FCC Rules.


