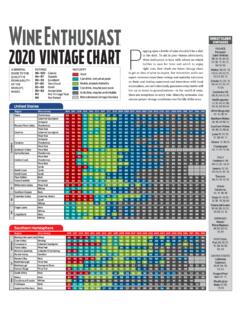
Transcription of Wine Enthusiast Wine Cellars
1 1 Wine Enthusiast Wine Cellars User Manual (Features and Size May Vary) PLEASE READ THIS MANUAL CAREFULLY BEFORE INSTALLING AND OPERATING 2 IMPORTANT SAFEGUARDS When using this appliance, always exercise basic safety precautions, including the following: 1. Read all of the instructions before using this appliance. 2. This appliance is not intended for use by persons (including children) with reduced physical, sensory or mental capabilities, or lack of experience and knowledge, unless they have been given supervision or instruction concerning use of the appliance by a person responsible for their safety.
2 3. Children should be supervised to ensure that they do not play with the appliance. 4. Use this appliance only for its intended purpose as described in this use and care guide. 5. This wine cellar must be properly installed in accordance with the installation instructions before it is used. See grounding instructions in the installation section. 6. Never unplug your wine cellar by pulling on the power cord. Always grasp the plug firmly and pull straight out from the outlet. 7. Unplug your wine cellar before cleaning or before making any repairs. Note: If for any reason this product requires service, we strongly recommend that a certified technician performs the service.
3 8. The SUPPLY CORD cannot be replaced. If the cord is damaged the appliance should be scrapped. 9. This appliance is designed for free standing installation or can be recessed into cabinetry. 10. DANGER: RISK OF CHILD ENTRAPMENT. Before you throw away your old wine cellar, take off the doors. Leave the shelves in place so that children may not easily climb inside. 11. Do not operate your wine cellar in the presence of explosive fumes. 12. Do not store foods in wine cellar as interior temperature may not be cool enough to prevent spoilage or may cause bacteria growth. 3 SAVE THESE INSTRUCTIONS DANGER Risk of child entrapment.
4 Before you throw away your old wine cellar, take off the doors. Leave the shelves in place so that children may not easily climb inside. Thank you for using our Wine Enthusiast product. This easy-to-use manual will guide you in getting the best use of your wine cellar. Please remember to record the model and serial number, they are located inside the cabinet on a label on the bottom right side. Staple your receipt to your manual. You will need the receipt to obtain warranty service. Model number Serial number Date of purchase 4 Table of Contents IMPORTANT SAFEGUARDS .. 2 Wine Cellar Features and Use .. 5 Initial Setup.
5 5 Temperature Adjustment .. 6 Shelving .. 6 Charcoal Filter .. 6 Parts and Features .. 7 Installation as a Built-In Cellar .. 8 Reversing the Door Swing .. 8 Installing the Handle .. 12 Operating Your Wine Cellar .. 13 Control Panel Display .. 14 Before You Start .. 15 Setting the Temperature Control .. 15 Lock or Unlock the Control Panel .. 15 Removing the Rolling Shelf .. 16 Normal Operating Sounds You May Hear .. 17 Technical Data .. 18 Proper Wine Cellar Care and Cleaning .. 19 Troubleshooting .. 20 Limited Warranty .. 22 5 Electrical Requirement Make sure there is a suitable power Outlet (115 volts, 15 amps outlet) with proper grounding to power the wine cellar.
6 Avoid the use of three plug adapters or cutting off the third grounding in order to accommodate a two plug outlet. This is a dangerous practice since it provides no effective grounding for the wine cellar and may result in shock hazard. Install Limitations Do not install your wine cellar in any location not properly insulated or heated garage etc. Your wine cellar was not designed to operate in temperature settings below 60 Fahrenheit. Select a suitable location for the wine cellar on a hard even surface away from direct sunlight or heat source radiators, baseboard heaters, cooking appliances etc. Any floor unevenness should be corrected with the leveling legs located on the front and rear bottom corners of the wine cellar.
7 This appliance is designed for free standing installation or can be recessed into cabinetry. Use of Extension Cords Avoid the use of an extension cord because of potential safety hazards under certain conditions. If it is necessary to use an extension cord, use only a 3-wire extension cord that has a 3-blade grounding plug and a 3-slot outlet that will accept the plug. The marked rating of the extension cord must be equal to or greater than the electrical rating of the appliance. Wine Cellar Features and Use Initial Setup Before connecting the wine cellar to the power source, let it stand upright for approximately 24 hours.
8 This will reduce the possibility of a malfunction in the cooling system from handling during transportation. 6 Once you have plugged the unit into an electrical outlet, let the unit run for at least 30 minutes to acclimate before making any adjustments. Temperature Adjustment When the wine cellar is plugged in for the first time, the LED display will show the factory preset temperature of 50 F. The wine cellar can be set to accommodate your wine storage requirements. To set the temperature, press the up or down arrow button to increase or decrease the temperature setting until the desired temperature is attained.
9 It may take some time to reach the set temperature. The temperature will fluctuate more so when the wine cellar is empty. Shelving (Type and number of shelves will vary per model) Your cabinet was designed to store a maximum number of bottles securely. We recommend that you observe the tips below to optimize loading: Remove tape from shelves once unit is stable and ready for bottle storage. Disperse the bottles evenly to avoid concentrating weight in one place. Bottles must not touch either the back of the cabinet or the step at the bottom. While your wine cellar was designed to hold large format bottles, such as Pinot Noir and Champagne, larger bottles reduce the number of bottles you can fit on a shelf.
10 Make sure that the bottles are not all grouped together either at the top or bottom of the cabinet. Only pull out one shelf at a time, never attempt to pull out more than one. Maximum weight capacity per shelf is 55 lbs. All shelves are full size steel with low profile scalloping to accommodate varying bottle sizes except the shallow bottom wire shelf on models SD and S as well as the 2 bottom shallow wire shelves on model LX. Charcoal Filter Charcoal air filters ensure the natural ventilation and humidity control that encourages wine to mature properly free from damaging odors. We recommend you replace your filter every year, order part number 268 03 98 99 at 7 Replacing the Charcoal Filter Located on the back wall of your wine cellar, Turn counterclockwise to unlock, then remove.