Transcription of www.cstsales
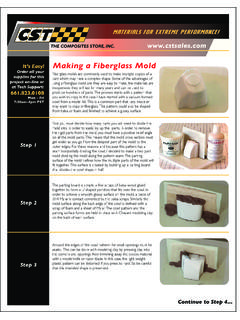
1 It s Easy!Order all yoursupplies for thisproject on-line orat Tech - Fri7:30am-4pm fiberglass PartsStep 1 Step 2 Step 3 Continue to Step mold release to all the surfaces of the new mold . If this is your first mold , it is likely that you will have some small air bubbles in the corners. These must be filled with the mold release wax. Make sure that all surfaces are covered, including the edges and back of the mold with a few coats of wax. When you are making parts the epoxy can go everywhere and this makes it easier to clean up the mold .
2 Use many coats of wax. If you need a number that will work in all cases, apply ten coats of wax. Then apply a liquid mold release to the mold the gel coat layer set up for at least 30 minutes. It should be slightly tacky to cut a piece of glass cloth. For this type of part I recommend CST style G3733 cloth. The cloth should be cut on the bias because of the many tight corners. Also in the corners at the front of the cowl, cut the cloth diagonally into the corner, to allow the fabric to the same West System Epoxy that was used to build the mold for the parts.
3 Mix up a small batch of West System 105/205 for the gel coat layer, and brush it over the mold surface. If you have any small radii corners in the mold , mix a little 406 Colloidal Silica Filler into the remaining epoxy and fill these corners. Glass cloth will not stay in these tight corners and as it pulls away it will pull in air to form a bubble. Wet out the surface of the mold with a coat of epoxy and lay the dry glass into the mold . Start pushing the cloth into the epoxy at the deepest corner of the mold and work out from there to press all the cloth into the epoxy.
4 Use a disposable epoxy brush and push the cloth down with the end of the brush. Dry spots will appear white against the dark mold . Add more epoxy as needed to wet out the cloth completely and eliminate all air fiberglass Parts, 5 Step 4 Step 6 Step 7 Use the edge of the mold as a guide and trim off all the excess glass around the parts. If the blade is sharp and the epoxy is cured to the right stage it, should cut is the best time to join the parts. Clamp the mold halves together then wet the inside surface of the parts along the seam with epoxy.
5 Cut a strip of cloth and apply it to the inside of the seam. For the cowl I cut a bias strip of the same fabric used to mold the parts. In the case of a long narrow part like a fuselage, glass tape is easier to use for joining. Again trim off the excess glass after it has cured for about 45 the cowl cure overnight before you remove it from the mold . Start at one corner and separate the mold halves with a model knife. As soon as the corner starts to open use a thin strip of wood or plastic to open all the edges of the mold .
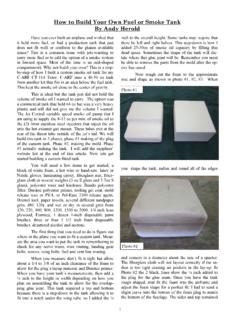
6 Now carefully remove the part from the out the cloth in the mold completely extending about 1/4 inch past all the edges of the mold . Let the epoxy cure for at least 45 minutes this time. When you trim off the excess glass the epoxy must be cured to a solid yet flexible stage. If you get gummy epoxy on the knife blade when you start trimming the edges, wait another 15 minutes and try to Step fiberglass Parts, 8 You now have a fiberglass part that is an exact duplicate of the s Easy!Order all yoursupplies for thisproject on-lineorat Tech - Fri7:30am-4pm Supplies: Safelease 20 mold Release V203 High Temperature Wax V207 Fillers: Colloidal Silica A406 Core Material: Coremat H2000 fiberglass : oz.
7 fiberglass cloth G3733 either 38 or 50 wide (Sometimes referred to as 6 oz. boat & tooling glass)Epoxy: WEST SYSTEM Resin A105 WEST SYSTEM Hardener A205 (If you prefer a longer working time, refer to the WEST SYSTEM Epoxy Selection Chart, as A206 or A209 will also work.) Metering Pumps A300 Epoxy App. Tools: Reusable Mixing Sticks A804-8 Reusable Mixing Pots A5001 Disposable Glue Brushes A803-12 Disposable Gloves A832-4 We also offer two different kits that contain everything EXCEPT the epoxy, which needs to be ordered separately.
8 See options : Deluxe Molding Kit for large or multiple parts M2000 Basic Molding Kit for smaller parts M2010 Click hereto buytheseproducts!Supplies to complete this project: CST-The Composites Store, Inc.