
Installation Instructions - Painless Wiring
Step-By-Step Instruction Vehicle Harness 11-13 Step-By-Step Instruction EFI Connections 14-15 Step-By-Step Instruction/Diagram 3 Carb or Diesel Connections 16-17 Step-By-Step Instruction/Diagram 4 Identify & Setup of Universal TPS 17-18 Identify, Test & Install Universal TPS Optional Accessories 19-21 Speedo Output, Table Select & Push Button
Download Installation Instructions - Painless Wiring

Information
Domain:
Source:
Link to this page:
Documents from same domain

Manual #90567 For Installing: Part #30830
www.painlessperformance.com7 Figure 1 C.S.I. Harness Schematic CONTENTS OF THE PAINLESS C.S.I. WIRE HARNESS KIT Refer to the list below to take inventory of all the parts in the kit. If anything is found to be
For Installing: #10127 Customizable Mopar Chassis …
www.painlessperformance.comWire Harness Installation Instructions For Installing: #10127 Customizable Mopar Chassis Harness 21 Circuit Manual #90542

Wire Harness Installation Instructions - Painless …
www.painlessperformance.comWire Harness Installation Instructions For Installing: #20110 Classic Customizable Chevy II/Nova 1966-67 Harness 21 Circuit Manual #90522

Wire Harness Installation Instructions - Painless …
www.painlessperformance.comWire Harness Installation Instructions For Installing: Part #20120 22 Circuit Ford Mustang (1965- 1966) Manual #90526

Wire Harness Installation Instructions - Painless …
www.painlessperformance.comWire Harness Installation Instructions For Installing: #10101 Classic Customizable Harness-GM Keyed Column-21 Circuit #10102 Classic Customizable Harness-Non GM Keyed Column-21 Circuit

175 o OFF THERMOSTAT INSTALLATION …
www.painlessperformance.com1 2501 Ludelle Street Fort Worth, Texas 76105 . 817-244-6212 phone . 817-244-4024 fax . 800-423-9696 Tech . E-Mail: painless@painlessperformance.com . Web: www.painlessperformance.com

Manual #90560 For Installing: #10111 Direct Fit Jeep YJ ...
www.painlessperformance.com7 Sections are divided into subsections and Paragraphs.Throughout these instructions, the Figure numbers refer to pictures and the Diagram numbers refer to illustrations.Figure numbers correspond to the Section number the are covered in. Always pay special and careful

HIGH AMPERAGE ALTERNATOR KIT (140-190 AMPS)
www.painlessperformance.com2 onto the output post of the alternator. This connection can be seen in Figure 1 on the next page and can be accomplished one of two ways: #1 Install each wire separately • Slide the rubber boot and/or a piece of the smaller sized heat shrink onto the wire found in the kit.

Wire Harness Installation Instructions
www.painlessperformance.com3.0 CONTENTS OF THE PAINLESS WIRE HARNESS KIT Refer to the list below to take inventory of all the parts in the kit. If anything is found to be missing, contact the dealer the kit was purchased

80230 - painlessperformance.com
www.painlessperformance.comPainless Performance Limited Warranty and Return Policy Chassis harnesses and fuel injection harnesses are covered under a lifetime warranty. All other products manufactured and/or sold by Painless Performance
Related documents

INSTALLATION INSTRUCTION AND OWNER’S MANUAL
www.123filter.comwww.123filter.com | (678) 261-7611 sales@ispringfilter.com Page 6 Sample Installation Figure 5 A. Source water from Feed Water Adapter Æ B. Source water to water inlet next to 1st stage C. Waste water from Flow Restrictor Æ D. Waste water to Drain Saddle E. RO water from Automatic Shut-off Valve Æ F. RO water to Storage Tank

MICROWAVE HOOD COMBINATION INSTALLATION …
www.whirlpool.comThese installation instructions cover different models. The appearance of your particular model may differ slightly from the illustration in these installation instructions.
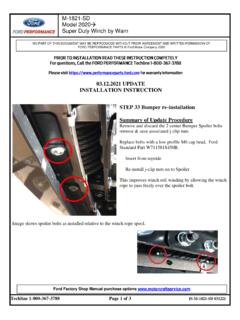
03.12.2021 UPDATE INSTALLATION INSTRUCTION STEP 33 …
performanceparts.ford.comINSTALLATION INSTRUCTION STEP 33 Bumper re-installation Summary of Update Procedure Remove and discard the 2 center Bumper Spoiler bolts remove & save associated j-clip nuts Replace bolts with a low profile M6 cap head, Ford Standard Part W711581S450B. Insert from topside Re-install j-clip nuts on to Spoiler

Installation Instructions
assets.moen.com2. Installation Schematics – Measuring for Ideal Tub/Shower Performance Installation of this product at non-recommended measurements may lead to issues such as water discharge from the showerhead during tub fill mode. 2-1/4" min. (57mm) 3-1/2" max. (89mm) less than 1/4" (6mm) 3/4" (19mm) E Thin Wall Installation For Walls Thinner Than 1/4 inch
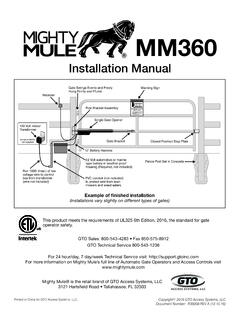
Installation Manual - Mighty Mule
www.mightymule.comii Mighty Mule MM360 Installation Instructions Product Usage The Mighty Mule Gate Operator meets all of the safety requirements of a Class I Residential Vehicular Gate Operator and is intended for use solely with vehicular swing gates in single-family residential applications that meet the Class I category listed

Installation Instruction - Tarkett
media.tarkett.comInstallation Instruction Collection iD Inspiration 55-70 Soft Walnut Dark Brown / Rock Grege Wimereux / 2015. 1. TRANSPORT & STORAGE 2. HANDLING In general the rolls and boxes must be stored in a sheltered clean and dry indoor place and free from any pollution. Before installation, the

INSTALLATION & OPERATING INSTRUCTION MANUAL
www.sweetmfg.comBUCKET ELEVATORS I 451337 06/2013 ® INSTALLATION & OPERATING INSTRUCTION MANUAL Manufactured in the U.S.A. by P.O. Box 1086, 2000 E. Leffel Lane • …

Installation Instructions - Whirlpool
www.whirlpool.cominstallation instructions This product is suitable for use above electric or gas cooking products up to and including 36" (91.4 cm) wide. See the “Installation