
Installation Instructions - Watts
wise to break the sleeve O-ring seals. Using the screwdriver, slowly slide the cover sleeve to the downstream side of the housing. (Figure B) 3. Remove the stainless steel check retainer from the housing. (Figure B) 4. Remove the #1 check module (Figure C) by inserting two flat blade screwdrivers into the slots on either side of the check
Download Installation Instructions - Watts

Information
Domain:
Source:
Link to this page:
Documents from same domain
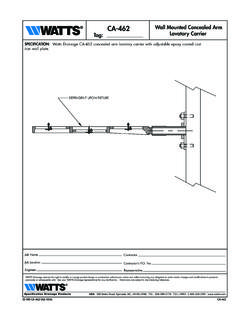
CA-462 Wall Mounted Concealed Arm - Watts Water
media.wattswater.comES-WD-CA-462 USA 0536 CA-462 Tag: CA-462 Wall Mounted Concealed Arm Lavatory Carrier SPECIFICATION: Watts Drainage CA-462 concealed arm lavatory carrier with adjustable epoxy coated cast

TABLE OF CONTENTS - Watts Water
media.wattswater.comFIXTURE CARRIERS CA-461 Wall Mounted Concealed Arm Lavatory w/Back Plate CA-462 Wall Mounted Concealed Arm Lavator CA-481 Wall …

Price List - Watts Water
media.wattswater.comFor the latest Watts pricing information in electronic format, visit our Data Exchange at: • Download product and list price data in .csv, .pdf, .tsv, .xls

Price List - Watts Water Technologies
media.wattswater.com2018 WATTS PRICE LIST Effective July 2, 2018 Price List Water Safety, Flow Control & Backfl ow Prevention Products Watts.com All prices supersede previous issues,

Chemical Resistance of Polypropylene and …
media.wattswater.comBismuth Carbonate 180 Black Liquor 150 Bleach—see Sodium Hypochlorite 12.5 150 Borax, Sodium Borate 180 Boric Acid 180 Brine 180 Bromic Acid NR Bromine Dry NR
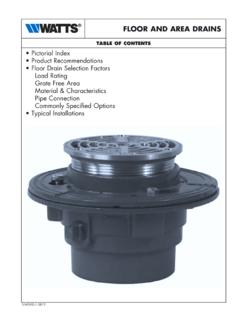
FLOOR AND AREA DRAINS - Watts Water …
media.wattswater.comFLOOR AND AREA DRAINS TABLE OF CONTENTS • Pictorial Index • Product Recommendations • Floor Drain Selection Factors Load Rating Grate Free Area

A!' /0# '-'+% D#/'%+ D 0 Installing Drainage …
media.wattswater.comInstalling Drainage Systems Proper installation of Orion drainage sys-tems is extremely important in assuring that installations perform flawlessly for years.
Typical Branch Line - Watts Water
media.wattswater.comSizing and Placement As shown above, it has been established that the preferred location for the water hammer arrestor is at the end of the branch line between
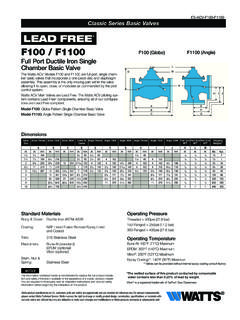
AD F - Welcome Watts Water Technologies
media.wattswater.comES-ACV-F100-F1100 1705 F100 Full Port Ductile Iron Single Chamber Basic Valve SA 0 F 0 Canada 0 00 F 0 0 Watts.ca Latin America 1100100 F 100001 W atts.com 01 AD F * * Contained in Main Valve Repair Kit

Pressure Drop Basics & Valve Sizing - Watts Water
media.wattswater.comWhat Pressure Drop is Not? Pressure drop is pressure loss across the valve created by system demand -NOT by the valve alone.
Related documents
S-Cam Air Brakes - Trailer Parts 4U
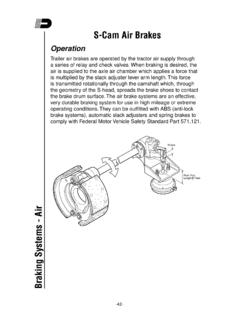
www.trailerparts4u.comdiameter shoe web holes near the camshaft roller end of the shoe. 8. Install retractor spring between shoes. Place top shoe onto spider as in service. Pivot bottom shoe on the camshaft head and twist the shoe 90° under the spindle, properly placing shoe on the spider as in service. 9. Install two (2) keeper springs on the anchor end of the ...

Check for Proper Ring End Gap - Wiseco
www.wiseco.comCheck for Proper Ring End Gap Failure to ensure proper ring end gap may cause the ring tips to butt, and engine damage could occur. 1. A torque plate should be attached to the engine block or cylinder (if applicable), and torqued to specifications. 2. Check the end gap by placing the ring into the cylinder. Cylinder bore should be free of taper.
www.nikkostirling
www.nikkostirling.comaligned with the bore axis, tighten the ring tops. CAUTION: Do not overtighten. Overtightening can cause damage to the scope, affecting performance or even rendering it inoperable. There should be a slight gap between the rings. The gaps should be even on the left and right side of both rings. 3. PRE-ZEROING CAUTION: Be sure gun is not loaded.

Series 2100 Brochure - EBAA
ebaa.com4. Place the O-ring into the groove of the 2100 Gasket Ring. (This step may have been completed at the factory, check Gasket Ring to see if O-ring is already in place.) Place the Gasket Ring on the pipe with the O-ring facing the pipe end and the gasket recess facing the EBAA-Seal (or transition) Gasket and restraint ring…

Quality Procedure QP158 Thread Inspection
www.flexial.com5.3.2.1. Use a CMM, comparator, or vision system to check the root radius on external threads. 5.3.3. Checking the Pitch Diameter of Threads Using GO and NOGO Thread Ring Gages 5.3.3.1. The use of the GO gage must allow for free acceptance. This means minimal force

ERIKS - Technical Manual - O-Ring Gland Design Information
o-ring.infothe O-ring, causing friction and heat. Because rubber is a poor conductor of heat, the O-ring can loose its proper-ties. To minimize or reduce wear, the following could be done; however consult the local ERIKS representative: • confirm amount of squeeze. • use the smallest possible cross section. • select an O-ring with internal lubri-

ENGINEERING ETHICS
ethics.tamu.eduapplied to the inner section of the joint prior to assembly. The gap between the tang and the clevis determines the amount of compression on the O-ring. To minimize the gap and increase the squeeze on the O-ring, shims are inserted between the tang and the outside leg of …

HardiePanel Vertical Siding Product Description
www.jameshardiepros.comend of the wall and snap a straight, level chalk line between the marks as a reference line. That line is for guidance in positioning the top edge of the panels. Check the reference line with a 4 ft. level. 2. Starting on one end and working across the wall, measure and trim the first panel making sure that the edge falls in the middle of a ...

John Deere 310 Tractor Loader Backhoe Service Manual
www.jensales.comCheck start-safety switch operation. Check battery voltage when starting. Check operation of alternator and oil pressure indicator lights. Carburetor mixture Dynamometer Test Transm iss ion-Reverser Check shifting. Check for proper operation without excessive noise. Check differential lock operation. Check brake pedal travel and even position.
SKF Universal Joints/Crucetas/Joints de cardan
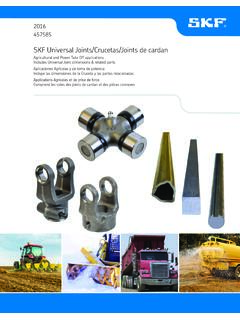
www.skf.comjoints with similar bearing diameter, next check lube itting footnote or the lock-up type. Use the series column to refer to the proper series section of the catalog for related components (yokes, etc.) if necessary. How to use this catalog—Universal joint identiication Round Inside Lock-Up/Snap Ring (ISR)