
Installation Instructions - Whirlpool
9. Reconnect the blower motor wire into the connector. 10. Reattach the two blower screws into the recessed holes in the back of the microwave. 11. Check to make sure the two screws are secured properly in the blower motor screw holes, so that the motor cannot move. 12. Return the damper plate to its original horizontal position. B A
Download Installation Instructions - Whirlpool

Information
Domain:
Source:
Link to this page:
Documents from same domain
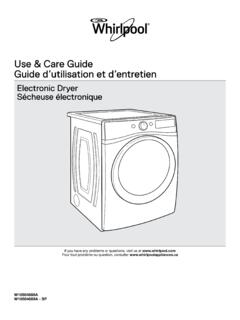
Use & Care Guide - Whirlpool
www.whirlpool.comUse the Automatic Cycles to provide the most energy savings and enhanced fabric care from the dryer. During Automatic Cycles, drying air temperature and moisture level are sensed in the load.

INSTALLATION INSTRUCTIONS AND OWNER’S …
www.whirlpool.comINSTALLATION INSTRUCTIONS AND OWNER’S MANUAL Top Mount Refrigerator Do Not Throw Away — Additional important safety information included. Para las instrucciones en español, visite nuestro sitio de internet.

MICROWAVE HOOD COMBINATION …
www.whirlpool.comMICROWAVE HOOD COMBINATION INSTALLATION INSTRUCTIONS MICROWAVE HOOD COMBINATION SAFETY This product is suitable for use above electric or gas cooking products up to 36" (91.4 cm) wide.

Use & Care Guide - Whirlpool
www.whirlpool.comW10607424B W10607425B - SP If you have any problems or questions, visit us at www.whirlpool.com Pour tout problème ou toute question, consulter www.whirlpool.ca Use & Care Guide

Use & Care Guide - Whirlpool
www.whirlpool.comW10680139D W10680140D - SP If you have any problems or questions, visit us at www.whirlpool.com Pour tout problème ou question, consulter www.whirlpoolappliances.ca Use & Care Guide Guide d’utilisation et d’entretien
DISHWASHER USER INSTRUCTIONS - Whirlpool
www.whirlpool.comTHANK YOU for purchasing this high-quality product. If you should experience a problem not covered in TROUBLESHOOTING, please visit our website at www.whirlpool.com for additional information. If you still need assistance, call us at 1-800-253-1301.
WHIRLPOOL CORPORATION MAJOR APPLIANCE LIMITED …
www.whirlpool.com2/14 WHIRLPOOL CORPORATION MAJOR APPLIANCE LIMITED WARRANTY ATTACH YOUR RECEIPT HERE. PROOF OF PURCHASE IS REQUIRED TO OBTAIN WARRANTY SERVICE. Please have the following information available when you call the
ELECTRIC RANGE USER INSTRUCTIONS - Whirlpool
www.whirlpool.comTHANK YOU for purchasing this high-quality product. If you should experience a problem not covered in TROUBLESHOOTING, please visit our website at www.whirlpool.com for additional information. If you still need assist ance, call us at 1-800-253-1301.

REFRIGERATOR USER INSTRUCTIONS - Whirlpool
www.whirlpool.comYour safety and the safety of others are very important. We have provided many important safety messages in this manual and on your appliance. Always read and obey all safety messages. This is the safety alert symbol. This symbol alerts you to potential hazards that can kill or hurt you and others.

ELECTRIC DRYER OWNER’S MANUAL GUIDE D’UTILISATION …
www.whirlpool.comELECTRIC DRYER OWNER’S MANUAL GUIDE D’UTILISATION DE LA SÉCHEUSE ÉLECTRIQUE Table of Contents Dryer Safety.2 Dryer Safety.2 Dryer Maintenance and Care.5 Cleaning the Dryer Location.5 Cleaning the Dryer Interior.5 Removing Accumulated Lint.5 Cleaning the Lint Screen.5 Changing the Drum Light (on some models).6 Check Your Vent …
Related documents
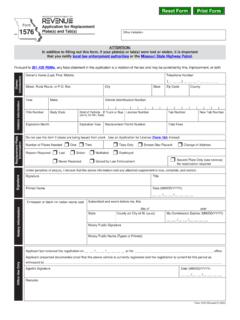
Form 1576 - Application for Replacement Plate(s) and Tab(s)
dor.mo.govWhen application is made for replacement plate(s), you will be issued one Replacement Plate Permit. This permit serves as proof of valid . registration until you receive the replacement plate(s). The permit is to be displayed on the back windshield of your motor vehicle unless it . is an autocycle, motorcycle, motortricycle, or trailer.
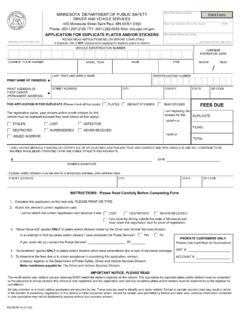
Application for Duplicate Plates and or Stickers
dps.mn.govINSTRUCTIONS: Please Read Carefully Before Completing Form . 1. Complete this application on this side only. PLEASE PRINT OR TYPE. 2. Attach this vehicle's current registration card. PS2067B-16 (01/16) MINNESOTA DEPARTMENT OF PUBLIC SAFETY . DRIVER AND VEHICLE SERVICES. 445 Minnesota Street Saint Paul, MN 55101-5160

TM-T88V Technical Reference Guide
files.support.epson.com4 Warnings WARNING • To avoid risk of electric shock, do not set up this product or handle cables during a thunderstorm • Never insert or disconnect the power plug with wet hands. Doing so may result in severe shock. • Handle the power cable with care. Improper handling may lead to fire or electric shock. ∗Do not modify or attempt to repair the cable.
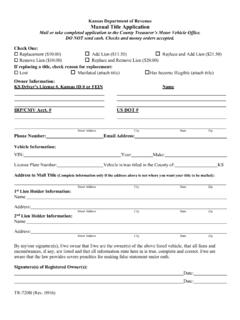
TR-720b - Manual Title Application - Kansas Department of ...
ksrevenue.govMotor Vehicle Office. DO NOT send cash. Checks and money orders accepted. Check One: Replacement ($10.00) Add Lien ($11.50) Replace and Add Lien ($21.50) Remove Lien ($10.00) Replace and Remove Lien ($20.00) If replacing a title, check reason for replacement: Mutilated (attach title) Owner Information: KS Drive. r’s

SNOWPLOWS MECHANIC'S GUIDE - Fisher Engineering
library.fisherplows.comoccur and fuse replacement is necessary, the replacement fuse must be of the same type and amperage rating as the original. Installing a fuse with a higher rating can damage the system and could start a fi re. Fuse Replacement, including fuse ratings and locations, is located in the Maintenance section of the Owner's Manual. PERSONAL SAFETY

Working safely under motor vehicles being repaired INDG434
www.hse.gov.ukA mechanic was replacing a gearbox with a car raised on a hydraulic trolley jack and two wheel-removal jacks. The car slipped from the supports, crushing and killing him. A trainee HGV fitter, working with an experienced mechanic, was fatally crushed when an HGV slipped from a hydraulic jack. Axle stands were available but not used.
Instruction Manual - STIHL USA
www.stihlusa.cominstructions for the saw chain. 7. Only use replacement bars and chains specified by the manu-facturer or the equivalent. 8. Reduced kickback bars and low kickback chains are designed to reduce the risk of kickback injury. Ask your STIHL dealer about these devices. ˘ˇ ˆ 1. Do operate a chainsaw with one hand! Serious injury to the