
JaCK POst - images.thdstatic.com
tapered side of the nut will fit into the smaller diameter post with the shoulder of the nut resting on top of the post (Figure ). a. Note: If the assembly was installed too high, it may prevent the installation of the adjusting nut and screw. If this is the case, go back to …
Download JaCK POst - images.thdstatic.com

Information
Domain:
Source:
Link to this page:
Documents from same domain

Bottom Mount Refrigerator
images.thdstatic.comDimensions are for planning purposes only. For complete details, see Installation Instructions packed with product. Specifications subject to change without notice. Ref. W10635370B 2/15 2¹⁄₂" (6.3 cm) ¹⁄₂" (1.25 cm) To ensure proper ventilation for your refrigerator, allow for a ¹⁄₂" (1.25 cm) space on each side and at the top.
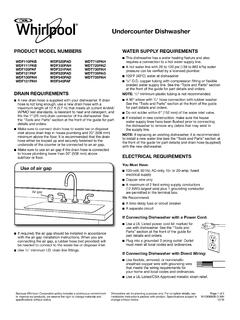
Undercounter Dishwasher
images.thdstatic.comsupply line. NOTE: If replacing an existing dishwasher, it is recommended to install a new water line (see the “Tools and Parts” section at the front of the guide for part details) and drain hose (supplied) with the new dishwasher. ELECTRICAL REQUIREMENTS You Must Have: 120-volt, 60 Hz, AC-only, 15- or 20-amp, fused electrical supply

LAUNDRY ACCESSORY GUIDE
images.thdstatic.comLAUNDRY ACCESSORY GUIDE. This quick reference guide to laundry accessories will help to make sure you have what . you need for a successful installation in just 3 easy steps. ... If your home was built before 1996 and has only a 3-wire connection, purchase a 3-prong dryer power cord. LG recommends a 4-wire connection and a 4-prong dryer power cord.

Unfinished Cabinetry orders deliver to the store within 3 ...
images.thdstatic.comTake in-stock cabinets home today or order through Express Options®. Express Options orders deliver to the store within 3 weeks; see an Associate or the Special Services Desk to place your order.* Most products are available when ordered through Express Options. In-Stock selection varies by store. Product Selection Unfinished

Electric Tankless Water heaters
images.thdstatic.comYour new electric tankless water heater features advanced water flow rate and temperature sensors designed to modulate power to the heating elements to maintain a user-selected output water temperature between 80°F (27°C) and 140°F (60°C) (subject to incoming water temperature and power of the selected heaters). ...
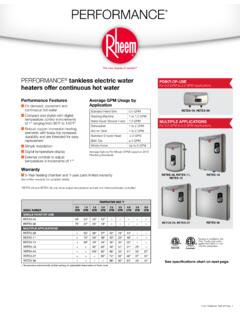
PERFORMANCE tankless electric water heaters offer ...
images.thdstatic.comPERFORMANCE™ tankless electric water heaters RHEEM PART NUMBER GPM RATING OF INSERTS PROVIDED CONNECTION SIZE RTE10001A 1.0, 1.5, 2.0 1/2" NPT RTE10001B 2.0, 3.0, 4.0, 5.0 3/4" NPT Optional Inline Flow Regulator • Enhanced outlet temperature control • Install on the outlet side of the heater • Limit maximum volume to the specified flow

PRODUCT GUIDE Interior & Exterior Doors (JPG013)
images.thdstatic.comInformation for Replacement weatherstrip Product Identification Weatherstrip Location Weatherstrip Type Color Amount Needed 1. Determine amount needed by measuring each piece to be replaced. Note the location on the door of each type of weatherstrip. 2. For each type of weatherstrip, add all measurements, then add an additional 10%. 3.

Heavy Electric Utility Heater Model: EG7500DGP “USER’S ...
images.thdstatic.com“USER’S MANUAL AND OPERATING INSTRUCTIONS” MODEL: Before the first use of this heater, please read this USER’S MANUAL very carefully. This USER’S MANUAL has been designed to instruct you as to the proper manner in which to assemble, maintain, store, and most importantly, how to operate the heater in a safe and efficient manner.
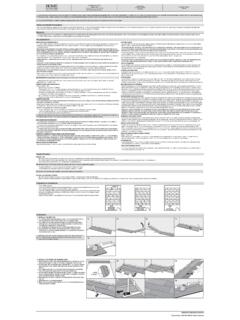
CONCRETE SUBFLOOR REQUIREMENTS NEW …
images.thdstatic.comApproved subfloors include concrete, plywood, OSB, particleboard, chipboard, hardwood (solid, engineered, parquet), tile (ceramic, terrazzo, stone, asbestos, peel and stick), non-cushion sheet vinyl, metal, VCT, DRIcore. Adhered and sound vinyl sheet goods, linoleum and resilient (VCT) tiles: Old vinyl and linoleum tiles or sheet goods normally ...
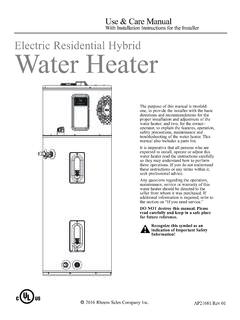
Electric Residential Hybrid Water Heater
images.thdstatic.comElectric Residential Hybrid Water Heater The purpose of this manual is twofold: one, to provide the installer with the basic directions and recommendations for the proper installation and adjustment of the water heater; and two, for the owner– operator, to explain the features, operation, safety precautions, maintenance and
Related documents

Satellite Self-Installation Manual - Shaw Direct
assets.aws.shawdirect.caa lock nut (3). Tighten just enough to hold in place – these will be used for Skew Adjustment. Step 4 – Attach the Satellite Feed Support Arm to the 60 cm Elliptical Dish Attach the Satellite Feed Support Arm to the 60 cm Elliptical Dish using the remaining hex head bolt (1), flat washer (2), plastic spacer (3), and lock nut (4), as shown

Illustrated Parts - Moen Incorporated
assets.moen.comInstallation Tool 118305 Pull-Out Wand (1.5 gpm) 163246 Chrome 163246CSL Classic Stainless 163246SRS Spot Resist Stainless Receptor Kit 163247 Chrome 163247CSL Classic Stainless 163247SRS Spot Resist Stainless Cartridge Nut Note: Must change nut with cartridge 144266 Cartridge, Cartridge Nut & Set Screw 1255 Set Screw (Requires 3/32” hex key ...

Process Specification for Installation of Threaded and ...
mmptdpublic.jsc.nasa.govinstallation of threaded fasteners, including conventional threaded fasteners and collared (Hi-Lok) fasteners. For the purpose of this document, the term “bolt” refers to any standard externally threaded fastener, including both bolts and screws. 2.0 APPLICABILITY This specification shall be applicable whenever the installation of threaded or

Pop-up clicker drain Installation and user Guide
resources.kohler.comInstallatIOn Install the Drain . If present, remove the protective plastic cap from the drain and discard. 2. Remove the nut, washer and gasket from the drain body. 3. Apply a bead of plumbers putty or other sealant around the underside of the flange according to …

RESIDENTIAL SECTIONAL GARAGE DOOR INSTALLATION ...
sweets.construction.comnut.(See Figure 1-1) NOTE: Locate the jamb bracket(405964-XXXX) on the first slot hole from the bottom of track and the other jamb bracket on the third slot from the top. 2. Assemble the flag Bracket to the transition curve using track bolt s and nut s from the inside of the track and through a slot on the flag bracket.(See Figure 1-2) 3.

OWNER’S GUIDE & INSTALLATION INSTRUCTIONS
www.airmar.comnut. Keeping the wire taut throughout, lead the wire in a counterclockwise direction and thread it through one eye in the cap nut, the pull ring/eye in the insert, the second eye in the cap nut, and the second eye in the hull nut. Twist the wire securely to itself. Metal housing —Wrap one end of the safety wire tightly around