
MICROWAVE HOOD COMBINATION INSTALLATION …
MICROWAVE HOOD COMBINATION INSTALLATION INSTRUCTIONS MICROWAVE HOOD COMBINATION SAFETY This product is suitable for use above electric or gas cooking products up to 36" (91.4 cm) wide.
Download MICROWAVE HOOD COMBINATION INSTALLATION …

Information
Domain:
Source:
Link to this page:
Documents from same domain
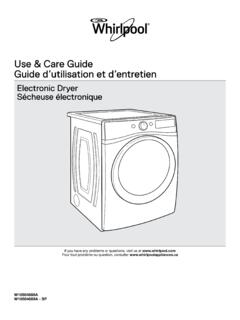
Use & Care Guide - Whirlpool
www.whirlpool.comUse the Automatic Cycles to provide the most energy savings and enhanced fabric care from the dryer. During Automatic Cycles, drying air temperature and moisture level are sensed in the load.

INSTALLATION INSTRUCTIONS AND OWNER’S …
www.whirlpool.comINSTALLATION INSTRUCTIONS AND OWNER’S MANUAL Top Mount Refrigerator Do Not Throw Away — Additional important safety information included. Para las instrucciones en español, visite nuestro sitio de internet.

Use & Care Guide - Whirlpool
www.whirlpool.comW10607424B W10607425B - SP If you have any problems or questions, visit us at www.whirlpool.com Pour tout problème ou toute question, consulter www.whirlpool.ca Use & Care Guide

Use & Care Guide - Whirlpool
www.whirlpool.comW10680139D W10680140D - SP If you have any problems or questions, visit us at www.whirlpool.com Pour tout problème ou question, consulter www.whirlpoolappliances.ca Use & Care Guide Guide d’utilisation et d’entretien
DISHWASHER USER INSTRUCTIONS - Whirlpool
www.whirlpool.comTHANK YOU for purchasing this high-quality product. If you should experience a problem not covered in TROUBLESHOOTING, please visit our website at www.whirlpool.com for additional information. If you still need assistance, call us at 1-800-253-1301.
WHIRLPOOL CORPORATION MAJOR APPLIANCE LIMITED …
www.whirlpool.com2/14 WHIRLPOOL CORPORATION MAJOR APPLIANCE LIMITED WARRANTY ATTACH YOUR RECEIPT HERE. PROOF OF PURCHASE IS REQUIRED TO OBTAIN WARRANTY SERVICE. Please have the following information available when you call the
ELECTRIC RANGE USER INSTRUCTIONS - Whirlpool
www.whirlpool.comTHANK YOU for purchasing this high-quality product. If you should experience a problem not covered in TROUBLESHOOTING, please visit our website at www.whirlpool.com for additional information. If you still need assist ance, call us at 1-800-253-1301.

REFRIGERATOR USER INSTRUCTIONS - Whirlpool
www.whirlpool.comYour safety and the safety of others are very important. We have provided many important safety messages in this manual and on your appliance. Always read and obey all safety messages. This is the safety alert symbol. This symbol alerts you to potential hazards that can kill or hurt you and others.

ELECTRIC DRYER OWNER’S MANUAL GUIDE D’UTILISATION …
www.whirlpool.comELECTRIC DRYER OWNER’S MANUAL GUIDE D’UTILISATION DE LA SÉCHEUSE ÉLECTRIQUE Table of Contents Dryer Safety.2 Dryer Safety.2 Dryer Maintenance and Care.5 Cleaning the Dryer Location.5 Cleaning the Dryer Interior.5 Removing Accumulated Lint.5 Cleaning the Lint Screen.5 Changing the Drum Light (on some models).6 Check Your Vent …

REFRIGERATOR USER INSTRUCTIONS - Whirlpool
www.whirlpool.compreset at the factory. When you fi rst install your refrigerator, make sure that the controls are still set to the “mid-settings.” The factory recommended set points are 37°F (3°C) for the refrigerator and 0°F (-18°C) for the freezer. IMPORTANT: Wait 24 hours before you put food into the refrigerator. If you
Related documents

Installation Instructions - Concrete Sealants Inc.
conseal.comInstallation Instructions CS-55 Black Proper preparation should be followed to ensure adequate coating adhesion to concrete and to optimize product performance.

ABS Module Removal & Installation Instructions Chevy Tahoe
modulemaster.comABS Module Removal & Installation Instructions ModuleMaster Support: 208-892-0764 www.modulemaster.com Chevy Tahoe Removal Procedure 1. Find a level place to raise the vehicle.

INSTALLATION INSTRUCTIONS - Bobrick Washroom
www.bobrick.comulysses INSTALLATION INSTRUCTIONS BOBRICK SHOWER SEAT MODELS B-517 AND 518 Figure 1 Figure 2 Installation to Wall. Secure unit to wall at points indicated by an S, with the two Mounting Flanges located at top and the Baseplate and Guide Bracket below.
WARNINGS & CAUTIONS LUBRICATION & INSTALLATION …
www.hubcityinc.comR-2 CALL: (605) 225-0360 • FAX: (605) 225-0567 The following and information is supplied to you for your protection and to provide you with many years of trouble free and safe operation of …

INSTALLATION INSTRUCTIONS Louver Kit - Magic-Pak
www.magic-pak.com507837-01 Issue 1822 Page 1 of 2 Save these instructions for future reference INSTALLATION INSTRUCTIONS Louver Kit For Use with MGE/MCE/MHP Series Magic-Pak® Units Manufactured By

POWER INLET BOX INSTALLATION INSTRUCTIONS
www.reliancecontrols.comPOWER INLET BOX CAT. NO. PB30 30 Amps., 120/240 VAC INSTALLATION INSTRUCTIONS IMPORTANT: Installation of this power inlet box and related wiring must be done by a …
Installation Instructions - roth-usa.com
www.roth-usa.comEcoDWT plus 3 Installation Instructions For Single and Multiple Tank Applications For Outside Tank Applications Listed under UL Standard SU2258
1 COREtec Plank & Tile Floating Installation Instructions
www.usfloorsllc.comflfififi ˙ ˆ˘˙˝ ˙ ˆ˛˝˙ ˇ˘˘fifi ˇ˛ ˆˆ˘˛ ˆ ˝fifiˆ COREtec™ Plank & Tile Floating Installation Instructions ATTENTION! READ BEFORE INSTALLING! In 2014, COREtec Plus ® transitioned from a drop & lock glueless profile to an angle/tap glueless profile. The installation instructions below