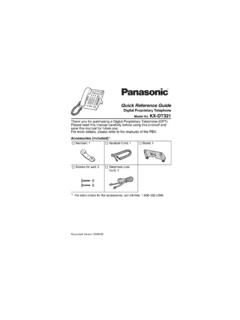
Quick Reference Guide - Panasonic
Quick Reference Guide ... Connect to a PBX. Connect to a digital proprietary telephone — Digital XDP connection ... Pull down the handset hook until it locks to prevent the handset from falling off the handset cradle when the unit is mounted to a wall or set at a high angle. To temporarily place the handset
Download Quick Reference Guide - Panasonic

Information
Domain:
Source:
Link to this page:
Documents from same domain

AG-HPX250 - Panasonic
www.panasonic.com(AG-HPX250P, AG-HPX250EJ, AG-HPX250EN) 1 Shoulder-Type Performance and Functions ... and features three manual rings for precise control. Imaging is optimized by the high-sensitivity, low-noise 1/3-type ... The AG-HPX250 has Waveform and Vectorscope Display functions for the

Panasonic Group Green Procurement Standards
www.panasonic.com©Panasonic Corporation 1999-2016 Panasonic Group Green Procurement Standards (Version6.3) Date of enforcement: November30, 2016 Date of issue: November30, 2016
革新蓄電池の研究開発動向 - panasonic.com
www.panasonic.comPanasonic Technical Journal Vol. 63 No. 1 May 2017 51 革新蓄電池の研究開発動向 Technology Trend of Innovative Batteries リチウムイオン電池(Lithium Ion Battery, LIB)を超える高エネルギー密度な電池が求められている.革新蓄電
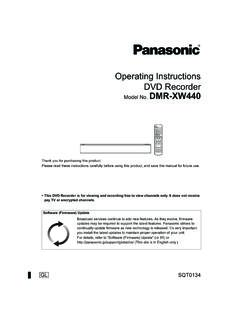
Operating Instructions DVD Recorder - Panasonic
www.panasonic.comSQT0134 3 Batteries • Danger of explosion if battery is incorrectly replaced. Replace only with the type recommended by the manufacturer. • Mishandling of batteries can …

Annual Report 2017 - panasonic.com
www.panasonic.comEV電池の需要拡大に応える 「ギガファクトリー」が稼働 特集1 パナソニックの車載事業 (画像提供:テスラ社) 05 Panasonic Annual Report 2017

特集「電子材料技術」 多層フレキシブル基板用の …
www.panasonic.com46 パナソニック電工技報(Vol. 59 No. 1) FRCC にはCVL 工法で使用されるプリプレグの特性であ るビルドアップ加工での耐薬品性や部品実装時の耐熱性と,

Supply Chain: Management Approach - Panasonic
www.panasonic.comSupply Chain: Management Approach . ... keeping working environments safe, ... Panasonic participated in the OECD Due Diligence Guidance for …
車載向けソフトウェア・プラットフォー …
www.panasonic.comオートモーティブ特集:車載向けソフトウェア・プラットフォームautosarを利用したソフトウェア開発 19 19
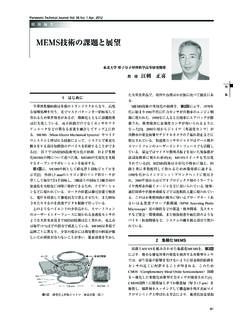
MEMS技術の課題と展望 - panasonic.com
www.panasonic.com43 集特 デバイス特集:mems技術の課題と展望 43 したsoiウェハをal-geの共晶接合でcmosウェハに接合 し,封止と電気的接続を行っている[10].なお,これら
Panasonic Technical Journal Vol. 61 No. 1 May 2015 EV・HEV …
www.panasonic.comPanasonic Technical Journal Vol. 61 No. 1 May 2015 72 72 EV・HEV用大電流メインリレーの小型化技術 Miniaturization Technology of Main Relay for High Current of EV and HEV
Related documents

Quick Setup Guide Start Here
download.brother.comQuick Setup Guide ENG Version 0 ... d Pull the paper strip to remove the protective material as shown in the illustration. e Take out the drum unit and toner cartridge assembly. ... a Connect the AC power cord to the machine and then connect it to an AC power outlet.
MFC-J3530DW / MFC-J6530DW Quick Setup Guide - Brother
download.brother.comPull out the paper support until it locks into place. Slowly push the paper tray completely into the machine. a. Extension telephone b. External telephone Quick Setup Guide MFC-J3530DW / MFC-J6530DW Read the Product Safety Guide first, then read this Quick Setup Guide for the correct installation procedure. 3 Connect the power cord

Dell EMC PowerStore Quick Start Guide
downloads.dell.com2. From the rear of the rack, pull the rail straight back until the latch is locked. 3. To install the front of the rail, press the blue latch release button until the latch rotates open. 4. Pull the rail forward until the pins slide into the holes on the front of the rack, then release the latch to secure the rail in place. 5. Repeat for the ...
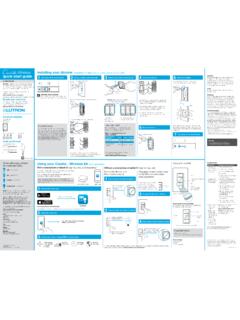
Wireless Installing your switch quick-start guide 1 2 3 4
www.casetawireless.comConnect the switch 5 Mount the switch 6 attach the wallplate 7 Turn power on at circuit breaker 2 remove existing switch from wall Remove the wallplate from switch. 3 remove side sections (if necessary) Remove the switch and pull it away from the wall. * If your light has more than one switch (called a 3-way), please visit www.casetawireless ...
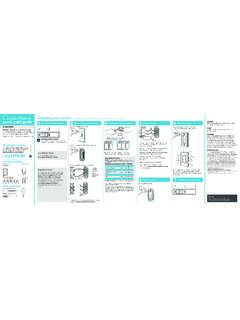
Wireless Installing your dimmer Installation for lights ...
www.casetawireless.comConnect the dimmer 5 Mount the dimmer 6 Attach the wallplate 7 Turn power on at circuit breaker 2 Remove existing switch from wall Remove the wallplate from switch. 3 Remove side sections (if necessary) Remove the switch and pull it away from the wall. * If your switch has more than 3 wires attached, see
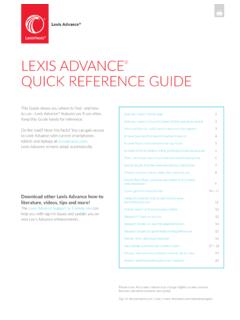
LEXIS ADVANCE QUICK REFERENCE GUIDE - LexisNexis
www.lexisnexis.comClick the icon for quick Folder access. Print, download or email without opening documents. Check the box next to your document title(s) and click a Delivery icon—print, download or email. Or create a printer-friendly page of results. Sort documents. Default is by relevance. Use this pull-down box to re-sort by date and/or jurisdiction, etc.

CS6080 Quick Start Guide - zebra.com
www.zebra.comQuick Start Guide 13 Charging Spare Batteries 1. Connect the cable to the cradle with the USB-C connector. 2. Connect the other end of the cable to a USB port on the host PC, or to a USB power adapter plugged into an AC outlet with the USB-A connector. 3. Remove the spare battery slot cap. 4. Insert the battery into the spare battery