
REFRIGERATOR USER INSTRUCTIONS
See the cleaning instructions in ... A 115 volt, 60 Hz, AC only, 15- or 20-amp fused, grounded electrical supply is required. It is recommended that a separate circuit serving only your refrigerator be provided. Use an outlet that cannot be turned off by a switch. Do not use an
Download REFRIGERATOR USER INSTRUCTIONS

Information
Domain:
Source:
Link to this page:
Documents from same domain
Maytag Dryer Specifications
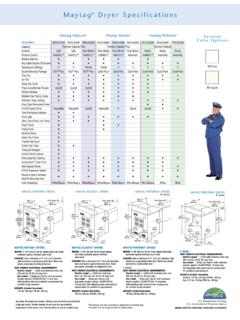
www.maytag.comMaytag® Dryer Specifications MAYTAG PERFORMA® DRYERS MOTOR: 1/4 HP, 120 volt, 60 Hz, single-phase, thermally protected against overload, auto-reset. EXHAUST: Use a minimum of 4" (10.2 cm) diameter rigid aluminum or galvanized steel duct.
Use & Care Guide - Maytag
www.maytag.comCYCLE GUIDE For best fabric care, choose the cycle that best fits the load being washed. Recommended settings for best performance are shown in Bold. Not all settings and options are available on each cycle. NOTE: If you are using fabric softener, be sure to select the Fabric Softener-On option.

Use & Care Guide - Maytag
www.maytag.comUse the Sensor Cycles to provide the most energy savings and enhanced fabric care from the dryer. During Sensor Cycles, drying air temperature and moisture level are sensed in the load.

FRONT LOAD WASHER OWNER'S MANUAL MANUEL DE …
www.maytag.comeach load. Also, this will use just the right amount of detergent required for a particular load/cycle. NOTE: Do not add single-dose laundry packets, Oxi-type boosters, color-safe bleach, or fabric softener crystals to dispensers. They will not dispense correctly. Adding HE detergent to Load & Go™ dispenser (on some models):
ELECTRIC RANGE USER INSTRUCTIONS - Maytag
www.maytag.comproperly installed anti-tip devices. to check if the devices are installed properly, slide range forward, look for anti-tip bracket securely attached to floor or wall, and slide range back so rear range foot is under anti-tip bracket. caution: do not store items of interest to children in
TOP LOAD WASHER OWNER’S MANUAL MANUEL DE …
www.maytag.comSystème de vidange. 15 Spécifications électriques 16 Installation 16 Déballage 16 Raccordement du tuyau de vidange. 17 Raccordement des tuyaux d’alimentation. 18 Établissement de l'aplomb de la laveuse. 19 Liste de vérification pour l’achèvement de l’installation. 20 Table des matières W11354659-SP
WASHER INSTALLATION & CARE INSTRUCTION MANUAL …
www.maytag.comWASHER INSTALLATION & CARE INSTRUCTION MANUAL MANUEL D’INSTRUCTION D’INSTALLATION ET D’ENTRETIEN DE LA LAVEUSE MANUAL DE INSTRUCCIONES PARA LA INSTALACIÓN Y EL CUIDADO DE LA LAVADORA ... INSTRUCCIONES DE INSTALACIÓN ..... 26 Conecte la manguera de desagote ..... 27 Conexión de las mangueras de entrada .....
Warranty - Maytag
www.maytag.comONE YEAR LIMITED WARRANTY WHAT IS COVERED WHAT IS NOT COVERED For one year from the date of purchase, when this major appliance is installed, operated and maintained according to instructions attached to or furnished with the product, Maytag brand of Whirlpool Corporation or Whirlpool Canada LP (hereafter “Maytag”) will pay for Factory

BRAVOS XL TOP-LOADING LAVEUSE HAUTE HIGH EFFICIENCY ...
www.maytag.comDESSUS GUIDE D’UTILISATION ET D’ENTRETIEN Para una version en espanol, visite www.maytag.com Certified to Sanitize Homologué pour assainir. 2 WASHER SAFETY. 3 Load garments in loose heaps evenly around the washplate. Do not load garments directly over the center of the washplate;
TOP LOAD WASHER OWNER’S MANUAL MANUEL DE …
www.maytag.comsponge to wipe away any spills. Use an affresh® Machine Cleaning Wipe or only mild soaps or cleaners when cleaning external washer surfaces. Nonuse and Vacation Care Operate your washer only when you are home. If moving, or not using your washer for a period of time, follow these steps: 1. Unplug or disconnect power to washer. 2.
Related documents
Owner's Manual and Installation Instructions
c.searspartsdirect.comInstallation Instructions 29-Inch Wide ELECTRIC DRYERS IMPORTANT: Read and follow all safety and operating instructions before first use of this product. Sears, Roebuck and Co., Hoffman Estates, IL 60179 U.S.A. www.sears.com 3979089B PRINTED IN U.S.A. 12/01
REFRIGERATOR USER INSTRUCTIONS
d1vofmza27mmhi.cloudfront.netSee the cleaning instructions in ... A 115 volt, 60 Hz., AC only 15- or 20-amp fused, grounded electrical supply is required. It is recommended that a separate circuit serving only your refrigerator be provided. Use an outlet that cannot be turned off by a switch. Do not use an
TRADITIONAL REACH-INS Congratulations!
dc2kentprodcontent.blob.core.windows.netrated voltage (+/-5%). Also, that the amp rating of the circuit is correct and that it is properly grounded. • The cabinet should always be plugged into its own individual dedicated electrical circuit. The use of adapter plugs and extension cords is prohibited. CLEARANCES TOP SIDES BACK T-Series Refrigerator 0" 0" 1" (25.4 mm)

Sniper EFI Fuel Kits P/N 526-5/526-8 (20 ft. hose ... - Holley
documents.holley.comOct 05, 2018 · Sniper EFI Fuel Kits P/N 526-5/526-8 (20 ft. hose) & 526-7 (40 ft. hose) 1.0 FUEL SYSTEM INSTALLATION DANGER! Take precautions to ensure that all fuel components are away from heat sources, such as the engine or exhaust

WALK-IN BATH INSTALLATION INSTRUCTIONS AND …
walkintubs.americanstandard-us.comOWNERS MANUAL 6 INSTALLATION PREPARATION 1. Check the floor area where the tub is to be installed. a. Clean area of any debris or trash. b. Use a …

User Guide - Whirlpool
www.whirlpool.com3 Electrical Requirements Observe all governing codes and ordinances. Required: A 120 volt, 60 Hz, AC only, 15- or 20-amp electrical supply with a fuse or circuit breaker. Recommended: A time-delay fuse or time-delay circuit breaker. A separate circuit serving only this microwave oven. Settings Clock The Clock is a 12-hour (12:00-11:59) clock, with A.M. and P.M. Touch
User Guide - Whirlpool
www.whirlpool.comUser Guide Microwave Hood Combination THANK YOU for purchasing this high-quality product. Register your microwave oven at www.whirlpool.com. For future reference, please make a note of your model and serial number located on the front facing of the microwave oven