Transcription of LDG Z-100Plus 100-Watt Automatic Tuner
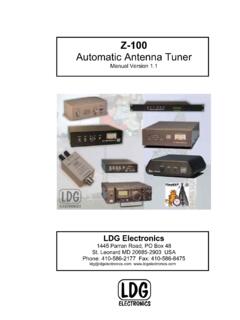
1 Z-100 PLUS OPERATIONS MANUAL MANUAL REV A. LDG Z-100 Plus 100-Watt Automatic Tuner LDG Electronics 1445 Parran Road St. Leonard MD 20685-2903 USA. Phone: 410-586-2177. Fax: 410-586-8475. PAGE 1. Table of Contents Introduction 3. Jumpstart, or Real hams don't read manuals! 3. Specifications 4. An Important Word About Power Levels 4. Important Safety Warning 4. Getting to know your Z-100 Plus 5. Front Panel 5. Rear Panel 6. Installation 6. Operation 7. Basic Tuning Operation 7. Toggle Bypass Mode: 8. Initiate a Memory Tune Cycle: 9. Force a Full Tune Cycle: 10. Status Indicators 11. Application Information 11. Mobile Operation 11. MARS/CAP Coverage 12. Optional Internal Battery Installation 12. Icom Interfacing 12. Yaesu Interfacing 13. Theory of Operation 13.
2 The LDG Z-100 Plus 15. A Word About Tuning Etiquette 16. Care and Maintenance 16. Technical Support 16. Two-Year Transferrable Warranty 16. Out Of Warranty Service 16. Product Feedback 17. PAGE 2. INTRODUCTION. LDG pioneered the Automatic , wide-range switched-L Tuner in 1995. From its laboratories in St. Leonard, Maryland, LDG continues to define the state of the art in this field with innovative Automatic tuners and related products for every amateur need. Congratulations on selecting the Z-100 Plus 100-Watt Automatic Tuner . The Z-100 Plus provides semi- Automatic antenna tuning across the entire HF spectrum plus 6 meters, at power levels up to 125 watts. It will tune dipoles, verticals, Yagis, or virtually any coax-fed antenna. It will match an amazing range of antennas and impedances, far greater than some other tuners you may have considered, including the built-in tuners on many radios.
3 The Z-100 Plus may be optionally powered by internal batteries, eliminating the need for an additional power cable to use the Z-100 Plus. Latching relays are used, so the Z-100 Plus consumes no power when not tuning, so batteries only need to be replaced once per year or less. JUMPSTART, OR REAL HAMS DON'T READ MANUALS! . Ok, but at least read this one section before operating the Z-100 Plus: Turn off power to your radio . Connect the antenna jack on the transceiver to the TX jack on the Z-100 Plus, using a 50 ohm coax cable jumper. Connect the 50 ohm coax antenna feedline to the ANT jack on the Z-100 Plus. Power up the transceiver and select the desired operating frequency. Select AM, FM, CW, or PKT mode, and then key down to transmit a carrier1.
4 Push and hold the TUNE button on the front of the Z-100 Plus for one second (until the Tuning LED comes on), then release. Wait for the tuning cycle to end (red LED goes out, 1 - 6 seconds) and then un-key. Restore the transceiver to the desired operating mode. You're ready to transmit! 1. You can tune while transmitting up to 125 watts if your transceiver has a roll-back circuit to protect it from high SWR. If it does not have a roll-back circuit, limit power when tuning to 10 watts. PAGE 3. SPECIFICATIONS. to 125 watts SSB, CW. 30 watts on PSK and digital modes. Latching relays for ultra-low power operation. 2,000 memories for instantaneous frequency and band changing. 7 to 18 Volts DC, 100 mA. Virtually zero current when not tuning.
5 Optionally internal battery powered, 7-18 VDC. to MHz continuous frequency coverage. Frequency for memory storage is determined by internal frequency counter. Tunes 6 to 800 ohm loads (16 to 150 on 6M), 16 to 3200 ohms with optional 4:1 Balun. For Dipoles, Verticals, Vees, Beams or any Coax Fed Antenna. Power cable included. Optional external Baluns allows tuning of random length, long wire or ladder line fed antennas. Optional interface cables available. See web site for details. Dimensions: L x W x H. Weight: 1 pound. AN IMPORTANT WORD ABOUT POWER LEVELS. The Z-100 Plus is rated at 125 watts maximum power input at most. Many ham transmitters and transceivers, and virtually all amplifiers, output well over 125 watts. Power levels that significantly exceed specifications will definitely damage or destroy your Z-100 Plus.
6 If your Tuner fails during overload, it could also damage your transmitter or transceiver. Be sure to observe the specified power limitations. IMPORTANT SAFETY WARNING. Never install antennas or transmission lines over or near power lines. You can be seriously injured or killed if any part of the antenna, support or transmission line touches a power line. Always follow this antenna safety rule: the distance to the nearest power line should be at least twice the length of the longest antenna, transmission line or support dimension. PAGE 4. GETTING TO KNOW YOUR Z-100 PLUS. Your Z-100 Plus is a quality, precision instrument that will give you many years of outstanding service; take a few minutes to get to know it. Tuning is performed when the Tune button is pushed on the front of the Z-100 Plus and held for one second.
7 The Tuner can be placed in bypass mode by pressing the Tune button momentarily. Although a DC coax jack is supplied on the rear of the Z-100 Plus, the Z-100 Plus may also be powered directly from internal AA or 9V batteries (not supplied); no separate power supply is needed. The Z-100 Plus automatically powers up at the start of a tuning cycle, and goes into an ultra-low-power sleep mode when tuning is complete. The latching relays hold the tuned configuration indefinitely, even when DC power is completely removed. Tuning memories are stored in FLASH memory. The internal batteries should last for approximately one year under normal operating circumstances; longer or shorter depending upon how frequently tuning is performed. The Z-100 Plus has 2,000 frequency memories.
8 When tuning on or near a previously tuned frequency, the Z-100 Plus uses Memory Tune to recall the previous tuning parameters in a fraction of a second. If no memorized settings are available, the Tuner runs a full tuning cycle, storing the parameters for memory recall on subsequent tuning cycles on that frequency. In this manner, the Z-100 Plus learns as it is used, adapting to the bands and frequencies as it goes. Front Panel On the front panel there is one pushbutton and two LED indicator lights. Tune Button: Initiates either a memory tune or a full tune, and also toggles the Tuner between active and bypass modes. SWR LED: Lights steady green at the end of a tuning cycle to indicate a good match has been found. Tuning LED: Lights during tuning operation will also blink error codes if a good tuning match is not found.
9 PAGE 5. Rear Panel The rear panel of the Z-100 Plus features five connectors. Antenna connector: Connect the 50-ohm coax antenna feedline to this standard SO-239. connector. GND connector (wing nut): Connect to antenna system ground. Transmitter connector: Connect a 50-ohm coax jumper cable from this standard SO-239. connector to the ANT jack on the back of the transceiver. Power jack: DC coaxial jack. Connect to 7 to 18 VDC, center positive. radio Interface jack: Connects via a control cable to a compatible transceiver. PAGE 6. INSTALLATION. The Z-100 Plus Tuner is designed for indoor operation only; it is not water resistant. If you use it outdoors (Field Day, for example), you must protect it from the rain. The Z-100 Plus is designed for use with coax-fed antennas.
10 If use with longwires or ladder-line-fed antennas is desired, an external balun is required. The LDG RBA-4:1 or RBA-1:1 is ideal, depending on the antenna and transmission line used. Always turn your radio off before plugging or unplugging anything. The radio may be damaged if cables are connected or disconnected while the power is on. Connect the HF antenna jack on the transceiver to the Transmitter jack on the back of the Z- 100 Plus, using a 50 ohm coax cable rated 125 watts or greater. The Z-100 Plus can interface directly with several popular transceivers. For Icom radios, it will enable their Tune button to start a tuning cycle and provide power to the Tuner . For Icom radios that are AH-3 or AH-4 compatible, connect the white Molex connector of the optional IC-PAC or IC-PAC-6 Interface cable into the radio 's Tuner port.