Transcription of Pacific Antenna Easy Audio Bandpass Filter Kit - …
1 Pacific Antenna easy Audio Bandpass Filter KitDescription and SpecificationsThe Audio Frequency band pass Filter kit from provides A basic Audio Filter kit .Incorporates a transistor preamp, op-amp based Filter and an LM386 Audio amplifier to drive headphones or speaker. Has a peak in Audio response that is tunable from approximately 300Hz to 2 Khz Has a bandwidth of approximately 500Hz. Designed to provide improved Audio filtering and amplification to CW reception or other devices that may not have sufficiently narrow bandwidth. The kit may be powered from ANTENNAQRP 1 ABPF20170527 Tools Needed Temperature Controlled Soldering Station with small tip or 15-35 watt soldering iron with small tip. Solder 60/40 or 63/37 Tin-Lead Small Diagonal Cutters Small Needle Nose Pliers Pencil, Pen, and/or Highlighter BRIGHT work lightOptional Magnifying headpiece or lighted magnifying glass. Multi-meter Solder Sucker or Solder Wick Small multi-blade Screw Driver Knife or Wire Stripper Small Ruler Cookie Sheet to build in and keep parts from jumping onto the Techniques There is no need to print out the whole assembly manual unless you want a copy.
2 Print the Parts List and Schematic (last two pages) then view the rest of the manual on a computer, laptop, or tablet. The Parts List has columns for inventory and construction. Please take time to inventory the parts before starting. Report any shortages to (In many cases itmay be faster and cheaper to pull a replacement from your parts supply, but please let us know if we missed something.) There is no need to print out the whole assembly manual unless you want a copy. Print the Pre-sorting the resistors and capacitors can speed up the assembly and reduce mistakes. You can insert several parts at a time onto the board. When you insert a part bend the leads over slightly to hold the part in place, then solder all at the same time. Clip the leads flush. Most parts should be mounted as close to the board as possible. Transistors should be mounted about 1/8 above the board. Solder one lead on ICs or IC sockets and then check to make sure the component is flush before soldering the remaining leads.
3 Use a Temperature Controlled Soldering Station with small tip or 15-35 watt soldering iron with small tip. Conical or very small screw driver tips are best. DO NOT use a large soldering iron or soldering gun. If you are a beginner, new to soldering, there are a number of resources on the web to help you get on the right track soldering like a pro. Google Soldering Techniques. Here is one good example: 2 ABPF20170527 Parts Identification:Note: This is a general guide. The parts supplied in the kit may vary slightly in appearance from those shown in this photo and not all parts included in the kit are shown. Linear Potentiometer R1 Audio Potentiometer R23 ABPF20170527 Inventory and Parts List The first column is for inventory of parts and the second is to track as they are installed4 ABPF20170527 InventoryInstalledPartValue IdentificationDescriptionR1410 Brn-blk-blk-gold10 Ohm 1/4W resistorR5100 Brn-blk-brn-gold100 Ohm 1/4W resistorR17330 Org-org-brn-gold330 Ohm 1/4W resistorR9430 Yel-org-brn-gold430 Ohm 1/4W resistorR8470 Yel-vio-brn-gold470 Ohm 1/4W Ohm 1/4W resistorR610 KBrn-blk-org-gold10K Ohm 1/4W resistorR1010 KBrn-blk-org-gold10K Ohm 1/4W resistorR415 KBrn-grn-org-gold15K Ohm 1`/4W resistorR3100 KBrn-blk-yel-gold100K Ohm 1/4W resistorR11100 KBrn-blk-yel-gold100K Ohm 1/4W resistorR13220 KRed-red-yel-gold22OK Ohm 1/4W resistor*R12*Not Used*R15*Not Film CapacitorC110uF10uF electrolyticRound can electrolytic capacitorC610uF10uF electrolyticRound can electrolytic capacitorC810uF10uF electrolyticRound can electrolytic
4 CapacitorC1010uF10uF electrolyticRound can electrolytic capacitorC1310uF10uF electrolyticRound can electrolytic capacitorC247uF47uF electrolyticRound can electrolytic capacitorC15100uf100uF electrolyticRound can electrolytic capacitorC16100uf100uF electrolyticRound can electrolytic capacitor*C5*Not Used*C11*Not UsedQ12N50882N5088 Plastic, TO92 TransistorSocket8 pin 8 Pin IC SocketBlack plastic socket for ICsSocket8 pin 8 Pin IC SocketBlack plastic socket for ICsIC1LM386LM3868 Pin ICIC2LF356LF356N8 Pin ICR110K linear potB10K9mm square rotary potentiometerR210K Audio potA10K9mm square rotary potentiometerKnobSmall Knobblack knobTuning knobKnobSmall Knobblack knobVolume knobConnector9V snap9V battery connector9V battery snap with Audio Audio jackWire3ftHookup wire3 Colors 1 ft eachPCBB oardCircuit BoardAF BPF PCB Rev A1 or laterInserting the PartsResistorsSort the resistors by value insert them smallest value first, largest value last. There are 3 - 10K resistors and one of each of the others.
5 Be sure to check the color code for each resistor as you install. [Measuring with an Ohm meter is a good idea.] R1410brn-blk-blk-gold R5100brn-blk-brn-gold R17330org-org-brn-gold R9430yel-org-brn-gold R8470yel-vio-brn-gold R610 Kbrn-blk-org-gold R1010 Kbrn-blk-org-gold R415 Kbrn-grn-org-gold R11100 Kbrn-blk-yel-gold R3100 Kbrn-blk-yel-gold R13220 Kred-red-yel-gold5 ABPF20170527 CapacitorsNext insert the molded capacitors. There are 3 - , 2 - , and 1 - The and capacitorslook very similar, double check the markings. insert the electrolytic capacitors. These capacitors are polarized. The negative lead is marked with a black bar on the side of the capacitor. C110uF10uF C610uF10uF C810uF10uF C1010uF10uF C1310uF10uF C247uF47uF C15100uF100uF C16100uF100uF6 ABPF20170527 Remaining PartsNow install Q1 the 2N5088 transistor. Follow the layout orientation on the board. The flat side of the transistor should match the flat side of the diagram. Q12N5088 Next install the two IC sockets and the ICs.
6 Make sure the orientation notch on the IC matches the orientation notch on the circuit board. IC1LM386 IC2LF356 The last 2 parts to install are the two potentiometers. The A10K and B10K identification marks are on the back of the pots and are a bit difficult to read. Use lots of light. Be sure that the B10K pot goes in the spot for R1 and the A10K goes in the location for R2 on the circuit board. R110K Linear Pot (B)B10K R210K Audio Pot (A)A10 KHooking Up the Audio Frequency band pass FilterThe ABPF requires 8 - 12V DC. The power may be supplied from a companion kit, a small power supply, or a 9V battery using the battery clip that is included in the kit. If using an AC operated supply, it should be well regulated and filtered to prevent hum or other noise being added to the Audio . An inline fuse of 1A or less is recommended when an AC power supply or 12V battery is to the many possible configurations, Audio Input and output connections are also left up to the builder.
7 The AFBPF may be wired directly into a receiver or speaker cabinet. Alternatively, the included jacks installed and plugs may be used for input and output connections. The kit is capable of directly driving a small the kit is first powered after assembly, it is recommended to use a battery or conenct an inline fuse or a power supply with the current limited to approximately 100-200mA to prevent damage if there are shorts. If you notice large power draw, stop and go back and inspect the board for any shorts or components installed incorrectly. When the kit is first powered, you should hear static in the speaker or headphones that varies as the volume control is turned. If not, recheck the board for shorts and component errors. 7 ABPF20170527If you have passed this step, you can connect an input Audio signal from a receiver or other source of CW signals and you should hear the signal through the output. Moving the tuning knob will place the peak response on the chosen signal.
8 PackagingPackaging is left up to the builder. The AFBPF can be built into another kit, or radio cabinet, installed in a speaker cabinet, or installed into a on the left side of the board is the tuning adjustment, tune to the desired listening frequency by peaking the audible sound on the chosen signal. This will have the affect of amplifying the desired signal while attenuating signals that differ in located on the right side of the board is the volume adjustment. Adjust for a comfortable listening the signals sound distorted, this is likely due to too much Audio signal on the input. Reduce the input Audio level from the source until the signals sound is a simple kit and if assembled correctly, it should work without any problems but problems do occasionally the kit fails to work, there are a few things to check. Verify power supply voltage is at least 8V at the power input. Recheck component values, locations and orientations to be sure everything is installed correctly.
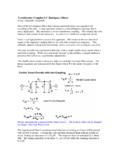
9 Inspect the board for any missed solder joints, joints that may have not been heated sufficiently or for shorts between adjacent component pads. Reheat any suspect solder connections. Check input and output connectors for correct these tests do not resolve the problem, contact us at: for further Layout9 ABPF20170527 Schematic Diagram10 ABPF20170527