Transcription of FREE PROJECT SHEET - Aguila Blanca
1 {FEATURING UTOPIA COLLECTION} free PROJECT SHEETDESIGNED BY :FINISHED SIzE: 42" X 42" download the instructions for this pattern visitREVERIE CITY WINTERFANTASY CITY FERVORUT-14500 Dreamlandia IlluminatedUT-24500 Dreamlandia IrradiatedUT-14501 Atomic Influx PerseUT-24501 Atomic Influx AlloyUT-14502 Specks of RambutanUT-24502 Specks of CarambolaUT-14503 Megalopolitan DimUT-24503 Megalopolitan GlimUT-14506 Lucid Hills AmberUT-14507 Paradise Dwellers VividUT-14508 Urban Sprawl MagentaUT-14509 Aglow Sapling MangoUT-24506 Lucid Hills JadeUT-24507 Paradise Dwellers NeonUT-24508 Urban Sprawl GrassUT-24509 Aglow Sapling SloeUT-14504 Orni BioluminescenceUT-24504 Orni IncandescenceUT-14505 Chatter Pods CitricaUT-24505 Chatter Pods Menta 2014 Courtesy of Art Gallery Quilts LLC. All Rights N 29th Ave. Hollywood, FL 33020 PH: FX: DESIGNED BY UT-24502UT-24509UT-24507UT-24204UT-14501 UT-14505UT-14503UT-24506NE-104 Backing1/8 1/2 QUANTITYbyFRANCES NEWCOMBEFABRIC REQUIREMENTSF abric A UT-24502 1/8 yd.
2 Fabric B UT-24509 1/4 yd. Fabric C UT-24507 1/4 yd. Fabric D UT-24504 1/8 yd. Fabric E UT-14501 1/8 yd. Fabric F UT-14505 1/4 yd. Fabric G UT-14503 1/4 yd. Fabric H UT-24506 3/8 yd. Fabric I NE-104 1 yd. Backing Fabric UT-24502 1 1/2 yds. (suggested)Binding Fabric UT-24506 (Fabric H) (included)CUTTING DIRECTIONS " seam allowances are included. WOF means width of (1) 3 1/2" x WOF strip from fabric A Sub cut stripinto four (4) 3 1/2" X 6 1/2" strips Two (2) 3 1/2" x WOF strips from fabric B Sub cut stripinto four (4) 3 1/2" x 12 1/2" stripsTwo (2) 3 1/2" x WOF strips from fabric C Sub cutstrip into four (4) 3 1/2" x 18 1/2" stripsOne (1) 3 1/2" x WOF strip from fabric D Sub cut stripinto six (6) 3 1/2" squaresOne (1) 3 1/2" x WOF strip from fabric E Sub cut strip into four (4) 3 1/2" x 6 1/2" strips Two (2) 3 1/2" x WOF strips from fabric F Sub cut stripinto four (4) 3 1/2" x 12 1/2" pieces (F6)Two (2) 3 1/2" x WOF strips from fabric G Sub cutstrip into four (4) 3 1/2" x 18 1/2" strips One (1) 3 1/2" x WOF strips from fabric H Sub cutstrip into six (6) 3 1/2" squaresFour (4) 12 1/2" squares from fabric IEight (8) 3 1/2" x 9 1/2" strip from fabric IEight (8) 3 1/2" x 6 1/2" strip from fabric IEight (8)
3 3 1/2" squares from fabric IFABRICS DESIGNED BY FRANCES NEWCOMBE FORART GALLERY FABRICSFINISHED SIzE: 42" X 42" download the instructions for this pattern visitQUILT DESIGNED BY Karen TurchanBLOCK ASSEMBLY Sew all rights sides together with " seam allowance. Take one 3 1/2" square from fabric D and attach it to the bottom of piece IA from DIAGRAM 1 Press towards fabric D(DIAGRAM 1) IA IAS e w h e re(DIAGRAM 2) Take one 3 1/2" x 9 1/2" strip from fabric I and one 3 1/2" X 6 1/2" strip from fabric A Lay strip I on the right side of strip A making a right angle, with strip I extending down. Draw a line using an erasable fabric marker from the upper left corner to the lower right intersection. Sew along the line (DIAGRAM 2) Trim away the excess fabric leaving 1/4" seam allowance. Press open IAAS e w h e re I(DIAGRAM 3)(DIAGRAM 4)(DIAGRAM 5) There are two block combinations for the construction of this quilt Follow the instructions below for the constructions of block a Start the construction of block a by taking one 3 1/2" x 9 1/2" strip from fabric I and one 3 1/2" X 6 1/2" strip from fabric A Lay strip I on the right side of strip A making a right angle, with strip I extending up.
4 Draw a line using an erasable fabric marker from the upper right corner to the lower left intersection. Sew along the line (DIAGRAM 1) Trim away the excess fabric leaving 1/4" seam allowance. Press openA ID Take the piece IA that is left and one 12 1/2" square from fabric I Sew the square from fabric I to the top of the strip IA Take the IAD strip and attach it to the right side of the piece previously sewnA I IA I IA ID Take one 3 1/2" x 6 1/2" strip from fabric I and one 3 1/2" x 12 1/2" from fabric B Using the same process shown in DIAGRAM 1 sew the strip from fabric I to the right side of the strip from fabric B Draw a line using an erasable fabric marker from the upper right corner to the lower left intersection. Sew along the line Trim away the excess fabric leaving 1/4" seam allowance. Press open(DIAGRAM 6)B I(DIAGRAM 7)(DIAGRAM 8)(DIAGRAM 10) Take one 3 1/2" x 6 1/2" strip from fabric I and one 3 1/2" x 12 1/2" from fabric B This time use the same process shown in DIAGRAM 2 sew the strip from fabric I to the right side of the strip from fabric B Draw a line using an erasable fabric marker from the upper left corner to the lower right intersection.
5 Sew along the line Trim away the excess fabric leaving 1/4" seam allowance. Press openB I Take one 3 1/2" square from fabric D and attach it to the bottom of piece IB from DIAGRAM 6 Press towards fabric D Pay close attention to the fabric orientationB ID Take the piece IB that is left and Sew it to the bottom of the square made in DIAGRAM 5 Take the IBD strip and attach it to the right side of the piece previously sewnA I IA IDB I(DIAGRAM 9)A I IA IDB IB ID Take one 3 1/2" square from fabric I and one 3 1/2" x 18 1/2"from fabric C Repeat the same procedure done for DIAGRAM 1 & 6 IC(DIAGRAM 11) IC Take one 3 1/2" square from fabric I and one 3 1/2" x 18 1/2"from fabric C Repeat the same procedure done for DIAGRAM 2 & 7(DIAGRAM 12) Take one 3 1/2" square from fabric D and attach it to the bottom of piece IC from DIAGRAM 11 Press towards fabric D Pay close attention to the fabric orientation ICD(DIAGRAM 12) Take the piece IC that is left and Sew it to the bottom of the square made in DIAGRAM 10 Then take the ICD strip and attach it to the right side of the piece previously sewn(DIAGRAM 13)A I IA IDB IB ID IC ICD Make two of block a for the quilt construction IE IE Take one 3 1/2" square from fabric H and attach it to the bottom of piece IE from DIAGRAM 15 Pay close attention to the fabric orientation Press towards fabric H the construction of block b is pretty much the same as block a but backwards, the strip construction remains the same Follow the instructions below for the block b construction Take one 3 1/2" x 9 1/2" strip from fabric I and one 3 1/2" X 6 1/2" strip from fabric E Lay strip I on the right side of strip E making a right angle, with strip I extending up.
6 Draw a line using an erasable fabric marker from the upper right corner to the lower left intersection. Sew along the line Trim away the excess fabric leaving 1/4" seam allowance. Press open(DIAGRAM 14) Take one 3 1/2" x 9 1/2" strip from fabric I and one 3 1/2" X 6 1/2" strip from fabric E Lay strip I on the right side of strip E making a right angle, with strip I extending down. Draw a line using an erasable fabric marker from the upper left corner to the lower right intersection. Sew along the line Trim away the excess fabric leaving 1/4" seam allowance. Press open(DIAGRAM 15)(DIAGRAM 16) IEH Take the piece IE that is left and one 12 1/2" square from fabric I Sew the square from fabric I to the top of the strip IE(DIAGRAM 17) IE I IE IE IH Take the IAD strip and attach it to the left side of the piece previously sewn(DIAGRAM 18) Take one 3 1/2" x 6 1/2" strip from fabric I and one 3 1/2" x 12 1/2" from fabric F Using the same process shown in DIAGRAM 14 sew the strip from fabric I to the right side of the strip from fabric F(DIAGRAM 19)F I(DIAGRAM 20) Take one 3 1/2" x 6 1/2" strip from fabric I and one 3 1/2" x 12 1/2" from fabric F This time use the same process shown in DIAGRAM 15 sew the strip from fabric I to the right side of the strip from fabric FF I Take one 3 1/2" square from fabric H and attach it to the bottom of piece IF from DIAGRAM 20 Pay close attention to the fabric orientation Press towards fabric HF IH(DIAGRAM 21)
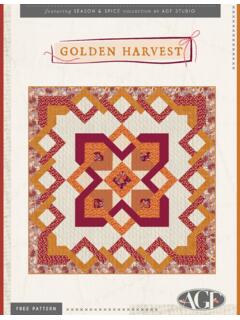
7 Follow the cover picture for block placement Sew a Block a to a Block a Make two of this rows. Press toward Block THE TOPSew all rights sides together with " seam allowance. Press open. Take the piece IF that is left and Sew it to the bottom of the square made in DIAGRAM 18 Then take the IFH strip and attach it to the left side of the piece previously sewn IE IE IHF IHF I(DIAGRAM 22) Take one 3 1/2" square from fabric I and one 3 1/2" x 18 1/2" from fabric G Repeat the same procedure done for DIAGRAM 14 IG(DIAGRAM 23) IG Take one 3 1/2" square from fabric I and one 3 1/2" x 18 1/2"from fabric G Repeat the same procedure done for DIAGRAM 15(DIAGRAM 24) Take one 3 1/2" square from fabric H and attach it to the bottom of piece IG from DIAGRAM 24 Press towards fabric H Pay close attention to the fabric orientation(DIAGRAM 25)H IG Take the piece IG that is left and Sew it to the bottom of the square made in DIAGRAM 22 Then take the IGH strip and attach it to the left side of the piece previously sewn(DIAGRAM 25)
8 IE IE IHF IHF I IGH IG Make two of block b for the quilt construction Sew the two rows together to complete the quilt aBlock bBlock aBlock bBlock bBlock a45 DIAGRAM B2 DIAGRAM B1 Stop stitching hereDIAGRAM B3foldNOTE: While all possible care has been taken to ensure the accuracy of this pattern, we are not responsible for printing errors or the way in which individual work read instructions carefully before starting the construction of this quilt. If desired, wash and iron your fabrics before starting to cut. 2014 Courtesy of Art Gallery Quilts Rights more free patterns right sides together. Place BACKING FABRIC on a large surface wrong side up. Stretch it with masking tape against that surface. Place BATTING on top of backing fabric. Place TOP on top of the batting with right side facing up. Smooth away wrinkles using your hands. Pin all layers together and baste with basting thread, using long stitches. You can also use safety pins to join the layers.
9 QUILT ASSEMBLY Machine or hand quilt starting at the center and working towards the corners. Remember that quilting motifs are a matter of personal preference. Have fun choosing yours! After you finish, trim excess of any fabric or batting, squaring the quilt to proceed to bind it. Sew right sides Cut enough strips 1 " wide by the width of the fabric I to make a final strip 190" long. Start sewing the binding strip in the middle of one of the sides of the quilt, placing the strip right side down and leaving an approximate 5" tail. Sew with " seam allowance (using straight stitch), aligning the strip s raw edge with the quilt top s raw edge. Stop stitching " before the edge of the quilt (DIAGRAM B 1). Clip the threads. Remove the quilt from under the machine presser foot. Fold the strip in a motion of 45 and upward, pressing with your fingers (DIAGRAM B2). Hold this fold with your finger, bring the strip down in line with the next edge, making a horizontal fold that aligns with the top edge of the quilt (DIAGRAM B3).
10 Start sewing at " of the border, stitching all the layers. Do the same in the four corners of the quilt. Stop stitching before you reach the last 5 or 6 inches. Cut the threads and remove the quilt from under the machine presser foot. Lay the loose ends of the binding flat along the quilt edge, folding the ends back on themselves where they meet. Press them together to form a crease. Using this crease as the stitching line, sew the two open ends of the binding with right sides together (you can help yourself by marking with a pencil if the crease is difficult to see). Trim seam to " and press open. Complete the sewing. Turn binding to back of the quilt, turn raw edge inside and stitch by hand using blind stitch.