Installation Instructions Bolt On 4
Found 6 free book(s)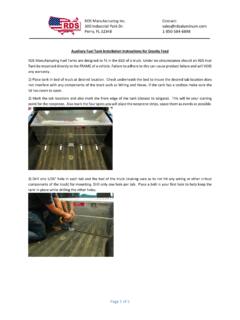
Auxiliary Fuel Tank Installation Instructions
www.rdsaluminum.comPage 4 of 5 13) Place a washer on the ¼” x 2 1/2” bolts. Insert the bolts into the holes. Underneath the bed place a washer, spring, washer and then lock nut on the other side of the bolt. You will need two people to easily bolt the tank. Stop
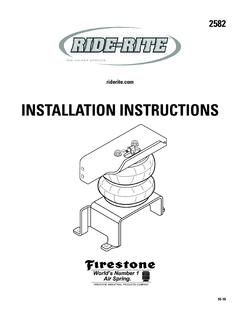
INSTALLATION INSTRUCTIONS
www.firestoneip.combolt from jounce bumper removal. keep this bolt! ehicle front remove the existing jounce bumper 1 start the installation on the left side of the vehicle when facing forward. 1 remove the existing jounce bumper. keep the bolt from the jounce bumper. it will be used later in the installation.

SUPER DAMPER - ATI Racing
www.atiracing.com1. Remove existing damper bolt and damper from engine. If necessary, use ATI Puller/Installer (#918999) with Adapter for LS1/LS7 (#918999SC) or similar damper puller. Save your old bolt for installation in the last step. (OEM bolts are a 1-time use only bolt - …

AND INSTALLATION INSTRUCTIONS
www.differentials.comInstallation Instructions Please read completely before beginning! You can expect many years and many miles of dependable use from your differential if it is set up properly and if you use only top quality parts. You already have quality parts if you bought a Sierra kit. By following these instructions carefully, you will achieve proper set up.
Installation Instructions MUSTANG II IFS COMPLETE PARTS ...
www.southernrods.comstarting your installation! Your Southern Rods & Parts Mustang II IFS Parts Package contains the following items: 1 pr) Upper Control Arms (2023) 1) Upper Arm Bolt Kit (MP-001-A) 1 pr) Lower Control Arms (2024) 1 pr) Brake Rotors with Bearings & Seals 1 pr) Brake Calipers with Pads 1) Caliper Bolt Kit 1 pr) Spindles (5556 or 2-5556)

700-R4, 4L60, and 4L60E Automatic Case Mount Shifter ...
www.lokar.comFig. 4 If you have a 4 wheel drive application that will not accept the rear mounting bracket, start the 5/16"-24 x 5/8" tension set screws into the tension set screw holes at the front and in the center of the shifter main plate. Set the mounting bracket assembly into place on top of the transmission. Fig. 4