Transcription of 1. DESCRIPTION (page 3) Important - De'Longhi
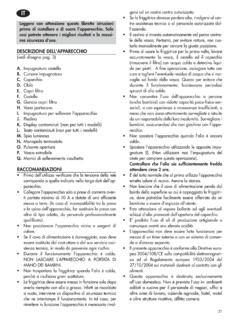
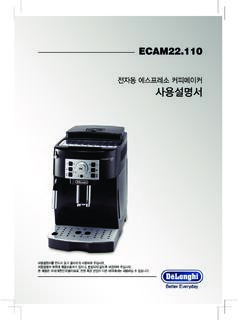
1 151. DESCRIPTION (page 3)The terminology below will be used repeatedly on the following DESCRIPTION of the appliance A1. Water tank lidA2. Tank extraction handleA3. Water tankA4. Cup warmerA5. Boiler outletA6. ON/OFF switchA7. Cup trayA8. Drip tray full indicatorA9. Drip trayA10. Mugs or glasses trayA11. Steam dialA12. Hot water/steam spoutA13. Hot water/steam connection nozzleA14. Cappuccino maker selection ringA15. Hot water/steam connection DESCRIPTION control panelB1. One cup button B2. ON light on button (white)B3. Two cups button B4. ON light on button (white)B5. Steam button B6. ON light on button (white) B7. Descale light (orange) DESCRIPTION of the accessoriesC1. Filter holderC2. 1 cup filter ( symbol under filter)C3. 2 cup filter ( symbol under filter)C4. Pod filter ( symbol under filter)C5. Measure/presserC6. Water softener filter (*not included, can be purchased from authorised Customer Services) 2. FILLING THE WATER TANKP lease note:Before first use, wash all the accessories and water tank with warm Extract the tank by pulling it upwards (fig.)
2 1). 2. Open the lid and fill the tank with fresh clean water, taking care not to exceed the MAX level (fig. 2). Put the tank back in the appliance, pressing lightly to open the valves located on the bottom of the More simply, the tank can also be filled without removing it, pouring the water directly from a : Never operate the appliance without water in the tank or with-out the note: It is normal for there to be water in the space under the tank. This should therefore be dried regularly with a clean FIRST USEAt first use, rince the internal circuit as follows:1. Turn the appliance on by pressing the ON/OFF switch (fig. 3). The appliance performs a self-diagnosis cycle, indicated by sequential flashing of the three The and lights flash to indicate the appliance is heating up. When the lights stop flashing and remain on steadily, the appliance is ready for operating the Attach the filter holder to the appliance (fig.
3 9).4. Place a container with a minimum capacity of 500 ml under the boiler outlet (A5) (fig. 4) and press the button. Repeat this operation 5 Empty the container and put it under the hot water/steam spout (A12) (fig. 4).6. Turn the hot water/steam dial to the position (fig. 5) and deliver to empty the water tank (A3); then turn the knob to the PROGRAMMING THE SETTINGS MENUTo access the menu, make sure the appliance is ready for use, then press and hold the button for 10 seconds until the three buttons flash in sequence: The appliance is now in programming mode. Set the coffee maker as you wish, then exit the settings menu by waiting for 15 note:If no selections are made for 15 seconds, the appliance automat-ically exits programming and is ready for use Setting coffee temperatureTo modify the temperature of the water used to make the coffee, proceed as follows:1. Access the settings menu;2.
4 Press the button to enter the coffee temperature selection mode. The lights corresponding to the current selection come on:16 low medium high3. The lights start flashing in sequence;4. Press the button corresponding to the required temperature: low medium high5. The button flashes to indicate that the selection has been saved. The appliance exits the menu and is ready for use. Setting water hardnessThe light (B7) indicating that the coffee maker needs descaling comes on after a period of operation established according to water hardness. The appliance can also be programmed according to the hard-ness of the mains water in the various regions so that descaling needs to be performed more or less frequently. Proceed as follows:1. Access the settings menu;2.
5 Press the button to enter the water hardness selec-tion mode. The lights corresponding to the current selec-tion come on: soft medium hard3. The lights start flashing in sequence;4. Press the button corresponding to the water hardness in your area: soft water medium water hard water<10 dH10 dH - 20 dH>20 dH<18 fH18 fH - 36 fH>36 fH<180mg/l CaCo3180-360mg/l CaCo3>360mg/l CaCo3- The button flashes to indicate that the selection has been saved. The appliance exits the menu and is ready for Adjusting auto-off (stand-by)To save energy, an auto-off function turns the appliance off when not used for a long period. To turn it back on again, press any button on the control Access the settings menu;2. Press the button to enter the auto-off time selection mode. The lights corresponding to the current selection come on: 9 min 30 min 3 hours3. The lights start flashing in sequence;4. Press the button corresponding to the required time: 9 min 30 min 3 hours5.
6 The button flashes to indicate that the selection has been saved. The appliance exits the menu and is ready for use. Default values (reset)This resets all menu settings and programmed quantities back to the default values. To reset the default values, proceed as follows:1. Position the steam spout over the drip tray;2. Access the settings menu;3. Turn the steam dial to the position;4. Press the button. The three lights flash simulta-neously to confirm that the original settings have been The and lights flash to indicate that the steam dial must be closed again ( symbol).When the steam dial has been closed, the appliance is ready for HOW TO MAKE ESPRESSO Tips for a hotter coffeeFor hotter espresso coffee, you should: You are recommended to warm the cups before making coffee by rinsing them with a little hot water. Attach the filter holder to the appliance with the filter in place but without adding coffee.
7 Using the same cup as will later be used to make the coffee, press the 1 cup button and deliver hot water into the cup to heat it. Raise the coffee temperature in the settings Rest the cups you will be using on the cup warmer (A4) which becomes hot during How to prepare espresso coffee using pre-ground coffee1. Place the ground coffee filter (C2 or C3) in the filter holder (fig. 6). To make one coffee, use the filter with the symbol on the bottom, to make two coffees, use the filter with the symbol on the To make just one coffee, place one level measure of pre-ground coffee (about 7 g) in the filter (fig. 7). To make two coffees, place two loosely filled measures (about 7+7 g) of pre-ground coffee in the filter. Fill the filter a little at a time to prevent the pre-ground coffee from overflowing. Important : For correct operation, before filling with pre-ground coffee, make sure there are no coffee residues left in the filter from the last time you made Distribute the pre-ground coffee evenly and press lightly with the presser (fig.)
8 8). Correct pressing of the pre-ground coffee is essential to obtain a good espresso. If you press too firmly, the coffee will be delivered slowly and will be strong. If you press too lightly, the coffee will be delivered quickly and will be Remove any excess coffee from the rim of the filter holder and attach the filter holder to the appliance. To attach cor-rectly, align the filter holder handle with the INSERT sym-bol (fig. 9), attach the filter holder and rotate the handle towards the right until aligned with the CLOSE Place the cup or cups under the filter holder spouts (fig. 10). 6. Make sure the lights corresponding to the coffee buttons are on, then press the or coffee button. The appliance proceeds to make the coffee and delivery is in-terrupted To remove the filter holder, turn the handle from right to left. Danger of burns!
9 To avoid splashes, never remove the filter holder while the appliance is delivering coffee. Always wait for a few seconds after How to make espresso coffee using pods Please note: Use pods conforming to the ESE standard, indicated on the pack by the following symbol. The ESE standard is a system accepted by lead-ing pod producers and enables espresso coffee to be prepared simply and Place the filter for coffee pods (with the symbol on the bottom) in the filter Insert the pod, centring it as far as possible on the filter (fig. 11). Always follow the instructions on the pod pack to position the pod on the filter correctly. Proceed as described in points 4 to 6 in the previous section. Please note: While the appliance is making coffee, delivery can be in-terrupted at any moment by pressing the coffee button pressed previously. At the end of delivery (within 3 seconds), to increase the amount of coffee in the cup, press and hold the coffee but-ton pressed previously.
10 Delivery is automatically interrupt-ed after a few seconds. To remove the filter holder, turn the handle from right to left. Danger of burns! To avoid splashes, never remove the filter holder while the appliance is delivering coffee. Always wait for a few seconds after Programming the quantities of coffee in the cupThe appliance is set by default to automatically deliver standard quantities. To change these quantities, proceed as follows:1. Place one or two cups under the filter holder Press and hold the button you want to programme ( or ). The coffee maker starts delivering coffee and the other coffee button flashes to indicate that the appli-ance is in programming Once the required quantity of coffee has been delivered into the cup, release the button. Delivery stops and the light flashes to indicate that the quantity has been saved When the two coffee lights come on steadily, the appliance is ready for HOW TO MAKE CAPPUCCINO1.