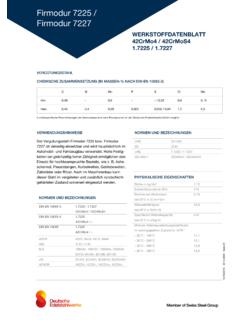
Transcription of 42CRMO4 (+QT) - MEKA Steel
1 This document is only valid for internal usage MEKA Steel BV and must not be copied in its original or modified state, reproduced or used for any unauthorized purpose, nor may its contents be imparted to a third party without written permission. Contravention will lead to prosecution. MATERIAL SPECIFICATIONS HOT ROLLED / HOT FORGED QUENCHED AND TEMPERED Grade 42 CRMO4 (+QT) According EN 10083 -3 ISO 683-17 Article code WN Standards & Specifications Version 01 Page s 02 04-02 Product Standards Material Specification Quality Standards Project CMT coop MCI (DRT) Author AKa Source SKF 1 GENERAL This specification gives the detailed requirements for Grade 42 CRMO4 (+QT) medium carbon bearing Steel in the form of hot rolled/hot forged quenched and tempered seamless forged parts.
2 This specification covers Material Grade, Homogeneity, Microstructure and Mechanical properties. Forged parts produced with this Steel are used for manufacturing bearing retaining parts. All other requirements, common to medium carbon bearing Steel grades in the form of rolled/hot forged, quenched and tempered ring are specified in EN 10083 -3 and ISO 683-17. 2 MATERIAL REQUIREMENTS Material Grade Grade 42 CRMO4 (+QT) comparable but not identical international material grades are; B43 acc.
3 To ISO 683-17, grade 4140 acc. to ASTM A866, 42 CrMo4 acc. to EN- 10083 -3 Chemical composition Check analysis is according to Grade B43, see ISO 683-17:1999. The calculated ideal critical diameter DI, should be 115 - 205 mm, acc. to ASTM A255. Calculated from the ladle chemical composition. Weight % ppm alloy C Si Mn P S Cr Ni Mo Cu As +Sn+Sb Al O1 Min. - - - - - - - Max. 20 Maximum limit for As is Homogeneity Each supplier process route must be approved separately. For the approval of ingot or continuous cast material, the procedure described in S&P, D33 General, section "Steelmaker Metallurgical Approval" shall be followed.
4 The casting method shall be stated. Inclusions The maximum length for a single inclusion shall not exceed 3 mm. Heat check according to ISO 4967:1998 (E), Method A. The micro-inclusion rating can be made on the sample types of billets/bar/parts in accordance with verification level A-C (see ) The micro-inclusion rating shall not exceed the limits specified below. Inclusion type Thin Heavy A B C D This document is only valid for internal usage MEKA Steel BV and must not be copied in its original or modified state, reproduced or used for any unauthorized purpose, nor may its contents be imparted to a third party without written permission.
5 Contravention will lead to prosecution. Cracks, flakes, pipe and porosity No indications are accepted which are corresponding to defects visible at 2x magnification on the fracture surface of hardened and cracked test samples. Microstructure Tempered martensite and/or homogenous bainite, without areas of free ferrite, are general based on cross sections. The austenite grain size of the forged blanks shall be checked according to ISO 643. The limit specified for these ratings is 6. Excessively banded microstructures are not permitted.
6 To evaluate if the banding is acceptable or not, specimens shall be taken from ring or bar sections, as described for the tensile and Charpy tests. For evaluation of segregation, the specimens shall be taken from a position representing raceway area/functional area or gear teeth and shall preferentially also contain the core/centre part of the material. For the Carbon analysis, samples shall be drilled from positions across the section using a 3 mm. drill. The carbon content in the segregated areas shall not be in excess of +15% of the nominal carbon content, as given by the heat certificate.
7 Mechanical properties The samples for verification shall be made according to the appropriate level A, B or C. The positions from which the samples shall be taken for the tensile and Charpy tests. Specific demands shall be separately documented in an agreement between factory purchaser and supplier. Hardness: 235 to 300 HBW, according to ISO 6506-1:1999. Remarks Ball hardness testing: 10% of forged parts per batch (minimum 2), for the same melt and series of heat treatment operations. The impact mark will be on the upper surface (delivery direction).
8 Tensile strength: Rm = 800 - 1000 MPa measured according to ISO 6892:1998 Yield Strength: Re > 600 MPa measured according to ISO 6892:1998 Elongation: A > 12% measured according to ISO 6892:1998 Impact strength: The impact strength shall be measured according to ISO 148:1983 Remarks The three impact tests shall be performed at a temperature of +20 C and -40 C in the radial and tangential directions. Charpy V in accordance with minimum values in Joules: Temperature +20 C -40 C Tangential direction (T) 20 J 14 J Radial direction (R) 17 J 10 J Verification levels Option A Each melt is characterised by tests on bars with a cross-section of approximately 100 x 100 mm, undergoing the same manufacturing process as the forged parts.
9 Option B To have a complete characterisation of the forging a test bar or test ring is needed. This test specimen shall have the same section (or equivalent ), same melt, same process and heat treatment as the forging. ) The section of the test bar is considered as equivalent section when it is in a range of 100 to 150% of the corresponding part. Option C The requirement for this level shall be described in the order.


