Transcription of Barcode Printer and Scanner Hardware Setup …
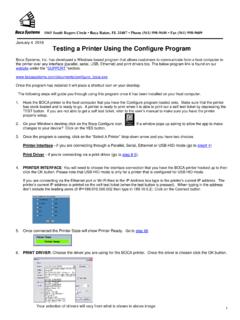
1 Barcode Printer and Scanner Hardware Setup instructions using Barcode Hardware through Remote Connection: If you are going to be scanning and printing through a remote hosted application ( using remote desktop client), then you need to set the local devices that you want to use for your remote session. As shown in the screenshot below, you need to select at least Printers and Ports . Barcode Printer Hardware Setup : Should be the Zebra LP 2844 or newer model. Connect the Printer Hardware to your computer and add a roll of labels. If you connected the zebra Printer with serial cable (older models) then you do not need to install the additional zebra software. If you connect the Printer with a USB cable, then you need to install software from the zebra website.
2 Choose the recommended software for your Printer model and OS version. In the zebra software configuration, you need to select a COM port that the USB connection will use. Choose COM1 for now, you can always go back into the zebra software configuration and change the port at a later time. Once the COM port is Setup , login to OnCommand and run the Barcode Printer configuration (File->Settings->Parts Inventory->Configure Barcode Printer ). Choose the COM port that you set the Printer to and press Configure Barcode Printer , wait for a message that says it finished. You can test the Printer is connected properly by pressing the Print Configuration Label button. You should now be able to print Barcode labels from the parts list and check-in screen.
3 Barcode Scanner Hardware Setup : Setup depends on the model of the Scanner . The Scanner needs to be programmed with a prefix or leading character. It needs to match the character that you choose in the Parts Inventory Settings (File->Settings->Parts Inventory). The default character is a Tilde ~ with hexadecimal code 7E. You will need to print out 1 or 2 pages from the Barcode Scanner user manual to program the Scanner . The Scanner is typically programmed by scanning a special Barcode image from the user manual. You will then scan the hexadecimal numbers that make up the prefix character. Process may vary between scanners, so follow the instructions given in the user manual of the Barcode Scanner .
4 Barcode scanners are usually factory programmed with a trailing carriage return character (CR\LF) to complete each Barcode scan. If you notice that the Barcode Scanner is not registering with the software, even after verifying the correct prefix character, then it could be missing the trailing carriage return character. You will need to follow the process in the user manual of the Barcode Scanner to program the trailing character as (CR\LF). Testing Barcode Scanner Hardware : Open Notepad or any text editor program (MS Word) on the computer that the Scanner is plugged into. Scan a Barcode . You should hear a beep sound and see the Scanner input as text in the program. You should see the programmed prefix character first.
5 If not then Setup the prefix character as described above. You should see the cursor is not at the end of the line, but on a new line below it. In other words, it looks like the Enter key has been pressed. If the cursor is still at the end of the line and has not been returned to the next line, then program a carriage return as the trailing character as described above. Once you see the leading character and carriage return on each Barcode scan, you are ready to use with Maintenance and Inventory Management.


