Transcription of BASIC COMPUTER SKILLS LABORATORY MANUAL - Kar
1 BCS LAB programs Govt. Polytechnic, Gulbarga 1 BASIC COMPUTER SKILLS LABORATORY MANUAL FOR 1ST SEM IS AND CS (2011-2012) BY MISS. SAVITHA R LECTURER GOVT. POLYTECHNIC GULBARGA FOR ANY FEEDBACK CONTACT TO EMAIL: BCS LAB programs Govt. Polytechnic, Gulbarga 2 EXERCISE 1 PROCEDURE TO CREATE PERSONAL LETTER: 1. Open MS Office 2003 ms word File New. 2. Go to Tool-Letters and mailings-Letter Wizard- Under Letter Format tab tick Date Line- Select the Date Format- a Page Design and Letter Style. 3. Click on Recipient Info Tab-Enter the Recipient s name (and Address if necessary) - Select Informal Option. 4. Click Sender Info Tab- Enter the Sender s Name (and address if necessary) - click ok.
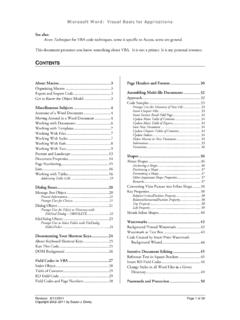
2 5. Now you will get Date, Recipient name and Sender s name along with a selected text Type your text here - Start writing your massage in this area. 6. If you want to align Date to the right of the page then select the date and click Align right button in the standard tool bar. BCS LAB programs Govt. Polytechnic, Gulbarga 3 OUTPUT PERSONAL LETTER October 5, 2010 Dear Smith By the grace of almighty, I am fine here. I hope you are also fine there. My semester exam stars from 11th November that is this month end. I am very much confident that I will get good marks in this exam and I am working very hard for that.
3 Then how is your study going on? I know you are very well in studies. When is your exam? After your exam please come home. I will be waiting to meet you. I have many doubts regarding mathematics which I wanted to clarify from you. Please do write a letter Your loving brother John BCS LAB programs Govt. Polytechnic, Gulbarga 4 EXERCISE 2 PROCEDURE TO CREATE COMPANY LETTER HEAD: 1. Open MS Office- ms word File New. 2. Go to View- Header and Footer- Type the complete address of a company. 3. Select the Text and click align right on the standard tool bar. 4. In order to insert the company logo (create a logo using paint software and save it or use the existing one) inside the header go to Insert- Picture-From File-and browse for the required Picture/file/logo where you have saved click Insert.
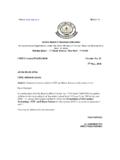
4 6. After inserting the logo/image resize the logo to fit the top left corner of the page by right clicking on the logo, go to Format Picture select Layout tab select the Wrapping Style to Infront of text- click ok. insert a Line go to Insert- picture- Auto shapes- Select the line and draw below the Logo and the address inside the header. 8. Format the line by Right clicking and selecting Format Auto shape- select the Color and Line tab- chose your style- click ok. 9. Then go to the footer- Insert and format a line as did for header. 10. Type the text inside the footer and below the line. 11. Go to Format-Background-Printed Watermark-Picture Mark-Click Select Picture- Browse for the required background- click Washout- Apply- Ok BCS LAB programs Govt.
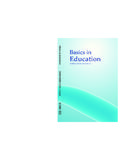
5 Polytechnic, Gulbarga 5 OUTPUT BCS LAB programs Govt. Polytechnic, Gulbarga 6 EXERCISE 3 PROCEDURE TO CREATE SIMPLE NEWS LETTER: 1. Open MS Office- ms word File New - Type the heading 2. When ever you want to change the number of columns then go to Insert Break - Select the section break type as continuous - Click OK 3. Go to Format Column - select the number of columns u want and click ok. 4. Type news and when ever you need curser in the next column then go to Insert - Break- now select Column Break click Ok. 5. If you want picture to be inserted then go to Insert- Picture-From file-and browse for the required picture/file-then click Insert 6. Format the text by changing the font size and color by selecting the required text and chose font size, style and color in the formatting tool bar below the menu.
6 7. Formatting text can also be done by selecting the text and applying the Wordart. For that go to Insert- Picture-Wordart- then chose the style u Want and click Ok. To change the color of the wordart text, right click on the text and go to Format Wordart. BCS LAB programs Govt. Polytechnic, Gulbarga 7 OUTPUT BCS LAB programs Govt. Polytechnic, Gulbarga 8 EXERCISE 4 PROCEDURES TO CREATE A MEMO: 1. Open MS Office- ms word File New 2. Go to View- Header and Footer- Insert the Institution name/code in the Header. 3. Go to Insert- Page Number-select the position bottom of the page and Alignment to Center Click Ok. 4. Type the content. Go to File- Page Setup- Margin tab- adjust left, right, top, bottom margins click ok.
7 5. Use Standard tool bar to align the text to the left, right and center of the page. 6. Place the cursor where you want to insert the date then go to Insert- Date and Time- Chose in the Available Formats- Click Ok. BCS LAB programs Govt. Polytechnic, Gulbarga 9 OUTPUT BCS LAB programs Govt. Polytechnic, Gulbarga 10 EXERCISE 5 PROCEDURES TO CREATE A RESUME: 1. Open MS Office- ms word File New 2. Go to View- Header and Footer- Type name, mobile number inside the Header 3. Go to Insert- Page Number-select the position bottom of the page and Alignment to Center Click Ok. 4. Go to Table-Insert-Table- chose Number of Columns 2 and Rows to 1.
8 Enter the name, format it (bold and increase the font size via standard tool Bar). And in the second column type the whole address. 5. When ever you want to increase the number of column in the existing row, Select that row and go to Table-click Split Cells- enter number of columns- click Ok. 6. In order to decrease the existing column numbers, select that columns and Go to Tables- click Merge cells. 7. Finally type the declaration out side the table with your name aligning right side and date to the left side. BCS LAB programs Govt. Polytechnic, Gulbarga 11 OUTPUT BCS LAB programs Govt. Polytechnic, Gulbarga 12 BCS LAB programs Govt. Polytechnic, Gulbarga 13 EXERCISE 6 PROCEDURE TO CREATE GREETING CARD: 1.
9 Open MS Office- ms word File New 2. Keep the cursor where you want to insert a picture and then go to Insert- Picture-From file-and browse for the required picture/file-then click insert. 3. In order to insert text on the picture go to Insert-Text box-and draw it on the page. Enter the required text and Format the text by selecting the required text and choosing font size, style and Color in the formatting tool bar below the menu. 4. Select the text box and drag it on to the picture. Place it where ever you want. 5. Select the text box on the picture and go to Format Text box select the Color and lines Tab- Make Fill Color to Nil and Transparency to 100%. 6. Make Line Color to No Line click Ok.
10 7. Go to the Format- Border and Shading- Select the Border tab and the style and color of your choice-click OK. BCS LAB programs Govt. Polytechnic, Gulbarga 14 OUTPUT BCS LAB programs Govt. Polytechnic, Gulbarga 15 EXERCISE 7 PROCEDURES TO CREATE A COVER PAGE OF A PROJECT REPORT: 1. Open MS Office- ms word File New 2. Type university name, project title, guide name etc line by line. Select the text and click align center on the standard tool bar. Keep the cursor where you want to insert the institution logo and then go to Insert-Picture-From File-and browse for the required picture/file - then click insert. 3. Format the title of your project by selecting and applying the Wordart.