Transcription of Blue Easy Reader Thermostat - climate.emerson.com
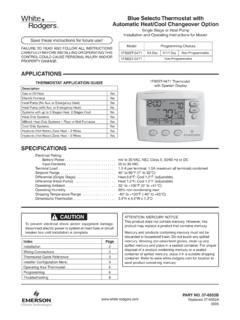
1 Blue Easy Reader Thermostat Single Stage, Multi-Stage, Heat Pump Installation Instructions for Model: Save these instructions for future use! Model Programming Choices FAILURE TO READ AND FOLLOW ALL INSTRUCTIONS. CAREFULLY BEFORE INSTALLING OR OPERATING THIS. 1F95EZ-0671 Non-Programmable 7 Day CONTROL COULD CAUSE PERSONAL INJURY AND/OR. PROPERTY DAMAGE. APPLICATIONS. Thermostat APPLICATION GUIDE. Maximum 1F95EZ-0671 Thermostat Thermostat Thermostat Stages Configuration Options Applications Heat/Cool Single Stage 1 Gas, Oil, Electric, Heat Only, Cool Only or Heat/Cool 1/1. No Heat Pump (SS1). Systems, 2 or 3 wire Hydronic Multi Stage 2 Zone (Hot Water or Steam). 2/2. No Heat Pump (MS2) Systems, 24 Volt or Millivolt Heat Pump 1 Single Stage Compressor Single Stage Compressor Heat Pump Systems - up to 2 3/1. Heat Pump (HP1) Stages Heat Heat Pump 2. Two Stage or Two Compressor Two Stage or Two Heat Pump systems - up to 2 4/2.
2 Compressor Heat Pump Stages Heat (HP2). SPECIFICATIONS. Electrical Rating: Battery Power .. mV to 30 VAC, NEC Class II, 50/60 Hz or DC. Input-Hardwire .. 20 to 30 VAC. Terminal Load .. per terminal, maximum all terminals combined Setpoint Range .. 45 to 99 F (7 to 32 C). Rated Differentials: Fast Med. Slow Heat (Single Stage/Multi Stage) .. F F F. Cool (Single Stage/Multi Stage) .. F F F. Heat Pump .. F F F. Aux. Heat .. F F. Operating Ambient .. 32 F to +105 F (0 to +41 C). Operating Humidity .. 90% non-condensing max. Shipping Temperature Range .. -40 to +150 F (-40 to +65 C). Dimensions Thermostat .. 4-3/16"H x 6-1/2"W x 1-5/8"D. ! CAUTION ATTENTION: MERCURY NOTICE. To prevent electrical shock and/or equipment damage, This product does not contain mercury. However, this disconnect electric power to system at main fuse or product may replace a product that contains mercury.
3 Circuit breaker box until installation is complete. Mercury and products containing mercury must not be Index Page discarded in household trash. Do not touch any spilled Installation 2 mercury. Wearing non-absorbent gloves, clean up any Wiring Connections 2 spilled mercury and place in a sealed container. For Wiring Diagrams 3 proper disposal of a product containing mercury or a Thermostat Quick Reference 4 sealed container of spilled mercury, place it in a suitable Installer Configuration Menu 5 shipping container. Refer to Operating Your Thermostat 7 for location to send product containing mercury. Troubleshooting 8. PART NO. 37-6986C. Replaces 37-6986B. 1407. INSTALLATION. Power Stealing Switch ! WARNING The Power Stealing Switches (Fig. 1) should be left in the Thermostat installation and all components of the "On" position for most systems. control system shall conform to Class II circuits per Power Stealing Assist is very reliable to increase battery life, the NEC code.
4 Drawing a small amount of power from the HVAC system. But Remove Old Thermostat on a small number of heating or cooling systems with high Before removing wires from old Thermostat , mark wires for impedance electronic modules you may observe one of the terminal identification so the proper connections will be made following conditions to indicate that Power Stealing Assist is to the new Thermostat . incompatible: Installing New Thermostat 1. The furnace draft inducer motor may run with no call for 1. Pull the Thermostat body off the Thermostat base. Forcing heat. or prying on the Thermostat will cause damage to the unit. 2. The furnace fan may turn on with no call for heat or may 2. Place base over hole in wall and mark mounting hole not turn off. locations on wall using base as a template. 3. The furnace may not turn off when the call for heat ends. 3. Move base out of the way.
5 Drill mounting holes. If you 4. The air conditioner may not turn off when the call for cool are using existing mounting holes and the holes drilled ends. are too large and do not allow you to tighten base snugly, If the Power Stealing Assist method is not compatible with use plastic screw anchors to secure the base. your system, place the Power Stealing Switches to "Off". This 4. Fasten base snugly to wall using mounting holes shown cancels Power Stealing Assist, operates the Thermostat on in Figure 1 and two mounting screws. Leveling is for batteries and corrects the condition. appearance only and will not affect Thermostat operation. Figure 1 Thermostat Base Multi-Stage 1F95EZ-0671. 5. Connect wires to terminal block on base using appropriate wiring schematic. 6. Push excess wire into wall and plug hole with a fire resistant material (such as fiberglass insulation) to prevent Mounting Mounting drafts from affecting Thermostat operation.
6 Hole Hole 7. Install 2 "AA" alkaline batteries. 8. Carefully line the Thermostat up with the base and snap into place. Place Level Place Level Battery Location across Mounting Tabs (for appearance only). across Mounting Tabs (for appearance only). 2 "AA" alkaline batteries are included with the Thermostat . Install the batteries before snapping the Thermostat on the Rear view of Thermostat base. Install the batteries in the rear along the top of the 2 "AA" Batteries Thermostat (see Fig. 1). To replace batteries, set system to OFF and remove Thermostat from wall. For best results, use a premium brand Power Stealing "AA" alkaline battery such as Duracell or Energizer . If the *. Switches home is going to be unoccupied for an extended period (over 3 months) and is displayed, the batteries should be replaced before leaving. * A1 For Damper Control Not Applicable To This Model.
7 WIRING CONNECTIONS. Refer to equipment manufacturers' instructions for specific Wiring diagrams shown are for typical systems and describe system wiring information. After wiring, see CONFIGURA- the Thermostat terminal functions. TION section for proper Thermostat configuration. Terminal Designation Single Stage Multi Stage Heat Pump 1 Heat Pump 2. O/B Changeover Terminal Energized in Heat (B) or Cool (O) for Heat Pump or Damper Systems Y2 No Output 2nd Stage Compressor No Output 2nd Stage Compressor Y Cool Mode Cool Mode 1st Stage - Heat and Cool Mode 1st Stage - Heat and Cool Mode 1st Stage - Compressor Relay Compressor Compressor Compressor G Fan Relay RC Power for Cooling RH Power for Heating C "Common wire from secondary side of cooling (Optional). Required for fault indication, continuous backlight operation or remote temperature sensor operation". 6 Powered closed 3rd wire for No Output No Output No Output 3-wire zone valve W/E Heat Mode Heat Mode 1st Stage Heat Mode 2nd Stage, Heat Mode 3rd Stage, Emergency Mode 1st Stage Emergency Mode 1st Stage W2 No Output Heat Mode 2nd Stage Heat Mode 3rd Stage, Heat Mode 4th Stage, Emergency Mode 2nd Stage Emergency Mode 2nd stage L System Diagnostic Terminal - Displays Call for Service 2.
8 WIRING DIAGRAMS. Figure 2 Single Stage, SS1, or Multi-Stage, MS2, System (No Heat Pump). with Single Transformer (Gas, Oil or Electric). Jumper L O/B Y Y2 W/E W2 G RH RC C 6. System O Blower/. Single Diagnostic Energized Constantly Circulator Stage 1. (SS1). Indicator in No Heat No Output Fan Energized 24 Volt 24 Volt *. Optional Input Cool Mode Output Mode Cool Mode on Call for (Hot) (Hot) 24 Volt or 1st Stage 1st Stage Cool (and Heat Cool (Com- System B. Multi- Cool Heat Mode Heat if mon). Malfunction Energized Constantly Stage 2 Mode 2nd Stage configured Switch in Heat, Off, (MS2) 2nd for Electric Input Emergency Stage Heat). Mode Comfort Alert II Module or Similar System NEUTRAL. Diagnostic Module 24 VAC 120 VAC. See Module Instructions HOT. for details * Common connection required for diagnostic or malfunction indication. CLASS II. TRANSFORMER. Figure 3 Single Stage, SS1, or Multi-Stage, MS2, System (No Heat Pump).
9 With Two Transformer (Gas, Oil or Electric) Remove Jumper Wire Jumper between RH & RC. L O/B Y Y2 W/E W2 G RH RC C. System O Blower/. Single Energized Constantly Circulator Stage 1 No Output (SS1) Diagnostic in No Heat Fan Energized 24 Volt 24 Volt Optional *. Cool Mode Indicator Cool Mode Output Mode on Call for (Hot) (Hot) 24 Volt 1st Stage 1st Stage Cool (and Heat Cool (Com- (Optional). Multi- B Cool Heat Mode Heat if mon). Stage 2 Energized Constantly Mode 2nd Stage configured (MS2) in Heat, Off, 2nd for Electric Emergency Stage Heat). Mode NEUTRAL. 24 VAC 120 VAC. NEUTRAL. HOT. 120 VAC 24 VAC. COOLING. HOT. CLASS II. HEATING TRANSFORMER. CLASS II * Common connection required for diagnostic or malfunction indication. TRANSFORMER. Figure 4 Heat Pump Systems, HP1 (Single Stage Compressor System with Gas or Electric backup), HP2 (Multi-Stage Compressor or Two Compressor System with Gas or Electric backup).
10 Jumper L O/B Y Y2 +. W/E +. W2 G RH RC C 6. System Heat Mode - 2nd Heat Mode - 3rd Stage, Emergency Stage, Emergency O Mode - 1st Stage Mode - 2nd Stage Blower/. Heat Pump 1 Energized in No +. Note: Dual Fuel option +Note: Dual Fuel option Circulator Fan (HP1). Diagnostic Cool Mode Heat and Output de-energizes Heat mode de-energizes Heat mode stage 1 (compressor) stage 1 (compressor) Energized on Optional *. Indicator Cool Mode when auxiliary heat is energized when auxiliary heat Call for Heat 24 Volt 24 Volt 24 Volt is energized (Hot) (Hot). or System B or Cool. (Com- 1st Stage Heat Mode - 3rd Heat Mode-4th Heat Cool mon). Heat Pump 2 Malfunction Energized in (Compressor) 2nd Stage, Emergency Stage. Emergency Set Elect/Gas (HP2) Switch Heat, Off, Stage Mode - 1st Stage Mode - 2nd Stage Option for Emergency (Com- +. Note: Dual Fuel option Note: Dual Fuel option Emergency +.)