Transcription of Bruce E. Hall, W8BH
1 Add an LCD to your avr microcontroller Bruce E. Hall, W8BH There are hundreds, if not thousands, of online articles about interfacing HD44780-compatible LCD displays to microprocessors/ microcontrollers . I have contributed one to the pile already, with my write-up on adding LCD displays to the Raspberry Pi. Here is what sets this article apart from the rest: Breadboard construction ATmega328 microcontroller Uses C language (AVR studio, AVR-gcc) Does not rely on libraries or other code Simple, no-nonsense functionality If you have an AVR micro that you d like to connect to an LCD display, this is for you. 2) THE WIRING AND THE SWITCHES The centerpiece of this project is the ATmega328 microcontroller by Atmel.
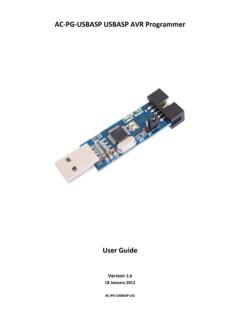
2 First, you need a way to program the microcontroller. I have the AVRISP II, which costs about $37 from Digikey (or eBay). This unit connects to your computer via USB, and connects to the microcontroller via a 6pin female header. A $1 AVR-breakout board from Sparkfun, shown here, lets you breadboard the output of the AVRISP programmer. Next, you ll need a suitable 5V power supply for your breadboard. I started to wire up my micro, ISP-header, and power supply when I realized that I have a compact module containing all three: the DC boarduino by adafruit. This compact board contains the power supply, micro, and ISP header; plus a status LED and reset switch. For around $17 it s a good way to save breadboard space.
3 I ll use it here. The DC boarduino is an arduino-like device, so it uses the same analog and digital pin numbering. But I am not using it as an arduino. For me, it s just a convenient way to breadboard the ATmega chip. Connect 6 data lines between the boarduino and LCD as indicated here. The first two are control lines, and remaining four are the data lines. Next, connect the power lines. The +5 and Gnd lines from the boarduino will supply power the rest of the project. The LCD has a 16-pin interface, as shown here. On the LCD, connect pins 2 & 15 to +5v power and pins 1, 5, and 16 to ground. Pin 3 is the contrast voltage. For some displays, you can connect this directly to ground. For others, a 1K resistor to ground works better.
4 When everything is hooked up, the LCD will have pins 7-10 disconnected. Apply power, and you should see the glow of your LCD backlight. If not, unplug and check all power connections. In addition, the top row of the LCD should display a line of solid-block characters. If not, the display contrast may need to be adjusted. Vary the voltage on pin3 to get good display contrast. Start AVR studio, choose Device Programming from the Tools menu, or press Ctrl-Shift-P. Choose AVRISP II as the Tool, ATmega328P as the Device, and ISP as the Interface. Click Apply. Now click on the Device Signature Read button. A result of 0x1E950F indicates successful 2-way communication with your microcontroller. From this device programming window you can also set the microcontroller s fuses.
5 Click on Fuses in the left-hand pane. All the fuses except SPIEN should be unchecked. (You will need to uncheck the CKDIV8 fuse.) Also, the SUT_CKSEL fuse should be set to EXTXOSC_8 MHZ_16 KCK_14CK_65MS. This will run the chip at 16 MHz, using the external resonator. After checking your values, click the program button. You need to program the fuses only once. 3) CODING 328 (boarduino) LCD Display PB0 (digital 8) pin 4 PB1 (digital 9) pin 6 PB2 (digital 10) pin 11 PB3 (digital 11) pin 12 PB4 (digital 12) pin 13 PB5 (digital 13) pin 14 For this project I chose C as my programming language. For me, C is a bit easier to use than assembly language. The complete source code for my project is given at the end of this article.
6 Like many microcontroller projects, the outer shell of the program is very simple: int main (void) { init(); DoSomething(); } First, init() is called for do-once, initialization steps. Next, DoSomething() is called to create interesting displays on the LCD. This routine is typically set up as an infinite while(1) loop, so that the program never ends. The first initialization job is to set up microcontroller pins as inputs or outputs. We need only outputs for this project. To set a pin as an output, we write a 1 to the ports data direction register. DDRB is the data direction register for port B. Look at this statement: DDRB = 0x3F; // ; set B0-B5 as outputs In Port B, we use the lower 6 pins (B5-B0) as outputs, so the corresponding bits are set to logic 1: B7 B6 B5 B4 B3 B2 B1 B0 0 0 1 1 1 1 1 1 The binary number is 00111111, or hexadecimal 0x3F.
7 4) NIBBLES & BYTES Put on your thinking cap, because it s time for the interesting part: sending data to the LCD controller. There are 8 bits to each byte, but we will only send 4 bits at a time. And we have to time them according to the controller s specifications. Check out the datasheet for the specific details. The gist is to send the upper 4 bits of the data, pulse the LCD enable pin, and then send the lower 4 bits. The half-byte chunks are called nibbles. #define LCD_RS 0 // pin for LCD R/S (eg PB0) #define LCD_E 1 // pin for LCD enable #define dat4 2 // pin for data4 #define DAT5 3 // pin for data5 #define DAT6 4 // pin for data6 #define DAT7 5 // pin for data7 void SendNibble(byte data) { PORTB // = clear 4 data lines if (data & _BV(4)) SetBit(PORTB, dat4 ); if (data & _BV(5)) SetBit(PORTB,DAT5); if (data & _BV(6)) SetBit(PORTB,DAT6); if (data & _BV(7)) SetBit(PORTB,DAT7); } void PulseEnableLine () { SetBit(PORTB,LCD_E).}
8 // take LCD enable line high usDelay(40); // wait ClearBit(PORTB,LCD_E); // take LCD enable line low } The SendNibble() routine takes the upper 4 bits of the data and places them on four I/O lines (PB2-PB5). The first line takes all 4 pins to logic 0. SetBit() is an inline macro which sets the value of a port pin to logic 1. Pulsing the LCD enable line is as simple as taking the line high, waiting, then taking it low again. The data is clocked into the module on the high-to-low transition. A very short waiting period, in microseconds, is specified in the datasheet. void SendByte (byte data) { SendNibble(data); // put upper 4 bits on data lines PulseEnableLine(); // clock them into controller data <<= 4; // get lower nibble SendNibble(data); // put lower 4 bits on data lines PulseEnableLine(); // clock them into controller } Sending a byte to the LCD controller involves two SendNibble operations: send the upper half of the byte first, then send the lower half.
9 A right-sift operation << 4 moves the lower four bits into the upper 4 bits. Bytes can be send to the controller as either data byte (characters) or as commands. The controller uses the input line RS to distinguish the two: anything sent when RS is low is a command, and anything sent when RS is high is a character. We ll create two new routines to account for this requirement. void SendChar (byte ch) { SetBit(PORTB,LCD_RS); // R/S line 1 = character data SendByte(ch); // send it } void SendCmd (byte cmd) { ClearBit(PORTB,LCD_RS); // R/S line 0 = command data SendByte(cmd); // send it } Now we have routines for sending commands and characters to the display.
10 It would be nice to test them right away, but we can t: we have to initialize the display first. All HD44780-based displays require certain startup commands to specify things like data-length, cursor-mode, etc. These command bytes will set the data-length to 4 bits, turn the cursor off, enable sequential addressing, and clear the display. void InitLCD() { SendCmd(0x33); // initialize controller SendCmd(0x32); // set to 4-bit input mode SendCmd(0x28); // 2 line, 5x7 matrix SendCmd(0x0C); // turn cursor off (0x0E to enable) SendCmd(0x06); // cursor direction = right SendCmd(0x01); // start with clear display msDelay(3); } It s time to write something on the LCD display, like Hello, World.