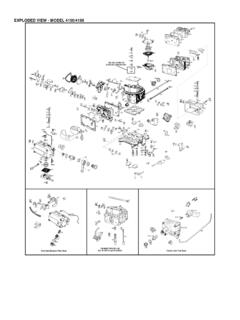
Transcription of COMPETITION CARBURETORS MODEL 4150 HP SERIES
1 COMPETITION CARBURETORS MODEL 4150 HP SERIES Installation and Adjustment Instructions CONGRATULATIONS on your purchase of Holley carburetor! We feel that you have purchased the finest performance carburetor manufactured today. Should you need information or parts assistance, please contact our Technical Service Department at 1-866-464-6553, Monday through Friday, 8 to 6 CST. Please have the part number of the product you purchased on hand when you call. WARNING! These instructions must be read and fully understood before beginning installation.
2 Failure to follow these instructions may result in poor performance, vehicle damage, personal injury, or death. If these instructions are not fully understood, installation should not be attempted. APPLICATIONS: P/N USE Calibration CFM SECONDARIES BOOSTER TYPE 0-80507-1 Race, NASCAR Approved Touring SERIES Style Racing 390 Mechanical Conventional 0-80540-1 Race Gasoline 600 Mechanical Conventional 0-80575S Race, Supercharger Gasoline 600 Mechanical Conventional 0-80541-1 Race Gasoline 650 Mechanical Conventional 0-80528-1 Race Gasoline 750 Mechanical Double -step Down Leg 0-80529-1 Race Gasoline 750 Vacuum Double -step Down Leg 0-80535-1 Race Alcohol 750 Mechanical Double -step Down Leg 0-80576S Race.
3 Supercharger Gasoline 750 Mechanical Double -step Down Leg 0-80509-1 Race, NASCAR Approved Winston Cup Style Racing 830 Mechanical Double -step Down Leg 0-80511-1 Race, NASCAR Approved Winston Cup Style Racing 830 Mechanical Annular 0-80496-1 Race Gasoline 950 Mechanical Double -step Down Leg 0-80498-1 Race Alcohol 950 Mechanical Double -step Down Leg 0-80577S Race, Supercharger Gasoline 950 Mechanical Double -step Down Leg 0-80513-1 Race Gasoline 1000 Mechanical Double -step Down Leg 0-80514-1 Race Gasoline 1000 Mechanical Annular SPECIAL NOTE: Part number 0-80507-1 is shipped from Holley without the high-speed air bleeds to allow for the Touring SERIES Style racing calibration.
4 See the air bleed section for clarification and identification of the high-speed air bleeds. NOTE: These CARBURETORS are not legal for use in California on any pollution-controlled motor vehicle. INTRODUCTION: Holley Performance Products has written this instruction sheet for the installation of the MODEL 4150 HP SERIES CARBURETORS . This instruction sheet contains all the information needed to install these CARBURETORS . Please read all the WARNINGS and NOTES, as they contain valuable information that can save you time and money.
5 Holley Performance Products cannot and will not be responsible for any alleged or actual engine or other damage, or other conditions resulting from misapplication of the carburetor described herein. However, it is our intent to provide the best possible products for our customer; products that perform properly and satisfy your expectations. Should you need information or parts assistance, please contact our Technical Service Department at 1-270-781-9741, Monday through Friday, 7 to 5 Central Time; please have the part number of the product you purchased when you call.
6 GENERAL INFORMATION: This instruction sheet cannot contain all of the information, which may be desired by some individuals. Further clarification is available in HOLLEY CARBURETORS , published by books and available at your Holley distributor (P/N 36-73). An in-line fuel filter should be installed between the fuel pump and the carburetor. Recommended fuel pressure should be set at 7-1/2 psi maximum, 5 psi minimum. Fuel pressures above 7-1/2 psi can create severe fuel control problems and are not recommended.
7 Fuel lines should be a minimum of 3/8 . A Non-restrictive open-element air cleaner kit is recommended (Holley P/N 120-102). The pump cam adjustment kit is available under Holley P/N 20-12. Slosh tubes for preventing fuel starvation during rapid acceleration are available under Holley P/N 122-5000. Vacuum secondary diaphragm springs (if applicable), which vary secondary opening, are available under Holley P/N 20-13. For additional parts and accessories, see the Holley Performance Parts Catalog.
8 2 REMOVAL OF OLD CARBURETOR: WARNING! Prior to and after installing your new carburetor, manually operate the throttle lever, checking for any sticking or binding. Failure to do so may result in a runaway engine or a wide open throttle condition, which could result in engine damage personal injury and/or death. NOTE: Make a visual inspection of the carburetor, looking for any missing parts, bent levers, or any possible shipping damage. 1. Remove the air cleaner. 2. Label any connections to the carburetor, such as the fuel line.
9 3. After labeling all connections to the carburetor, carefully disconnect all hoses and lines. When removing the fuel line, slide a rubber cap plug over the end to prevent fuel from running out, which may create a fire hazard. Use a clean metal container to collect any spilled fuel. DANGER! DO NOT SMOKE WHEN WORKING AROUND GASOLINE OR GASOLINE VAPORS. EXTINGUISH ALL OPEN FLAMES. AN OPEN FLAME, SPARK, AND/OR EXTREME HEAT COULD RESULT IN A FIRE AND/OR EXPLOSION CAUSING SERIOUS INJURY, DEATH, AND/OR PROPERTY DAMAGE.
10 4. Remove the throttle linkage and automatic transmission controls from the throttle lever. Disassemble and save the throttle return spring. 5. Remove the two front and two rear-attaching manifold flange nuts. 6. Remove the throttle cable bracket, if so equipped, (located at the right rear attaching bolt). 7. Remove the carburetor by lifting it straight upward. Sometimes the carburetor can stick to the manifold gasket, requiring it to be pried loose. Before prying, double check to make sure all the carburetor attaching bolts and connections have been removed.
