Transcription of Computer Basics - Nashua Public Library
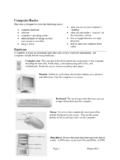
1 Computer Basics Handout Page 1 Winter 2011 Computer Basics This class is designed to cover the following Basics : Computer hardware software Computer s operating system different kinds of storage devices you can use to save files using a mouse what you see on your Computer s desktop what you see inside a window on the Computer s screen how to toggle between two open programs how to shut your Computer down safely Hardware A Computer is made up of multiple parts that send, receive or process information. All computers include the following hardware: Computer case: The case that holds all the electronic components of the Computer , including the hard disk, RAM chips, central processing unit (CPU), and motherboard. Inside the case is where everything takes place. Monitor: Similar to a television, the monitor displays text, pictures, and other items from the Computer on a screen.
2 Keyboard: The set of typewriter-like keys you use to type information into the Computer . Mouse: The device that controls the movement of the pointer displayed on the screen. You use the mouse pointer to select and open items on the Computer . Disk drives: Devices that read data from and write data to a disk. A DVD drive reads both CDs and DVDs. A DVD Computer Basics Handout Page 2 Winter 2011 drive has the words compact disc on the front. Some older computers have a drive for a diskette. All computers have a USB port either on the front or back of the Computer case. This port is where you plug in a USB drive/thumb drive. A USB drive, floppy disk, and certain CDs are all ways to save files such as letters, pictures, and presentations. Laptop Computers: Laptop computers are portable computers with the electronic component, monitor, keyboard and mouse all encased in a light-weight, battery-powered, portable unit which can fit on your lap.
3 They are also sometimes referred to as notebooks. Portable Storage Devices There will be times when you want to save a file either as a backup, or because you need to access the file, but will be using a different Computer . There are several options for saving files: Floppy disk ( Megabytes) o Has a small amount of space (about 20 documents/100 pages of text) CDs (700 Megabytes) o Has more space (500 times as much room as a floppy disk) DVDs ( Gigabytes) o 1,000 Megabytes = 1 Gigabyte USB Drive (Universal Serial Bus) (2, 4, 8 or 16 Gigabytes) Using the Mouse Getting comfortable using the mouse is essential for beginning Computer users. While it may seem a little awkward at first, maneuvering the mouse will soon become intuitive with a little practice. Parts of the Mouse: At the top of the mouse, there are two major buttons: the left button and the right button.
4 (Some mice also have a small roller which can also be used as a button but generally not.) Remember: the buttons on the mouse should always be pointing away from you! Holding the Mouse: With the buttons on the mouse pointing away from you, hold the sides of the mouse with your thumb, ring finger and pinkie. Place your index finger on the left button and your middle finger on the right button. Rest your wrist on the desk or mouse pad. The mouse stays on the mouse pad. You can lift the mouse to move it when you run out of room on the pad. Pointing and Clicking: The most common mouse operation is pointing and clicking. Simply move the mouse so that the cursor is pointing to the object you want to select, and then click the left mouse button once. Pointing and clicking is an effective way to select menu items, directories, and files.
5 Computer Basics Handout Page 3 Winter 2011 Double-Clicking: If you re using a Windows Operating System, you ll need to double-click an item to open programs or files. This involves pointing at something onscreen with the cursor and then clicking the left mouse button twice in rapid succession. For example, to open programs, simply double-click a specific icon. Right-Clicking: When you select an item and then click the right mouse button, you ll often see a pop-up menu. This menu, when available, contains commands that directly relate to the selected object. This is sometimes referred to as a shortcut menu. Refer to your individual programs to see whether and how they use the right mouse button. Dragging and Dropping: Dragging is a variation of clicking. To drag an object, point at it with the cursor and then press and hold down the left mouse button.
6 Move the mouse without releasing the mouse button, and drag the object to a new location. When you re done moving the object, release the mouse button to drop it onto the new location. Hovering: When you position the cursor over an item without clicking your mouse, you re hovering over that item. In some Microsoft programs you can hover over an icon and a small label will appear telling you what action will be taken by clicking that icon. If you d like to practice using these skills, an excellent mouse tutorial called Mousercise is available online for free. The web page address for Mousercise is: Using the Windows Operating System The operating system on the Computer is the program that starts when you turn on the Computer . It performs the basic tasks required to use the Computer , including interacting with the Computer hardware, scheduling tasks, and maintaining files.
7 The operating system also manages the other programs on the Computer . If you are using a PC, you will probably have one of the following operating systems: Windows 98, Windows Me, Windows NT, Windows XP, Vista or Windows 7. Computers using a Microsoft Windows operating system have the following features: The desktop: When you first log on to the Computer , you see the desktop. The desktop is the display area you see when Windows opens. The major parts of the Windows desktop include the following: Start button: The Start button is in the lower left-hand corner of your screen. In Window 7, the round Microsoft globe is the Start button. (In earlier version, the button was labeled Start ) This button opens the Start menu, which is what you can use to open programs and documents. Taskbar: Located along the bottom of the screen.
8 Displays buttons for your open applications and windows as well as icons to open some programs. System Tray: The right-hand part of the taskbar that holds the clock, volume control, and icons for other utilities that run in the background of your system. Shortcut icons: These are links to programs, file or folders that you can place on your desktop. Computer Basics Handout Page 4 Winter 2011 Recycle Bin: This is where you can drag and drop any files you want to delete. Mouse pointer: The indicator on the screen that you use to select and move objects. It moves as you move the mouse and it changes appearance depending on what program you are using and what tool you have selected. Windows : Using the Microsoft Windows operating system, you can have more than one program or folder open for viewing at the same time.
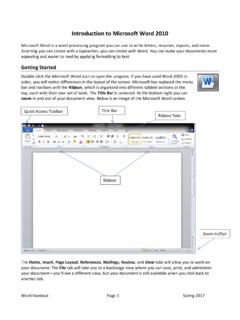
9 Each program or folder is in its own window, a rectangular area on the screen. Having multiple windows open is similar to having multiple books open on the top of a desk. Each window contains different information. For instance, you can have a window open that displays a letter you are writing and a window that displays a map of the world. When you are using multiple windows, the one you are working in is called the active window. The active window is located on top of the other windows and is in the foreground. Common Windows elements: Most windows have common features, so once you become familiar with one program, you can use that knowledge in another program. Title bar: The top bar of a window displaying the title of the program and the name of the document. Menu bar: The bar containing names of menus, located below the title bar.
10 You can use the menus on the menu bar to access many of the tools available in a program. Toolbars: The bar below the menu bar containing buttons that provide access to the most commonly used tools in a program. Each button has a picture on it, also called an icon , which represents the button s action. Recycle Bin Shortcut Icons Start Button Taskbar System Tray Desktop Computer Basics Handout Page 5 Winter 2011 Ribbons: If you are using a Microsoft Office 2010 product, you do not have menus or toolbars. Instead you have the Ribbon . Ribbons are accessed by clicking on any of the tabs towards the top of the window. Depending on what tab you click, you can access different Ribbons. Each ribbon contains a different group of icons which performs various tasks. For example, on the Home Ribbon, you can find icons that will change which font you are using or what size font you are using.