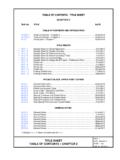
Transcription of Contents 1. GENERAL INFORMATION & …
1 Technical Support Line: Phone: + | Toll Free: + | USA: + | Rev 01-2017 Dec float equipment OPERATING MANUAL TYPE 505/506 Float Equipment Contents 1. GENERAL INFORMATION & RECOMMENDATIONS 1 2. INSTALLATION FLOAT EQUIPMENT 2 PRE-USE FIELD INSPECTION 2 POSITION FLOAT ON CASING STRING 3 3. RUNNING OF FLOAT EQUIPMENT 3 CIRCULATION UPON LANDING THE CASING 4 CEMENT PUMPING AND DISPLACEMENT 5 4. DRILL OUT PROCEDURES - FLOAT EQUPMENT & PLUGS 6 PREPARATION 6 DRILLOUT PROCEDURES ROTARY TRI CONE BIT 6 DRILLOUT PROCEDURES PDC BITS AND MILLS 6 Type 505 float collar Type 506 Float Shoe Float Equipment The Type 506 Float Shoe and Type 505 Float Collar with spring loaded valves are designed to ensure positive sealing in vertical, horizontal and all deviated wells.
2 All valve parts are aluminum and can be drilled with either conventional rotary tri-cone bit or PDC bit. The Type 506 float shoe is attached to the bottom of the casing string to guide the casing safely past minor obstruc- tions as it is lowered to cementing depth. The Type 505 float collar is then installed in the casing string above the float shoe. Circulation can be performed at anytime during the running of casing to total depth. Because of the high pressure applications (10,000 psi) these valves are designed for, It is highly recommended that a Type 506 float shoe be run together with a Type 505 float collar If high content of solids (LCM) is to be circulated in the well, it is recommended that a latch down plug be added to string due to the possibility that solids can clog the valve(s) in the collar and shoe All float equipment should be stored and shielded from UV light as well as extreme temperature and humidity, all of which can degrade the performance of the float valve.
3 Optimal storage conditions are 5-25 deg C with a relative humidity of 70-75%. The shelf life for properly stored float equipment is 5 years. 1. INFORMATION & RECOMMENDATIONS Technical Support Line: Phone: + | Toll Free: + | USA: + | Rev 01-2017 Dec float equipment OPERATING MANUAL TYPE 505/506 Float Equipment Performance Features Valve is rated to 10,000 psi bump and back pressure, and tested to 24 hours of flow @ 10 bpm. Available in 4-1/2 to 5-1/2 casing sizes. The valve parts are aluminum, Rubber and PEEK in construction. Features an over molded HNBR seal for temperature capabilities up to 400 F.
4 Float shoe comes standard with an aluminum eccentric nose with integral downjets. PDC and Tri-Cone drillable. Plugs Natural Rubber Cement Plugs have a shelf life of 5 years if stored at 5-25 deg C with a relative humidity of 70-75% and not exposed UV light. Extreme temperature and humidity should be avoided as it will degrade the shelf life of the product. Moisture due to rain, seawater or condensation water must be strictly avoided, as it can lead to rot or mold which will affect the performance of the plug. The following instructions should be referenced for the installation of all threaded Top-Co float and cementing equipment.
5 IMPORTANT: When picking up casing equipment to install onto casing NEVER insert any lifting device inside the body of the float equipment as the device may damage the float valve or box threads. It is important to apply Thread Lok only to the PIN END of casing or float equipment when used in the process of positioning float equipment on the casing string. NEVER apply Thread Lok to the box end. If applied to the box end, Thread Lok can travel into the float equipment and impede the operation of the float valve. 1 1. Obtain the piece of equipment to be inspected. Note the markings on the outside of boxing material to ensure the correct size, weight and threads have been obtained.
6 2. Remove packing materials. Save any written instructions that may be stored inside the box end of the float equipment. 3. Verify the markings on the float equipment, checking the size, weight, thread and type markings. 4. Inspect float equipment for damage to the cement surfaces of the piece (chips, flaking, cracks). 5. Check float equipment shell for 6 digit stamped MD# and record this number. 6. Remove any thread protectors. 7. Inspect threads for damage and unusual markings. 8. Lay the float equipment on its side, obtain a wooden stick with a diameter between 12MM (1/2 ) and 32 MM (1 1/4 ) and of 300MM (12 ) length.
7 9. Insert the wooden stick in the box end of the float equipment and push it into the orifice above the valve mak- ing contact with the plunger. Push the plunger in and release several times observing the bottom shaft of the plunger moving back and forth. Ensure that the plunger returns to the seated position upon releasing pressure against the plunger. 10. If no deficiencies are identified during field inspection proceed to section for instructions on proper in \ stallation of the float equipment on the casing string. In the event that a deficiency is identified during the field inspection do not position the deficient piece on the casing string.
8 Contact your supplier for immediate delivery of replacement equipment. 2. INSTALLATION FLOAT EQUIPMENT PRE-USE FIELD INSPECTION Technical Support Line: Phone: + | Toll Free: + | USA: + | Rev 01-2017 Dec float equipment OPERATING MANUAL TYPE 505/506 Float Equipment 1. Ensure that field inspection of float equipment has been completed see section 2. Remove thread protectors from the casing threads. 3. Obtain thread lok and mix according to manufacturer s instructions. 4. Apply thread lok to the casing pin thread and install shoe by aligning the shoe box end and starting the thread by hand. Ensure the alignment is correct to prevent cross threading.
9 Thread lok should ONLY be applied to the pin end of casing and Top-Co float equipment. 5. Thread box end of float shoe on to pin end of first casing joint. 6. Rotate the shoe as far as possible onto the casing pin by hand. 7. Make up thread per torque specifications. 8. Install float collar at desired location in casing string. The float collar serves as a back-up valve should the shoe valve fail. 9. Apply thread lok to the pin thread of collar and install collar by aligning the collar pin end with the casing box end and starting the thread by hand. Ensure the alignment is correct to prevent cross threading.
10 Thread Lok should ONLY be applied to the pin end of casing and Top-Co float equipment. 10. Rotate the collar as far as possible into the casing box end by hand. 11. Apply thread lok to the pin thread of the next length of casing in string. 12. Stab casing pin into box end of float collar. 13. Make up thread per torque specifications. During running in of the casing the following procedures should be followed: 1. Maintain fluid level inside the casing to a level that does not compromise the collapse pressure rating of the casing or the differential pressure rating of the float equipment. The differential pressure rating of the float equip- ment is provided on the float equipment specification sheet and is a static differential pressure rating.