Transcription of Control Unit Installation and Operation Guide Please Read
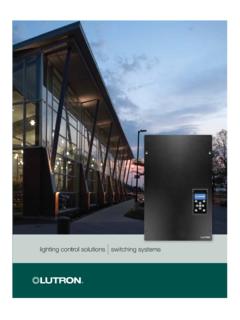
1 LUTRONC ontrol UnitInstallation and Operation GuidePlease ReadThe GRAFIK Eye QS Control unit allows for Control of both lights and shades, without interfaces, using a single Control unit . Features include pushbutton scene recall, info screen that displays energy savings and status, IR receiver, astronomic timeclock, contact closure input, and engravable backlit buttons that are easy to find and Numbers: QSGRJ-3P, QSGRJ-4P, QSGRJ-6P QSGR-3P, QSGR-4P, QSGR-6P120 V~ 50/60 Hz220 - 240 V~ 50/60 HzUnit Capacity (watts)2000 W3000 W MLV2000 VA / 1600 W3000 VA / 2400 WZone Capacity (watts)25 800 W40 1200 W MLV25 800 VA / 25 600 W40 1200 VA / 40 960 WSee page 7 for IEC PELV/NECR Class 2 California residents only.
2 The batteries in these devices contain Perchlorate Material special handling may more information visit olFran aisGRAFIK Eye QS Control unit Installation and Operation Guide 2 ContentsFeatures and Functions of the GRAFIK Eye QS Control unit ..3 Wiring the GRAFIK Eye QS Control UnitOverview of Line Voltage/Mains Wiring ..4 Line Voltage Wiring Details ..5 Overview of IEC PELV/NECR Class 2 Wiring ..7QS Link Control Wiring Details ..8 Powering More Than 3 Wallstations Example ..9 Completing Installation of the GRAFIK Eye QS Control unit ..10 General Functionality ..11 Pre-Programmed Button Functionality.
3 12 Zone Button OperationZone LED Displays for % of Lighting Levels ..13 Programming ModeEntering and Exiting Programming Mode ..14 Navigating Menus in Programming Mode ..14 Wireless Mode ..15 Zone SetupAssigning Load Types ..16 Assigning Non-Dim Load Types ..16 Setting Load Types ..17 Setting High End or Low End Trim ..18 Setting Minimum Level (optional) ..18 Labeling a Zone (optional) ..19 Scene SetupSetting Zone Levels, Fade Rates, and Shade Group Actions ..20 Labeling a Scene (optional) ..21 Enabling/Disabling Daylighting in a Scene ..21 Setting Save ModeSave Mode Settings ..22 Quick Scene Programming: Save by OK Mode.
4 22 Contact Closure Input (CCI) Setup ..23 Occupancy Sensor Setup ..25 Associating Wireless Occupancy Sensors ..26 Selecting the Mode ..27 Scene Mode ..28 Zone Mode ..29 Labeling an Occupancy Sensor (optional) ..30 Configuring Occupancy Sensor Settings (optional) ..31 Daylight Sensor Setup ..32 Associating Wireless Daylight Sensors ..33 Assigning Sensors ..34 Calibrating Sensors ..34 Labeling a Daylight Sensor (optional) ..35 Pico Wireless Control Setup ..36 Associating with a GRAFIK Eye QS Wireless Control unit ..37 Associating through a QS Sensor Module ..38IR Setup ..39 Enabling/Disabling the IR Receiver.
5 40 Associating the QS IR Eye with a GRAFIK Eye QS Control unit ..41 Associating through a QS Sensor Module ..43 Associating Sivoia QS Shades/Drapes and GRAFIK Eye QS Control Units ..44 Adjusting Shade Settings Setting Limits ..45 Preset Adjustment: Simple Method ..46 Preset Adjustment: Advanced Method ..46 Naming a Group of Shades ..47 Enable/Disable Stop If Moving Functionality ..48 Associating Sivoia QS Triathlon Shades with GRAFIK Eye QS Control unit .. 49 Setting Upper and Lower Limits of a Sivoia QS Triathlon Shade with GRAFIK Eye QS Control unit .. 50 Associating Multiple GRAFIK Eye QS Control Units.
6 51 Timeclock OperationSetting Time and Date ..52 Setting Location ..53 Setting Daylight Saving Time ..53 Adding an Event ..54 Deleting an Event ..55 Viewing an Event ..55 Setting a Holiday ..56 Viewing a Holiday ..56 Deleting a Holiday ..56 Copying a Schedule ..57 Deleting a Schedule ..57 Afterhours ..58 Afterhours Examples ..59 Setting Up Afterhours ..60 Ending Afterhours ..60 Diagnostics and Special SettingsEnabling/Disabling the Timeclock ..61 Enabling/Disabling the Backlighting ..61 Diagnostics ..61 Setting the Security Password ..62 Language Selection ..63 Faceplate Removal .. 63 Troubleshooting.
7 64 Troubleshooting: Wireless Functions ..65 Troubleshooting: Shade Functions ..66 Warranty ..67 Contact Information ..67 OKGRAFIK Eye QS Control unit Installation and Operation Guide 3 Optional Shade button groupsPreset and raise/lower buttons with integral LEDs (maximum of 3 button groups)Zone numbersZone raise/lower buttonsZone LEDs display current lighting zone levelsHinged faceplateHinged faceplateFeatures and Functions of the GRAFIK Eye QS Control UnitInfo screenDisplays status or programming functionsScene buttonsWith integral scene indicator LEDsTimeclock buttonDisplays current timeclock info OK buttonUsed for programmingInfrared receiverFor handheld remote useMaster buttonsTemporarily raise and lower lighting levels on unitUSB Receptacle for PC programming.
8 Micro or Mini B(To access micro USB receptacle, pull down to remove lower hinged faceplate)GRAFIK Eye QS Control unit Installation and Operation Guide 4 Wiring the GRAFIK Eye QS Control UnitOverview of Line Voltage/Mains Wiring123412 ABC123456LN 12 AWG ( mm2) each terminal120 - 127 V~ or 220 - 240 V~ distribution PanelLine Voltage/Mains Cables and Load Wiring123456 LNDimmable LED bulb** For a complete list of approved dimmable LEDs, Please visit or call controlled by power module or interfaceTerminal labels:L: Hot/LiveN: Neutral : Ground1-6: Dimmed/Switched line voltage outputsPower module or interfaceGRAFIK Eye QS Control unit Installation and Operation Guide 5 Wiring the GRAFIK Eye QS Control unit (continued)Line Voltage Wiring Details Use properly certified cable for all line voltage/mains cables.
9 Proper short-circuit and overload protection must be provided at the distribution panel. You can use up to a 20 A circuit breaker for your Installation . Install in accordance with all local and national electrical codes. IEC PELV/NECR Class 2 terminals may be temporarily unplugged for ease of IR, occupancy sensor, and Control wiring. Notice: Risk of damage to unit . Do not connect line voltage/mains cable to IEC PELV/NECR Class 2 1: Install wallbox. Mount a 3 in (89 mm) deep 4-gang wallbox on a dry, flat indoor surface that is accessible and allows for system programming and Operation . Allow at least 4 in (110 mm) clearance above and below the faceplate to ensure proper heat dissipation.
10 Allow 1 in (25 mm) for faceplate overhang on all sides. Note: 4-gang wallbox available from Lutron; P/N 2: Test load wiring. Turn power OFF at the circuit breaker or fuse box. Connect a standard light switch between the live lead and load wire to test the circuit. Turn power ON and check for short or open circuits. If load does not operate, the circuit is open. If the circuit breaker trips (fuse blows or opens), a load short may exist. Correct short or open circuits and test again.`Step 3: Check Control unit wiring. Earth/ground terminal connection must be made as shown in line voltage wiring diagrams.