Transcription of CVS V-100 Ball Valves 2 through 12 Inch Designs.
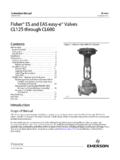
1 Product Manual CVS V- 100 ball valves 2 through 12 inch designs . Introduction: These instructions apply specifically to the 2. through 12 inch CVS V-100 ball Valve Bodies. This manual provides maintenance, operation, installation, and parts ordering information. The valve bodies are normally equipped with actuators and accessories. Please refer to the appropriate instruction manuals. Excellent Pressure and Flow Control for steam, gasses, various liquid, and fibrous slurries. The CVS V-100 ball valve design utilizes a standard ball with a triangular shaped wedge formed in it. design CVS V-100 Valve Body Shown This design allows for both throttling control and with CVS Type 1051 Actuator on/off service used in conjunction with a variety of actuators. Installation: The CVS V-100 valve design closes against one of several available ball seals with a shearing action. The valve body and internal components are made The CVS V-100 is a flangeless design and allows the of specific materials, and are designed for specific valve body to fit between two existing pipeline temperature, fluid control, pressure, and pressure flanges.
2 Drop conditions. The following listed parts may compromise the valve if temperature ranges and The flow characteristic is modified equal percent, service drops have been exceeded; Body, bushings, with normal (forward) flow into the convex side of shaft, and ball seals. the V- ball . Operation of these Valves outside the specified Bi-directional flow is into either side of the V- ball ; application ranges may cause damage to TCM ball seal, metal ball seal, or flow ring. equipment and or personal injury. Typical actuators used; are the pneumatic spring These Valves must not be used outside the and diaphragm rotary actuator (CVS 1051), and the specified condition ranges without contacting your pneumatic piston rotary actuator (CVS 1061). CVS sales representative. Mounting of these actuators can be on the right- hand or left-hand side viewed from the forward flow CVS recommends the installation of pressure inlet. control or pressure relieving devices. Sour Service Capability, optional NACE.
3 MRO175/ISO 15156-2009. Refer to page 2 for additional specifications. CVS Controls Ltd. Process Management and Instrumentation CVS Controls Ltd Product Manual: CVS V-100 ball Valve Specifications Flangeless body fits between RF Flanges, retained by line bolts. See Table 2 for body/flange End Connection Style compatibility. Maximum Inlet Pressures, Consistent with ASME Class 150, 300 and 600 lb pressure/temperature ratings as per ASME Temperatures and Pressure Refer to Table 2 and do not exceed the pressure, pressure drop and temperature conditions specified Drops1 at the time of ordering. Refer to Installation . Flow Characteristic Modified Equal Percentage Flow Direction Forward flow (normal) is into the convex side of the ball . Flow ring construction and all ball seals are (See Figure 2) suitable for forward flow. Range Ability 300:1. Metal ball Seal of valve capacity at full travel: 1/10 of Class IV per ASME/FCI 70-2. 2 ml of air/min/ inch of nominal valve size at 50 psi differential ( bar, Shutoff Classification TCM ball Seal differential).
4 Flow Ring 2% of valve capacity at full travel Maximum Valve Rotation 90 degrees Mounting of Actuator Right-hand or Left-hand as viewed from valve inlet Approximate Weight See Table 1. Additional Specifications See Parts List section of this manual for packing instructions and material specifications 1. Pressure, pressure drops and temperature limits in this manual as well as any applicable standard or code limitation must not be exceeded. Table 1, Approximate Weight Body Size, Weight Inches. Lbs. Kg 2 21 3 35 4 55 25. 6 85 8 135 10 235 107. 12 318 144. Table 2, Body Rating and Flange Compatibility BODY ANSI RATING CLASS FLANGE COMPATIBILITY. SIZE, COMPATIBILITY ASME. DIN PN. INCHES ( ) CLASS. 2 150, 300, 600 150, 300, 600 10, 16, 25, and 40. 3 through 6 150, 300, 600 150, 300, 600 10, 16, 25, and 40. a a a 8 150, 300, 600 150, 300, 600 10, 16 , 25 , and 40. 150 150 10 and 16. 10. 300 300 25 and 40. 12 150, 300 150 and 300 40. a. Special construction required. Table 3, Approximate number of ( mm) Shim Seals required to determine Zero Deflection BODY SIZE, ball SEAL FLOW.
5 INCHES METAL Bi-Directional TCM RING. 2 13 10 6 9. 3 13 10 7 9. 4 13 10 9 9. 6, 8, and 10 13 10 11 9. 12 12 10 12 9. CVS Controls Ltd. Process Management and Instrumentation 2. CVS Controls Ltd Product Manual: CVS V-100 ball Valve Table 4, Number of ( mm) thick Shim Seals to Remove after Determining Zero Deflection BODY SIZE, ball SEAL. INCHES METAL Bi-Directional TCM. 2 4 3 1. 3 4 4 2. 4 4 4 4. 6, 8, and 10 4 4 6. 12 4 4 7. Table 5, Min. Clearance for Flow Ring Construction SERVICE FORWARD REVERSE. TEMPERATURE FLOW FLOW. F C In. mm In. mm To 405 To 207 Above 405 Above 207 Table 6, Recommended Bolt Torque BODY SIZE, BOLT TORQUE. KEY NUMBER. INCHES ft lb. N m 2 27 37. 3 43 58. Guide Post 4 65 88. Retainer Nut 6 95 129. Key 6. 8 and 10 200 271. 12 95 129. Cap Screw 2-6 65 88. Key 11 8 through 12 100 136. Installation: 3. Position the valve on the line so that the flow Inspect the Valves for shipping damage and direction indicator corresponds to the foreign debris when uncrating. direction of the flow of the pipeline.
6 If the valve body is being used in a bi-directional CVS recommends the installation of a standard flow application then the flow direction three-valve maintenance by-pass system. This indicator should correspond to the direction of allows for isolation of the valve body without the highest flow condition. shutting down the pipeline. 4. When installing flange bolts, use figure No 4. to obtain necessary clearances. 1. Ensure the pipeline is free of welding slag, 5. Tighten the bolts in a crisscross pastern to and foreign debris by blowing out the pipe ensure all bolts are evenly torqued. lines before installation. 6. Install the CVS V-100 ball valve horizontally in 2. When mounting between pipeline flanges, the pipeline with the ball valve closing ensure the two connecting flanges are in line. downward. The actuator can be installed in a Install approved gaskets between the valve number of positions; refer to figure 3 and the body and the pipeline flanges. actuator instruction manual.
7 CVS Controls Ltd. Process Management 3 and Instrumentation CVS Controls Ltd Product Manual: CVS V-100 ball Valve Installation Cont.: Replacing Packing: 7. When a manual actuator is used in When conducting packing maintenance, the combination with a power actuator, it will be actuator must be removed from the valve. It is necessary to install a bypass valve on the also recommended that the valve be removed power actuator. This will allow the operation from the pipeline to allow for adjustment of the of the manual actuator. Following the power valve closed position. actuator instruction, connect he pressure line to the actuator. If the packing is new and tight on the shaft, and if leakage cannot be stopped by tightening the Note: Grounding the valve shaft is required when packing nuts, it is likely that the shaft has become the valve is exposed to hazardous goods or worn or nicked. installed for oxygen use. Without grounding the valve shaft, an explosive situation may result from If the leakage originates from the outside the static electricity from the valve parts.
8 Diameter of the packing, nicks or scratches may have damaged the packing box wall. Inspect the Maintenance: shaft and packing box during the following procedures. Scheduled inspections and maintenance are vital If it is not possible to control leakage around the to continued operation of all pressure control valve shaft by tightening packing flange bolts, the Valves and systems. Parts are subject to wear and packing may need to be replaced. tear and must be replaced as necessary, depending on the intensity of service conditions. Split-Ring Packing: Before beginning any maintenance, it is important Warning: to isolate the control valve and release all pressure contained in the valve body and the To avoid personal injury or damage to the actuator. process system, disconnect operating lines providing air pressure, control signals or Note: exercise caution during disassembly. Nicks electrical power to the actuator. Ensure the and scratches will affect the ability to seal the actuator cannot suddenly open or close.
9 Valve in the future. Isolate the valve from the system by using by- 1. Remove packing flange nuts (key 3) and lift the packing follower (key 15) from the packing pass Valves or by shutting off the process box. entirely. Relieve any pressure contained on 2. With a formed wire hook remove the packing both sides of the valve and drain the process rings. media. 3. Clean the packing box, all metal parts, and complete the required maintenance. Vent the power actuator, relieve actuator 4. Expand the split ring of the new packing to spring pressure and use proper lock-out allow it to pass over the valve shaft. Stager methods during all maintenance procedures. the connecting lines, then slide the rings in to the packing box. 5. Tighten the packing flange nuts until they are finger tight. Test under flow conditions. Continue tightening the nuts until all leakage has stopped. CVS Controls Ltd. Process Management and Instrumentation 4. CVS Controls Ltd Product Manual: CVS V-100 ball Valve Solid Ring Packing: Install the packing washer, if used.
10 Isolate the control valve. Release all pressure Replace the lantern ring and the contained in the valve body, and the actuator. remaining packing rings. Prior to disassembly, note the orientation of the If used, replace the packing actuator and lever in relation to the valve body. Install the packing follower (key 15). Replace the packing flange, if Use caution when removing the actuator used lever, using a wheel-puller if necessary. If the Replace and tighten the packing actuator lever is forced off the valve shaft the flange nuts until they are finger ball could move from the centered tight. position,damaging the V- ball , seal and valve 9. Reconnect the actuator following the body. previously noted orientation. 10. Replace the cap screws (key 4) and hex nuts (key 5) using the torques from table 6. 11. Follow the actuator instruction manual to complete the actuator assembly and to set the travel adjustment. 12. After the valve is placed in service, the packing flange nuts may require retightening to prevent leakage.