Transcription of DIGITAL CAMERA SP-100EE - Olympus Corporation
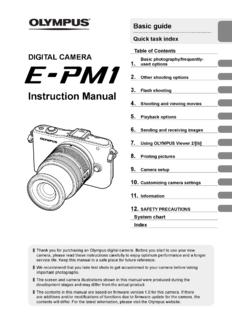
1 Thank you for purchasing an Olympus DIGITAL CAMERA . Before you start to use your new CAMERA , please read these instructions carefully to enjoy optimum performance and a longer service life. Keep this manual in a safe place for future reference. We recommend that you take test shots to get accustomed to your CAMERA before taking important photographs. The screen and CAMERA illustrations shown in this manual were produced during the development stages and may differ from the actual ManualDIGITAL CAMERASP-100EE2 ENUnpack the box contentsThe following items are included with the anything is missing or damaged, contact the dealer from whom you purchased the cameraStrapLithium Ion Battery (LI-92B) Olympus Setup CD-ROMorLens cap and lens cap strapUSB-AC adapter (F-2AC)USB cable (CB-USB8)Other accessories not shown: Warranty cardContents may vary depending on purchase Attaching the CAMERA strap Attach the strap to the other eyelet in the same manner.
2 Pull the strap tight so that it does not come loose. You can attach the lens cap to the of parts6506147832fg9bcadhe1 n button2 Indicator lamp3 Shutter button4 Zoom lever5 Built-in flash6 Strap eyelet7 Self-timer lamp/AF illuminator8 Dot sight9 Lens 0 Diopter adjustment dial a Dot sight switchb Flash switchc AFL/FOCUS LIMIT buttond Side zoom levere Tripod socketf Battery/card compartment lockg Battery/card compartment coverh Speaker5EN1590a642378ikghjbcdef1 Stereo microphone2 Viewfinder (EVF)3 Monitor4 Dot sight adjustment dial5 Mode dial6 Control dial7 Fn button8 u (EVF) button9 Connector cover0 Multi-connectora HDMI micro connectorb q (Playback) buttonc Arrow padd H (Left) buttone A buttonf buttong R (Movie) buttonh F (Up) / F (Exposure compensation) button i I (Right) /# (Flash) buttonj G (Down) / jY (Sequential shooting/Self-timer) / (Erase) buttonk INFO (Information display)
3 Button6 ENPreparations for shooting Inserting and removing the battery and card1 Follow Steps 1 and 2 to open the battery/card compartment cover. Turn off the CAMERA before opening the battery/card compartment compartment coverBattery/card compartment lock2 Insert the battery while sliding the battery lock knob in the direction of the arrow. Insert the battery as illustrated with the C mark toward the battery lock knob. Slide the battery lock knob in the direction of the arrow to unlock, and then remove the lock knob3 Insert the card straight until it clicks into place. Always use the specified cards with this CAMERA . Do not insert other types of memory cards. g Using the card (P. 89) Do not touch the metallic parts of the card switch7EN To remove the cardPress the card in until it clicks and comes out slightly, then remove the Follow Steps 1 and 2 to close battery/card compartment cover.
4 When using the CAMERA , be sure to close the battery/card compartment Charging the battery1 Connect the USB cable and USB-AC adapter to the CAMERA and charge the battery. The battery is not fully charged at shipment. Before use, be sure to charge the battery until the indicator lamp turns off (up to 5 hours). Connecting the cameraAC outletUSB cable (supplied)Connector coverMulti-connectorIndicator lampOn: ChargingOff: ChargedFor charging the battery abroad, see Using your charger and USB-AC adapter abroad (P. 88). Never use any cable other than supplied or Olympus -designated USB cable. This may cause smoking or burning. The included F-2AC USB-AC adapter (hereafter referred to as USB-AC adapter) differs depending on the region where you purchased the CAMERA . If you received a plug-in type USB-AC adapter, plug it directly into AC outlet. Be sure to unplug the power plug of the USB-AC adapter from the wall outlet when the charging is complete or the playback ends.
5 For details on the battery, see Battery Handling Precautions (P. 98). For details on the USB-AC adapter, see USB-AC adapter (P. 99).9EN If the indicator lamp does not light, check the USB cable and USB-AC adapter connections. If No Connection is displayed on the back monitor, disconnect the USB cable and set [Storage] in [USB Connection] (P. 61) before connecting the cable to charge the batteriesCharge the battery when the error message shown on the right messageBattery EmptyFlashes in red10EN Turning on the CAMERA and making the initial settingsWhen you turn on the CAMERA for the first time, a screen appears enabling to set the language for the menus and messages displayed in the monitor, and the date and change the selected date and time, see Setting the date and time d [X] (P. 63).1 Press the n button to turn on the CAMERA , press FGHI of the arrow pad to select your language and press the A Press FG of the arrow pad to select the year for [Y].
6 XMENUBackY/M/DYMDTime--------:..20143 Press I of the arrow pad to save the setting for [Y].XMENUBackY/M/DY M D Time--------:..20144 As in Steps 2 and 3, press FGHI of the arrow pad to set [M] (month), [D] (day), [Time] (hours and minutes), and [Y/M/D] (date order), and then press the A button. For precise time setting, press the A button as the time signal strikes 00 Use HI to select the time zone and then press the A button. Use FG to turn daylight saving time ([Summer]) on or off. 12:30 Summer11EN12 ENUsing basic functions Taking photographs1 Press the n button to turn on the the CAMERA is turned on, the monitor will turn Set the mode dial to mode P, the CAMERA automatically adjusts shutter speed and aperture in response to subject Frame the shot. When holding the CAMERA , take care not to cover the flash, microphone or other important parts with your fingers, etc.
7 To shoot using the viewfinder (EVF), press the u (EVF) button. Every time you press the u (EVF) button, the viewfinder (EVF) and the back monitor are switched alternately. If the display in the viewfinder (EVF) looks blurry, look through the viewfinder (EVF) and rotate the diopter adjustment dial (P. 4) until the display is in sharp Press the shutter button halfway down to CAMERA was unable to focus if the AF target mark flashes red. Try focusing again. The shutter speed and aperture value are displayed in red if the CAMERA is unable to achieve optimal Shutter speed Aperture valueAF targetPress halfway13EN5 To take the picture, gently press the shutter button all the way down while being careful not to shake the halfwayPress the rest of the way down Viewing photographs (Playing back images)Turn on the the q button. Your most recent photograph is displayed. Press HI to select an image.
8 Q buttonArrow padDisplays the previous frameDisplays the next frame 14/02/2612:304/304/30 Still image Index display In single-frame playback, turn the zoom lever to W for Index playback. Use FGHI to move the cursor. Turn the zoom lever to T for single-frame playback. 14/02/26 12:30 Close-up playback In single-frame playback, turn the zoom lever to T to zoom in up to 10 ; turn to W to zoom out. Press the A button to return to single-frame playback. Press FGHI to scroll an image to the direction of the button you :30 14/02/26 14/02/26 12:304/304/3014EN Recording movies1 Press the R (movie) button to start recording. The movie is shot in the set shooting mode. Note that the shooting mode effects may not be obtained for some shooting modes. Sound is also recorded. When using a CAMERA with a CMOS image sensor, moving objects may appear distorted due to the rolling shutter phenomenon.
9 0:00 RECREC0:000:340:340:000:00 RECREC0:340:34 Lights up red when recordingRecording timeRecording length (P. 91)This is a physical phenomenon whereby distortion occurs in the filmed image when shooting a fast-moving subject or due to CAMERA shaking. In particular, this phenomenon becomes more noticeable when using a long focal Press the R (movie) button again to stop Movie playbackSelect a movie, and press the A :12/00:3400:12/00:34 During playbackMovie 14/02/2612:3012:304/304/30 OKMovie PlayMovie Play 14/02/26 Pausing and restarting playbackPress the A button to pause playback. During pause, fast forward or reverse, press the A button to restart forwardPress I to fast forward. Press I again to increase the fast forward H to rewind. Press H again to increase the rewind the volumeUse FG to adjust the while playback is pausedDuring pause00:14/00:3400:14/00:34 Elapsed time/Total shooting timeCueingUse F to display the first frame and press G to display the last and rewinding one frame at a timePress I or H to advance or rewind one frame at a time.
10 Hold I or H pressed for continuous advance or playbackPress the A button to resume stop movie playbackPress the button. To play back movies on the computer, the supplied PC software is recommended. For the first use of the PC software, connect the CAMERA to the computer, then launch the Erasing images during playback1 Display the image you want to erase and press G ( ). To erase a movie, select the movie to erase and press G ( ).MENUE raseEraseCancel4/304/30100-0004100-0004 Back2 Press FG to select [Erase], and press the A button. Grouped images are erased as a group (P. 17). Multiple images or all images can be erased at a time (P. 58).17EN Playing back panorama and grouped images Playing back panorama imagesPanorama images that were combined together using [Auto] or [Manual] can be scrolled for Select a panorama image during Press the A 14/02/26 12:30 OKReplayTo control panorama image playbackStop playback: Press the : Press the A while pausedPress FGHI to scroll the image in the direction of the pressed the zoom lever to enlarge/shrink the the A button to restart areaPlaying back grouped imagesWith sequential shooting and interval shooting, the taken images are displayed as a group during sideExpands.