Transcription of Digital pH Meter - Extech Instruments, A FLIR …
1 User's Guide Digital pH Meter Model pH300 PH300-en-GB_ 12/14 2 Introduction Congratulations on your purchase of the Extech pH Meter . For best results, please read the entire manual before use. The pH300 Meter measures pH, mV, and temperature parameters. The built-in microprocessor provides automatic calibration, automatic temperature compensation, data storage, and self-diagnostics. The Meter can recognize up to 13 types of pH standard buffer solutions. The Meter s Digital filter improves measurement speed and accuracy. Two special modes (ammonia and purified water) are provided. The Meter offers a backlit LCD display and is dust-proof and water-proof, meeting the IP57 rating This Meter is shipped fully tested and calibrated and, with proper use, will provide years of reliable service.
2 Supplied Equipment List pH300 Meter pH / ATC (Automatic Temperature Compensation) Electrode Standard buffer solutions ( , , and ) / 50ml Screwdriver (for removing battery compartment) Batteries (2 x AA ) User s Guide Carrying Case You, as the end user, are legally bound (EU Battery ordinance) to return all used batteries, disposal in the household garbage is prohibited! You can hand over your used batteries / accumulators at collection points in your community or wherever batteries / accumulators are sold! Disposal: Follow the valid legal stipulations in respect of the disposal of the device at the end of its lifecycle PH300-en-GB_ 12/14 3 Meter Description 1.
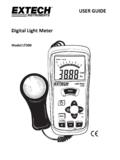
3 LCD Display (detailed in section below) 2. Rubber protective jacket (remove to access the rear battery compartment) 3. Keypad (detailed in section below) 4. Electrode connection jack 5. Electrode plug 6. Electrode measuring bulb 7. Electrode body 8. Electrode cable Display Description 1. Parameter Mode icon 2. Measurement reading 3. 888 (Stored data serial number), M+ (measurement to be stored icon), RM (reading to be recalled icon) 4. Unit of measure 5. Temperature reading 6. Stable measurement icon 7. Calibration icons 8. Low battery icon PH300-en-GB_ 12/14 4 Keypad Description The Meter has five (5) front panel function keys: ON/OFF Power Key Calibration Key: a) In the measurement mode, press this key to enter the calibration mode b) When in the programming mode, press this key to change the displayed number or the ON/OFF state Function Key a) Press momentarily (< seconds) to toggle between the two measurement modes pH and mV b) Press and hold for at least 2 seconds to enter the P1 programming parameter mode.
4 Subsequent presses will scroll through the remaining parameters P2, Backlight and ENTER Key a) In the measurement mode, momentary press to toggle the backlight on and off b) When in the programming or calibration mode, press to ENTER data MEMORY STORE and RECALL Key a) In the measurement mode, momentary press to store the displayed readings. To Recall a saved reading, Press and hold this key for at least 2 seconds b) In the programming mode, press to change the displayed number or the ON/OFF state Store, Recall, and Clear Datalogger Memory STORE Readings The Meter can store up to 100 pH and 100 mV readings for a total of 200 data points. To store a reading, wait until the reading stabilizes (the smiling face icon appears when the reading stabilizes).
5 Press the M+/RM key momentarily to store a reading. The M+ icon appears and the data point serial number increments. RECALL Readings In the measurement mode, press the M+/RM key for at least 2 seconds to recall the most recently stored reading. RM and the data point serial number for the displayed reading will appear on the display. The measurement information will appear on the lower right hand side of the display. Use the CAL or M+/RM buttons to scroll the remaining stored readings. Press the ENTER key to return to the normal measurement mode. CLEAR Readings From the RECALL mode, press and hold the ENTER key for at least five (5) seconds. The display will show CLR indicating that all of the stored readings have been erased.
6 The unit will automatically return to the normal measurement mode after approximately 2 seconds. PH300-en-GB_ 12/14 5 pH Measurement Mode Preparation for Measurement 1. Unscrew the protective cap on the probe jack located on the bottom of the Meter (store the protective cap in the carrying case for later use) 2. Carefully connect the pH probe to the Meter s probe jack. The probe can only be inserted in one orientation. Once it is firmly connected, screw the probe collar onto the Meter to secure the probe. 3. Turn the Meter ON using the power key 4. Press the MODE key momentarily to switch to the pH mode, if necessary 3-Point Calibration ( , and ) Note: Calibrate the unit once per day for best results.
7 1. Press the CAL key to enter the Calibration mode. The Meter s display will show a blinking Cl 2. Rinse the probe in distilled water, wipe it dry, and submerge it into a pH buffer solution. Stir the solution briefly and allow it to stay in the buffer solution until a stable reading is reached 3. Press CAL again and the display will show a blinking 4. This portion of the calibration procedure is complete when the display stops blinking and shows the C2 icon. The unit will automatically switch to the second point of the calibration 5. Rinse the probe in distilled water again, wipe it dry, and submerge it into a pH buffer solution. Stir the solution briefly and allow it to stay in the buffer solution until a stable reading is reached.
8 6. Press CAL again and the display will show a blinking 7. This portion of the calibration procedure is complete when the display stops blinking and shows the C3 icon. The unit will automatically switch to the third point of the calibration. 8. Rinse the probe in distilled water again, wipe it dry, and submerge it into a pH buffer solution. Stir the solution briefly and allow it to stay in the buffer solution until a stable reading is reached. 9. Press CAL again and the display will show a blinking 10. After the display stabilizes the 3-point calibration icons will appear 1-Point and 2-Point Calibration Note that the user can calibrate one or two points only, if the expected measurement is known.
9 For example, if the expeced pH is 4pH, it is acceptable to perform only a 1-Point Calibration (4pH). If the expected measurement is between and , the user should perform a 2-Point Calibration ( and ). For a 4pH calibration, only the circled L will appear on the LCD. For a , only the circled M will appear on the LCD. For a Calibration, only the circled H will appear (Low, Medium, and High). A 3-Point Calibration is recommended. Always perform a 3-Point Calibration on new probes and probes that have been in use for long periods. This maximizes measurement slope linearity. PH300-en-GB_ 12/14 6 Testing the pH of a Sample 1. Perform the pH Calibratoin as described above 2. Rinse and dry the pH Probe and submerge it in a sample liquid 3.
10 Stir the solution briefly with the probe and allow it to stand until the display stabilizes 4. Note that the closer the temperature of the sample solution is to the calibration solution, the more accurate the readings will be. Programming pH Parameters The Table below shows the available programming menu items P1 ~ P7. Each parameter is explained in detail in the subsequent sections. To Enter programming mode, Press and hold the MODE button for at least 2 seconds. Parameters Code Selections P1 pH buffer solution series selection USA (Europe & ) NIS (NIST) CH (China) P2 Distilled water pH temperature compensation setting (see note below this table) OFF / ON P3 Distilled water with Ammonia pH temperature compensation setting (see note below this table)