Transcription of Driving Manager Checklist
1 Driving Manager The Aceable Guide To Completing Your 14 Hours of In-Car Observation What is the Driving Manager ? Welcome Acelets! The Driving Manager is designed to help parents and students complete the 14 hours of in-car observation for the 44-hour behind-the-wheel requirement. The Driving tasks are designed to complement the material you learn in the course. You can complete each level s Driving tasks after finishing the corresponding level in our online course or work on your Driving hours after completing the entire online course.
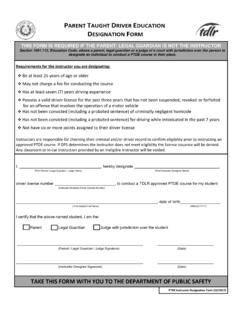
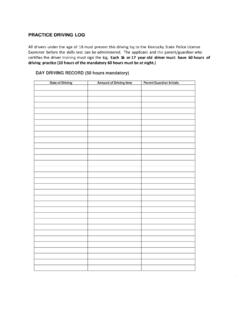
2 Driving tasks start with Level 2. It s up to you what order you d like to complete your hours. While using the Driving Manager , you ll record down your Driving hours using the In-Car Observation & Behind-the-Wheel Instruction Log from your PTDE Packet. These hours can only be done with your official parent instructor . To complete the remaining 30 hours of behind-the-wheel practice, you can use the 30 Hour Guide from the Texas Education Agency found here. How do I use the Driving Manager ? There are three different kinds of Driving tasks: Observation Practice Assessment Observation Observation tasks are where the student observes their parent instructor .
3 In the In Car Observation & Behind-the-Wheel Instruction Log, these tasks will help you fill out the column labeled In-Car Observation . You and your parent will observe safe and unsafe practices demonstrated by each other and other roadway users. You ll also discuss your observations with your instructor . Practice Practice tasks are where the parent instructor observes the student. Under the watchful eye of your instructor , complete the practice tasks safely and carefully. You should definitely try your best to master these skills because there will be a test!
4 In the In Car Observation & Behind-the-Wheel Instruction Log, these tasks will help you fill out the column labeled Behind-the-Wheel . Assessment In the assessment section, your instructor will grade you for different Driving skills you ve learned. Try your best parents can be tough critics! I hear making your bed helps. How does the Driving Manager match up with the Log? In this list, we will show you how the level names correspond to each section of the In-Car Observation & Behind-the-Wheel Instruction Log. Level Corresponding Module 2 Driver Preparation Pre-Drive, Starting, Operation, and Post-Drive Tasks 3 Vehicle Movements 4 Driver Readiness 5 & 6 Environmental Characteristics & Risk Factors 7 Distractions 8 Vehicle Movements & Reference Points 10 Adverse Conditions & Vehicle Requirements 11 Consumer and Personal Responsibility Level 1 is not listed since Level 1 of the Driving Manager as seen in the menu of your course is simply a guide that explains how the Driving Manager works.
5 Levels 9 and 12 are Assessments and would not be recorded in your log. Enjoy! Simply check off each task as you complete them. Level 2 Pre-Drive Tasks: Practice o Obtain Driver Permit: Go to your local DPS office to get your Driving permit so you can start Driving . o Walkabout: Walk around the car, check for oil leaking, children or bots behind the car. o Owner s Manual: Review the owner's manual for information on pre-drive tasks. Look for information on maintenance procedures performed prior to and after Driving . Occupant Protection: Observation o Owner s Manual: Review the vehicle's owner's manual for information on occupant protection and restraint systems (safety belts and airbags).
6 O Protection and Restraints: Identify the active and passive occupant protection and restraint systems (safety belts and airbags). o Protection and Restraints: Make sure you use your seat belt while sitting in the passenger seat for observation. Occupant Protection: Practice o Review: Discuss your observations with an instructor . Tell a knock-knock joke; parents love those. o Adjust Seat and Steering Wheel: You should be 10"-12" away from the steering wheel. Position hands on steering wheel (at 9 and 3 o'clock). Adjust head restraint if necessary.
7 O Seat Belt: Identify and utilize the active and passive occupant protection and restraint systems equipped in the vehicle (put your seatbelt on). o Passenger Check: Make sure your passengers have their seat belts on. You're Driving ; you're in charge. Don't get too bossy though. Symbols And Devices: Observation o Symbols and Devices: Observe your instructor using the vehicle symbols (alerts and warnings) and vehicle devices. Review observations with instructor . o Owner s Manual: Review your vehicle's owner's manual for information on vehicle symbols and devices.
8 Symbols And Devices: Practice o Turn the Ignition On : Put the key in the ignition and turn to the right. o Assess Vehicle Symbols: Look at the dashboard; identify alerts or warnings flashing (engine maintenance, low gas). Respond appropriately (get gas, go to mechanic). o Adjust Vehicle Devices: Be prepared to drive. Adjust the radio; turn on the lights and other vehicle devices before moving the vehicle. o Adjust Mirrors: Adjust mirrors for optimum viewing. Identify blind spots, and create a plan to compensate for said blind spots while Driving .
9 Starting Tasks: Practice o Owner s Manual: Review the vehicle s owner s manual for information on starting tasks. o Operate the Engine: Pay careful attention to the engine and listen for alarming sounds. While Driving , look for signs that maintenance is needed (high temperature alert, coolant refill alert). o Vehicle Operating Space: Describe your vehicle's operating space (the front, the rear, the corners, and the sides around your vehicle) to your instructor . While Driving , continue to be mindful of this space. Don't speak too loudly; some vehicles are very self-conscious.
10 O Start the Engine: With your right foot on the brake and gear in Park, turn the key in the ignition all the way to the right (or push to start for those fancier car.) Operation and Control Tasks: Observation o Observation of Vehicle Operation: Observe your instructor operating the vehicle (accelerating, decelerating, steering, moving forwards and backwards, turning, performing turnabout maneuvers, stopping, and parking). Review observations with your parent/guardian. o Mirror Observation: Observe your instructor performing blind spot and mirror checks.


