Transcription of ENVIROMUX Series ENVIROMUX-MICRO-T(RHP)
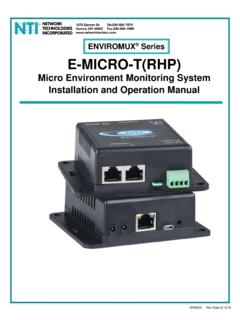
1 ENVIROMUX Series ENVIROMUX - micro -T(RHP). Quick Installation Guide The ENVIROMUX micro Server Environment Monitoring System ( ENVIROMUX ) monitors (from a remote location) critical environmental conditions, such as temperature, humidity, liquid water presence, power, intrusion, and smoke. When a sensor goes out of range of a configurable threshold, the system will notify you via email, web page, network management (SNMP), and/or SMS messages (via external USB 3G modem). The ENVIROMUX - micro -T features a built-in temperature sensor, two RJ45 sensor ports for external temperature/humidity sensors, and two dry contact inputs. The ENVIROMUX - micro -TRHP features a built-in temperature/humidity sensor, two RJ45 sensor ports for external temperature sensors, two dry contact inputs for the connection of contact-closure sensors and built-in Power over Ethernet (PoE). Installation 1. Mount the ENVIROMUX as desired. Mount the ENVIROMUX to the wall or within in a rack. Use hardware appropriate for your mounting method of choice.
2 2. Connect each of the sensors (purchased separately) to the ENVIROMUX . Mount the sensors where they are needed. A. Connect Temperature sensors to the RJ45 ports on the ENVIROMUX . B. Connect contact sensors ( ENVIROMUX -GBS-P glass break sensor, ENVIROMUX -SDS-PA smoke detection sensor, ENVIROMUX -LD water detection sensor and others) to the terminal blocks labeled DIGITAL IN . Connect each two-wire contact sensor using 16-26 AWG wire. 3. Connect the ENVIROMUX to the Ethernet for maximum remote system management using the Ethernet port and CAT5/5e/6 patch cable. 4. Connect the AC adapter (required for ENVIROMUX - micro -T model only). Setup 1. Use the Device Discovery Tool (on the CD provided) to locate the ENVIROMUX on the network. Update the IP address, Mask, and Gateway as needed to connect to the local network. Click on Submit to update the ENVIROMUX . Note: By default, the ENVIROMUX - micro will be assigned an IP address by your DHCP server, so unless you want to assign one manually, once you know the IP address assigned by the DHCP server, proceed to step 2 to access the ENVIROMUX - micro .
3 Note: The computer using the Device Discovery Tool and the ENVIROMUX must be connected to the same subnet in order for the Device Discovery Tool to work. Note: The Device Discovery Tool requires the Java Runtime Environment to operate. A link to the web page from which it can be downloaded and installed is provided on the CD. 2. Type the updated IP address into the browser address bar. 3. Log in to the web interface as the administrator- username = root password= nti (letters are case sensitive). 4. Configure Network and SMTP server settings (Administration->Network ). 5. Set the date and time. 6. Configure SNMP settings. 7. Add users (Administration->Users->Add New User) and specify email address, contact methods, etc. as needed. 8. Temperature and Humidity sensors will be automatically detected. External contact sensors and sensors connected to DIGITAL IN must be added manually through the web interface before configuring them. 9. Configure sensors and alerts as desired for thresholds, alert notification methods, etc.
4 Some Available Sensors (Sold separately) : Model Description ENVIROMUX -T-E7 Temperature Sensor For a complete list of compatible ENVIROMUX -T-IND-E7 Extended Range Temperature Sensor sensors, go to ENVIROMUX -TRHM-E7 Temperature/Humidity Sensor ENVIROMUX -LDx-y Liquid Detection Sensor-Digital ENVIROMUX -SDS-PA Smoke Detection Sensor ENVIROMUX -CMD-P Carbon Monoxide Detector ENVIROMUX -M-DCS Door Contact Sensor ENVIROMUX -IMD-P Infrared Motion Sensor ENVIROMUX -GBS-P Glass Break Sensor ENVIROMUX -EBS Emergency/Panic Button ENVIROMUX -ACVD-515M/C14M AC Voltage Detector ENVIROMUX -TDS Tamper Switch For more details, specifications, and troubleshooting tips, see the Installation and Operation Manual or go to MAN231 Rev. 1/18/17.