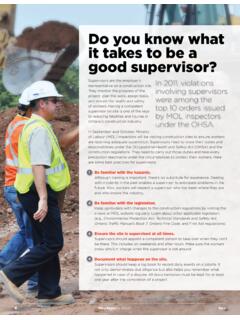
Transcription of Fall Protection on Sloped Roofs - IHSA
1 fall Protection on Sloped Roofs Working on a Sloped roof is one of the most dangerous jobs in construction. Just a small slip or loss of balance can lead to a life- altering injury or even death. Whenever you are exposed to a fall of more than 3 metres (10 feet). off the ground, you must be protected by a fall Protection system and you must be trained how to use it properly. Training In Ontario, Sloped roofers must have training to work at heights. If you received your training before April 1, 2015, you have until April 1, 2017 to complete a working at heights training program that has been approved by the Ministry of Labour (MOL). However, it is highly recommended that you take the new training before then.
2 An approved course will include information on hazard recognition and safe work procedures as well as a practical component showing how to use fall Protection equipment. To find an approved WAH training course and provider in your area, follow this link: Safe work procedures Step 1: Wearing the proper equipment The type of proper equipment for working on a Sloped roof generally includes 1. A CSA-approved full-body harness connected to a lanyard 2. A CSA-approved lanyard connected to a rope grab 3. A CSA-approved rope grab connected to a lifeline 4. A CSA-approved lifeline connected to an anchor point. For more information about proper equipment, go to the fall Protection equipment section at the end of this document.
3 W207 1. Step 2: Getting onto the roof using a ladder Ladders are the most common way for Sloped roofers to access a roof . Although falls from ladders are common in construction work, a ladder can be a safe means of access and egress if you follow proper safety procedures. However, you should not work from a ladder. It is not a work platform. Inspect ladder components such as rungs and hooks for damaged or defective parts before using it. Secure the ladder at the top and bottom. Set up the ladder at a slope of at least 3-to-1 but not more than 4-to-1 (one foot back for every 3 or 4 feet up). Make sure the ladder extends at least 90 cm (3 ft) above the access level of the roof . Keep the areas at the top and bottom of the ladder clear of debris.
4 Maintain three-point contact when climbing up or down a ladder. (That's two hands and one foot or two feet and one hand on the ladder at all times.) Never carry tools or material up or down the ladder. Instead, use a tool belt and hoist materials up by rope. Look for overhead powerlines before setting up a ladder. If overhead powerlines are close to the work area, we recommend using a non-conductive type of ladder, such as a fibreglass one. For additional information, refer to IHSA's Ladder Use in Construction Guideline and Chapter 20: Ladders in IHSA's Construction Health and Safety Manual (M029). Both of these resources can downloaded for free at by visiting these links: Step 3: Installing anchors If you're using a fall Protection system on a Sloped roof , you must be tied off at all times.
5 Finding an anchor point to tie off to can seem like a challenge. However, if you plan ahead and know what to do, there are several options. You can use roof peak anchors as your main anchor point. There are many different types, but they typically they look like this: W207 2. The biggest problem with installing a roof peak anchor is to get to the roof peak while still being tied off. One way to do this is to install temporary roof anchors and tie off to them along the way. Here are some examples on the right. On newer homes, some builders leave a hole in the sheathing near the roof peak so that you can tie off inside the house. Depending on the size of the roof , you may have to install several temporary anchors before you reach the roof peak.
6 Ensure that your anchors are installed correctly. For example, use the proper screws as indicated in the manufacturer's instructions. Always follow the manufacturer's guide and if you're not sure about something, ask for help or advice. On most homes, you will need multiple anchor points to prevent a swing- fall hazard. Make sure to tie off to anchor points that are at a height and location to prevent you from swinging and striking a lower level if you fall . Step 4: Working on the roof If you are working above 3 m (10 ft), you must be protected from a fall at all times. For roofers, that means you must be tied off from the time you leave the ladder until you get back on the ladder. If you have to move from one lifeline to another, use a Y-lanyard.
7 It has two places to attach to a lifeline, so it will allow you to be tied off at all times. Step 5: Getting off the roof Getting off the roof while remaining protected from a fall can be difficult because the peak anchor has to be removed. This will happen on every job, so there should be a clear procedure to follow. Find a method that works best for your situation and make a plan for getting off the roof before you start the work. For instance, there may be an appropriate anchor to tie off to at ground level. Or you can use the same method you used getting onto the roof , just in reverse. Remember to remove any temporary anchors on the way down. W207 3. fall Protection equipment Always inspect your equipment before each use (every morning before starting work).
8 If any part is damaged, remove it from service and use another one. Harness Inspect your harness before each use ( , check buckles and webbing). Adjust the chest strap so that it is snug and located near the middle of your chest. If you fall , a properly adjusted chest strap will prevent you from coming out of the harness. Adjust the leg straps so that your fist can fit snugly between the strap and your leg. Adjust the shoulder straps so that the back D-ring rests between your shoulder blades. A properly positioned D-ring will keep you upright after a fall . Make sure D-ring is between your shoulder blades! Lanyard A lanyard connects your harness to the lifeline and rope grab. Inspect your lanyard before each use ( , check if webbing is cut or frayed).
9 Use manufactured ( , store-bought) lanyards only. Try to keep the length of your lanyard as short as you can while making sure you are still able to work. This will reduce the likelihood that you will fall over the edge or fall too far. W207 4. Energy absorber When you are using fall arrest equipment, use a lanyard with an energy absorber (commonly called a shock absorber). It will absorb some of the energy exerted on your body while your fall is being stopped. This could save your life. Make sure one end of the energy absorber is connected to the D-ring on the full-body harness. The other end will connect to the rope grab. In most cases, the energy-absorbing component is enclosed in a snug-fitting jacket to protect it from damage.
10 Check the cover jacket for stress or tearing before each use. Many energy absorbers have a tag on the jacket that tears if the unit has been exposed to a shock load. Make sure this tag is intact. Lifeline (Rope). Inspect your lifeline before each use ( , check if rope is cut, burnt, or frayed). A vertical lifeline must reach the ground or have a positive stop at the end to prevent the rope grab from running off the end of the lifeline. Vertical lifelines are usually made of synthetic rope that is 16-mm (5/8-in) in diameter or larger. The photo on the left shows a three-strand twisted rope made from a polypropylene/polyethylene blend. The different-coloured strands indicate that this rope is approved as a lifeline.