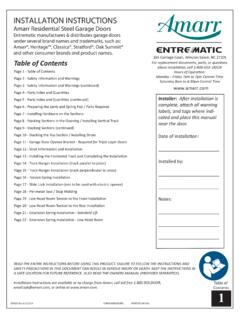
Transcription of FIBERGLASS DOOR SYSTEM Installation Instructions
1 DOC1 INSF 10/18 | 2018 Trinity Glass International, 1 -BEFORE YOU BEGIN:1. Do not remove the plastic door plug until instructed to do so. It keeps the door closed and aligned during shipping. The door plug is in the hole for the door lock set. If the door unit has handles on the latch and hinge jambs, remove them. 2. Make sure that the new door will properly fit in your frame opening. The recommended frame opening is 3/4" wider and 1/2" higher than the door unit. Resize the opening if needed. It is important that the floor is level without any bumps. Use the two foot long level to make sure floor is within 1/16" of perfectly flat. Use a carpenter s square and six foot long level to check the frame opening for square and plumb.
2 Minor (less than 1/4") out of plumb and square conditions at the sides and top can be corrected by using shims. Larger misalignments must be corrected before Installation . Diagonal measurements must be equal to within 1/4" (as shown in Figure B). WEATHER BARRIER INSTALLATIONAn Installation that is resistant to air and water leaks depends upon properly flashing the frame opening and installing a sill pan before installing the door unit. Building codes vary as to actual requirements. Also, different siding types require different flashing details. Please check with local building professionals for best flashing practices and regional code DOORSNon-Vented Storm Doors will void the Feather River Door warranty. A Non-Vented Storm Door will build up enough heat to permanently warp the door.
3 Our doors are energy efficient and storm door protection is not necessary. If installing a storm door, it must be ventilated to reduce the amount of heat buildup. Installing a Non-Vented storm door in an area with sun exposure will cause issues due to extreme heat (UV deterioration, color fading, warping, caulk/sealant oozing). FIBERGLASS DOOR SYSTEMI nstallation InstructionsThank you and congratulations! You have just purchased a premier FIBERGLASS entry door SYSTEM . If you have an unfinished door SYSTEM , we recommend that you paint/stain before Installation . Refer to the Finishing Instructions section. Please read all the Instructions before beginning Installation . CAUTION: Some door units are heavy and may require two people to lift and install.
4 Use proper lifting techniques and follow safe working nuestra p gina web para esta informaci n en espa AND MATERIALS NEEDED: Tape Measure Hammer Carpenter Square Two and Six foot long Levels Wooden Shims #2 Phillips Screwdriver #10 (#8 minimum) x 3" Exterior Grade Flathead Screws For #2 Phillips Power Drill With 3/16" ( ") Diameter Drill Bit Safety Glasses Caulking Gun Quality Clear Exterior Sealant PuttyEqual Equal Figure BFigure APARTS OF A DOOR SYSTEML atch JambLatch BrickmouldSquareDoor SillDoor SweepHead JambHead BrickmouldHinge BrickmouldHinge JambPlumbLevelDOC1 INSF 10/18 | 2018 Trinity Glass International, 2 - Installation :IMPORTANT: Before setting the door unit into the rough opening, apply generous beads (1/2" minimum diameter) of caulk to the underside of the door sill at locations shown in Figure 1a/1b, including the bottom of jambs (or plastic jamb adapters as shown) and brickmoulds.
5 Apply at least four lines of bead along the full length of the sill. If Brickmould is already attached to the jamb, apply a 1/2" bead of caulk around the entire perimeter. This caulk bead should be within 1/2" of outside edge of the Brickmould as shown in Figure 1a/1b. 123 Figure 2aFigure 3a(Exterior)(Interior)For a single door, remove the bolt from the plastic door plug. For a double door, remove the screws from the head jamb that secure doors during shipping. For a multiple panel door SYSTEM , get help when lifting, setting and aligning. From the outside, center and tip the door unit into the opening per Figure 2a. To keep the sealant beads from smearing, avoid sliding the door into place. Make sure the backside of the brickmould is against the outside sheathing.
6 The inside wall should be within 1/8" of the inside jamb surfaces. Use the two foot long level to make sure sill is less than 1/16" out of level. Fix any problems before moving onto next : Cover the door sill to protect against scratches during Installation or between building construction and occupation. Any contact with wet cement or cement powder will damage the sill : These Instructions minimize the number of fasteners an installer must cover before finishing the door Installation . Therefore, it is important to use help and shims to stabilize the door unit during hinge JAMB: From the inside, place shims between both jambs and frame opening at the same levels per Figure 3a. Locate shims at the top of the door unit and near the bottom hinge .
7 Use a six foot long level to plumb the hinge jamb both left to right and inside to outside. For a Sidelite Unit, plumb the jamb closest to the hinges. For a Double Door Unit, plumb the passive side jamb. (The passive side is the normally closed side). Adjust shims so they are tight before opening 1b(outswing)Figure 1a(inswing)BeadBeadCaulkCaulkShimsDOC1 INSF 10/18 | 2018 Trinity Glass International, 3 - Installation screw locations change depending upon configuration and finish. Sidelite jambs are different than hinge or Latch Jambs. PVC jambs are different than wood jambs. Use the table to choose a method depending upon jamb type and jamb ONE: Open Door and remove jamb weatherstrip to minimize damage.
8 For each hinge or latch jamb next to a frame opening, drill two 3/16" holes. Locate one 8" from the top and one 8" from the bottom. Drill the holes 1/4" from the jamb stop (Figure 3b). Drive #10 x 3" screws through holes in hinge jamb, leaving screw heads 1/4" above jamb surface. Place additional shims directly above screws (Figure 3c). Make sure new shims are tight but do not bow the jamb. Recheck hinge jamb to make sure it is still plumb. Finish driving screw heads 1/16" below jamb surface to avoid damaging door. METHOD TWO: Open Door and remove jamb weatherstrip to minimize damage. For each hinge or latch jamb next to a frame opening, drill two 3/16" holes. Locate one at 8" from the top and one at 8" from the bottom.
9 Drill the holes 1/4" from the jamb stop (Figure 3b). Drive #10 x 3" screws through holes in hinge jamb, leaving screw heads a 1/4" above jamb surface. Place additional shims directly above screws (Figure 3c). Make sure new shims are tight but do not bow the jamb. Recheck hinge jamb to make sure it is still plumb. Finish driving screw heads flush to jamb surface to avoid damaging door (Figure 3d). METHOD THREE: For each sidelite jamb next to a frame opening, drill four 3/16" holes. Locate first at 8" from the top and second at 8" from the bottom. Space holes 1-1/4" from sidelite surface (Figure 3e). Equally space additional two holes between first two holes. On hinge side only, drive #10 x 3" screws through holes.
10 Place additional shims directly above screws. Make sure new shims are tight but do not bow the jamb (Figure 3c). Recheck sidelite jamb to make sure it is still plumb. Finish driving screw heads slightly (1/16") below jamb surface. METHOD FOUR: For each sidelite jamb next to a frame opening, drill four 3/16" holes. Locate one at 8" from the top and one at 8" from the bottom. Space holes 1-1/4" from sidelite surface (Figure 3e). Equally space additional two holes between first two holes. On hinge side only, drive #10 x 3" screws through holes. Place additional shims directly above screws (Figure 3c). Make sure new shims are tight but do not bow the jamb. Recheck sidelite jamb to make sure it is still plumb. Adjust shims if necessary.