Transcription of FLIR Tools for PC 7/21/2016 - FLIR Systems
1 17/21/2016 FLIR Tools for PC2 FLIR Tools for PC7/21/2016 Tools +is an upgrade that adds the ability to create Microsoft Word templates and reports, create radiometric panorama images, and record sequences from compatible USB and Ethernet Tools for PC7/21/2016 FLIR Tools can be downloadedfrom the FLIR Support Center website. A user account is needed to download software and Tools +7/21/20167/21/20165 FLIR Tools for PCIf you connect a camera via USB while FLIR Tools is running a startup screen will appear with links to common functions. Click the button to Import images from images in library will close the startup screen and show the image to live stream will display a live image from compatible FLIR for updates will check for FLIR Tools updates. It can also check for updates for certain FLIR USB can also import images using the Import button in the image Tools for PC7/21/2016 FLIR Tools will read all the images and videos on the FLIR camera and display them in the import window.
2 IR and photo groups, MSX, and Fusion images will appear stacked in the import window and in the can use the CTRLor SHIFTkey on the keyboard to select specific groups to import, or you can choose to import all the files from the images can be automatically enhanced while being Tools for PC7/21/2016 The next step is to select a destination folder, or create a new folder, and then click Importto complete the file Tools for PC7/21/2016 Alllibrary folders appear on the panel to the left. The default folder is \My Documents\FLIR. The Add button allows you add more folders to the Tools for PC7/21/2016 Folders can be removed from the library byselecting the Options menu, then the Librarytab. Removing folders does not delete them from the PC, it just takes them out of the FLIR Tools Tools for PC7/21/2016 Images and sub-folderscan be deleted if you right-click and select Tools for PC7/21/2016It is important todelete images from within the FLIR Tools library.
3 If you delete them from Windows Explorer the Tools database will show a blank record because it can no longer find the images. You can right-click on these to delete Tools for PC7/21/2016 The Cloneoption on the right-click menu will make an exact copy of an image group or sequence (SEQ or CSQ) in your Extract Photo option will extract the visual photo from a fusion image and create a separate JPEG file. Extract Full Photo will extract the photo using the full visual camera the photo is not necessary if you create reports using FLIR Tools or Tools +. The FLIR software will automatically extract the photo for use in the Tools for PC7/21/2016 Some camera models do not have a built-in visual camera. In this case, you can create an image group manually by dragging a photo on top of its corresponding IR image. The resulting image group will be the same as if the images were taken on the same camera.
4 You would need to copy and paste the photos into the image folder using Windows can right-click on a previously grouped set of images and click Ungroup to separate Tools for PC7/21/2016To set the units in FLIR Tools , click the Optionsmenu and click Tools for PC7/21/2016 You can double-click on any of the images in the library to view a full-size radiometric image. This allows you to perform detailed measurements, adjust the temperature scale, palette, object parameters and other settings, and save Tools for PC7/21/2016 Many modern cameras can save images using one of the various Fusion modes, such as MSX or Picture-in-Picture. Regardless of which mode was used, FLIR Tools allows you to switch between MSX, Interval, Blending, and Picture-in-Picture modes. You can also view the standard thermal image and visual Tools for PC7/21/2016 This shows the same image in the four different fusion modes.
5 The second button from the left will show the plain thermal image with no Tools for PC7/21/2016 The level and span can be adjusted using the brackets under the image. You can also automatically adjust the scale, and you can type specific numbers for the maximum and minimum temperature if Tools for PC7/21/2016 The Adjust Region option allows the user to define a region of interest for the auto-adjust, rather than using the entire image. This can be helpful, particularly for outdoor electrical work, where the background is often a cold sky. When using this mode the auto-adjust algorithm is applied to a small area of interest, excluding much of the background. The result is better thermal contrast, which can help to identify potential Tools for PC7/21/2016 The Digital Zoom allows the user to digitally magnify the image. If you hover over the Zoom button some instructions will appear for zooming and panning.
6 If you click on the Zoom button you can reset to the full Zoom In and OutUse CTRL + and .Use CTRL and mouse PanHold down Space and move Select Zoom WindowUse Alt and drag mouse to select zoom Tools for PC7/21/2016 FLIR Tools offers a number of color palettes that can be applied to the image. Color palettes can help with image interpretation in certain Tools for PC7/21/2016 The Color Distribution menu allows you to change how the colors are being spread across the Equalization is the most common mode used by most handheld cameras. This can help to optimize thermal contrast, particularly when you have small areas of relatively high temperatures compared to a cooler and Temperature Linear will linearize the color scale based on pixel values or temperatures, Tools for PC7/21/2016 Color alarms, also known as isotherms, can be added to the image from the Palette menu. Alarm settings can be adjusted from the measurements table to the right of the are also building alarms for detecting areas of potential moisture and insulation Tools for PC7/21/2016 Spot meters, areas, lines, and difference functions can be added to the image.
7 Measurement results can be viewed in the table to the right of the Tools for PC7/21/2016 Temperature information displayed about areas and lines can be customized if you right-clickand select the Local max/min/avg/markers menu. You can choose any combination of parameters to display in the Measurements table. You can also show or hide the min/max markers on the Tools for PC7/21/2016 Emissivity, reflected temperature, and other object parameters can be easily adjusted from the table to the right of the image. These parameters have an impact on the accuracy of temperature measurements. Click Show Allto display the atmospheric temperature, humidity , distance, and external optics Tools for PC7/21/2016 Localobject parameters can help in cases where you have a variety of different materials in the same image. You can set the emissivity for each measurement tool to reflect the material being measured.
8 Right-click on the measurement tool and click Local Parameters. You can use local settings for emissivity, reflected temperature, and local parameters have been set an i symbol will appear next to the measurement tool. If you hover over the i symbol with the mouse a small window will appear showing the local parameter Tools for PC7/21/2016 Notes and text annotations can be added and saved with the image. The Notefield is meant for a brief note, perhaps describing your you click the + symbol in the Text Annotations section you can add a row with a label and value you click the + next to Import from template you can import text labels and values from pre-defined text annotation templates. See the section on Text Annotation Templates for more an image contains text from a camera then it will appear Tools for PC7/21/2016If an image was saved with a voice annotation in the camera, a playback bar will appear in the table to the right of the image.
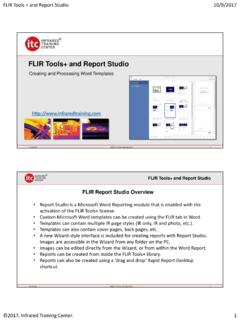
9 Click the Play button to listen to the voice annotation with your PC an image is saved with Meterlinkdata this will appear in the measurements table to the right of the Tools for PC7/21/2016 Click the Savebutton to save changes to the image. The image window will remain open so you can navigate through the library images. Click Save and close to return to the image Tools for PC7/21/201632 FLIR Tools for PC7/21/2016 From the Templates tab:Click to Import a TCF file. This can be afile created from an older version of Reporter, or a file that has been exported from FLIR can also Create a new text template and add the desired values and Tools for PC7/21/2016If you have an existing text template you can click the small pencil icon to edit the Tools for PC7/21/2016A text template contains a list of Fields (or categories) and Values (related to each Field). You typically will have several values for each field.
10 If you click on a field you can type new text. If you hover over the field with the mouse you will see an option to add a new row and to delete an item from the Tools for PC7/21/2016If you select a Field from the left column you can begin to add/edit related Values. These values are the choices that will appearwhen you select the you are done editing the template click Save As to save Tools for PC7/21/2016 TheExport button allows you to export the text template as a TCF file. This provides a way to share the template with other Thermographers, and can also help if you move to a new Tools for PC7/21/2016If you connect a compatible camera via the USB cable, or plug the SD card into the PC, FLIR Tools will recognize the device and show a drive letter. When you are ready to send the template to the camera simply click on the desired template file, click the arrow button, and that will place the template in the camera memory.